4-12
Sweep Mode Operating Instructions
4.4.1 Manual Mode
Tab Settings
4.4.1.1 Parameter
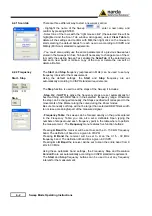
After having fixed the
Step
size (max. value 30.1), press the left and the
right arrow keys to decrease or increase the frequency by the selected
step. The center Frequency of the reading can also be directly edited into
the
Frequency
window. The default unit is MHz.
Hold time (ms)
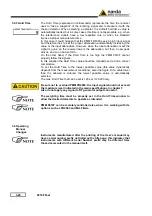
The Hold Time (expressed in milliseconds) represents the time the
receiver uses to “take a snapshot” of the incoming signal and to measure it
with the chosen detector. When the detector is selected, the last hold time
value set is automatically loaded, but in some cases this time is not
appropriate, e.g. when the interference signals have a low repetition rate.
In this case the PMM Receiver sees a high input signal and therefore tries
to set the proper attenuation automatically increasing the value or the input
attenuators.
However, when the input attenuation is set the signal is gone, so the
receiver lowers the attenuation, but then a new peak arrives, and so on
and so forth. On the other hand, if the Hold Time is too high the PMM
Receiver cannot properly follow the signals.
In this situation the Hold Time value should be set to find a correct
compromise.
To set the Hold Time to the lowest possible value enter 0; the max. Hold
Time that can be set is 20 sec (20.000 ms).
Max. Hold (ms)
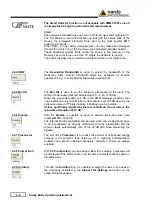
The Max. Hold (expressed in milliseconds) represents the time the
software uses to display the maximum level measured in the Hold Time
set.
The max. Hold that can be set is 20 sec (20.000 ms).
Max. Hold Infinite
If the Max. Hold. Infinitive is activated the software shows the maximum
level until a bigger value is measured; in this case the Max. Hold is
disabled.
4.4.1.2 Detector
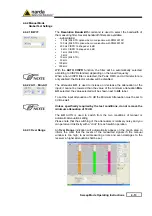
In the
Detector
window you can choose the most useful couple of
detectors to add to the default Peak and QPeak Detector; it will be disabled
when a non-CISPR filter is selected.
Summary of Contents for PMM FR4003
Page 10: ...X Contents This page has been intentionally left blank...
Page 20: ...1 10 General Information This page has been intentionally left blank...
Page 26: ...2 6 Installation Remove the battery charger and all AC plug adapters enclosed into the bag...
Page 32: ...2 12 Installation This page has been left blank intentionally...
Page 82: ...5 12 Utility Calibration and Analog mode This page has been left blank intentionally...
Page 94: ...7 10 Updating Firmware This page has been left blank intentionally...
Page 134: ...10 4 Packaging Instructions Close the carrying case...
Page 138: ...Suggerimenti Commenti Note Suggestions Comments Note...

