background image

English

19

Additional handle SOFTGRIP

The additional handle (17) can be screwed from the left or right gear-

box (5) side or from the top gearbox (5) part. Thanks to the special de-

sign vibrations are reduced by the additional handle (17).

Grinding or cutting wheel fixing

Attention! Prior to handling the accessories, the power 

supply cable has always to be disconnected from the power 

source socket!

Mounting with the standard clamping nut

Clean the bottom flange (11) and the clamping nut (13) as well as the 

clamping surfaces of the grinding or cutting wheel. Place the bottom 

flange (11) (by the recess out) on the spindle (7). Place the grinding or 

cutting wheel (12). The bottom flange recess (11) must be inserted pre-

cisely into the grinding wheel or the cutting wheel hole. Then put the 

clamping nut (13) on the spindle (7) so that when fixing the grinding 

wheel, the clamping nut recess (15) must be faced towards the wheel 

and when fixing the cutting wheel, the clamping nut recess (15) must 

be directed from the wheel!
Depress the lock spindle pin (3).

Attention! Use the lock spindle pin (3) only if the spindle is 

at rest and the grinder is de‑energized.

Swivel the wheel /spindle, until the lock spindle pin (3) is engaged. 

Tighten the clamping nut (13) firmly, using the wrench (16).

Attention! Prior to starting the grinder, verify that the 

wheel does not rotate freely between the bottom 

flange (11) and the clamping nut (13).

Mounting with quick‑clamping nut

The quick-clamping nut must be tightened or loosened by hand only 

(never use any additional tool!). Mounting of the grinding or cutting 

wheel is the same like for the grinder without the quick-clamping nut, 

with the sole difference, that after spindle locking the quick-clamping 

nut (14) may be tightened by hand only.

Attention! Do not tighten the quick‑clamping nut without 

the wheel not to damage its mechanism!

Attention! Prior to starting the grinder, verify that the 

wheel does not rotate freely between the bottom 

flange (11) and the clamping nut (14).

Putting into operation

Check whether the data on the rating plate match with the real power 

supply voltage. The tool intended for 230 V~ may be also connected to 

220/240 V~. Check whether the plug type corresponds to the socket 

type.

Switching on

Push the switch (1) forwards, thus switching the machine on. If you de-

press the front switch button part (1), the switch will be arrested in the 

ON position.

Switching off

By releasing the switch button (1), the switch will be returned to the 

initial position and the machine will be switched off. If the switch (1) 

is arrested in the ON position, then by moderate depressing the rear 

switch button part (1), the switch will be released and returned to the 

initial position, i.e. the machine will be switched off.

Motor electronics

Starting current limitation

Electronically controlled continual running secures device acceleration 

without back thrust. Due to starting current limitation in the device, 

16 A protection is suffi cient.

Switching off during back thrust

During sudden drop of revolutions, for example blocking in dividing cut, 

the current input in motor stops. For re-starting, the device must be first 

switched off and again switched on.

Protection against re‑starting

Prevent uncontrolled starting of the device after current supply cut off. 

For re-starting, the device must be fi rst switched off and again switched 

on.

Grinding and cutting discs

Check that the label on the disc shows the permissible peripheral speed 

or permissible revolution speed.
If the permissible revolution speed is given on the disc, it must not be 

lower than the highest no-load speed of the grinder.
Discs with a permissible peripheral speed of 80 m/s and higher may be 

used.
Test new cutting discs by letting them run for about one minute with 

no load.
Unbalanced or vibrating discs should not be used and should be dis-

carded.
Protect grinding discs from shock, impact and lubricants.
If the grinding and cutting wheels are worn down to the mark on the 

wheel guard (see the arrow sign), they should be replaced with new 

ones. This maintains the optimum grinding and cutting performance 

of the machine (peripheral speed of the grinding and cutting wheels).

Maintenance and service

Attention! Risk of el. shock. Prior to start any operation, 

pull the plug out of the socket!

Vent holes (2) of the motor guard may not be covered.
Cable replacement must be carried out by a specialized service station 

authorized correspondingly.

After ca 200 hours of operation the following activities and works 

have to be carried out:

Check of brush length. The brushes shorter than 5 mm have to be re-

placed for new ones.
The grinder will be stopped automatically if the brushes are worn. The 

grinder is sent to the service station for maintenance.
Grease replacement in gearbox and bearings.

Attention! With respect to protection from el. shock and 

preservation of the class of protection, all maintenance 

and service operations requesting jig saw case removal 

must be performed by the authorized service centre only!

The current list of authorized service centres can be found at our website 

www.narex.cz

, section 

“Service Centres”

.

Storage

Packed appliance may be stored in dry, unheated storage place with 

temperature not lower than -5 °C.
Unpacked appliance should be stored only in dry storage place with 

temperature not lower than +5 °C with exclusion of all sudden temper-

ature changes.

Environmental protection

Power tools, accessories and packaging should be sorted for environ-

mental-friendly recy.

Only for EU countries:

Do not dispose of power tools into household waste!
According to the European Directive 2002/96/EC on waste electrical and 

electronic equipment and its incorporation into national law, power 

tools that are no longer suitable for must be separately collected and 

sent for recovery in an environmental-friendly manner.

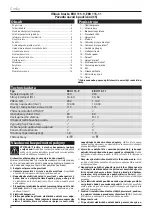
Summary of Contents for EBU 115-9

Page 1: ...n n vod k pou v n P vodn n vod na pou itie Original operating manual Originalbetriebsanleitung Instrucciones de uso originales p Pierwotna instrukcja obs ugi Eredeti haszn lati tmutat EBU 115 9 EBU 11...

Page 2: ...ra reducir los riesgos de que se produzcan da os Uwaga Dla zmniejszenia ryzyka urazu nale y przeczyta niniejsz instrukcj Figyelem A vesz lyek cs kkent se rdek ben olvassa el az tmutat t Dvojit izolace...

Page 3: ...3...

Page 4: ...4 1 2 2 3 4 5 6 7a 7b 8 8 9 9 10 11 12 13 14 15 16 16 17 19...

Page 5: ...5 7a 7b 8 5 9...

Page 6: ...P i pou v n elektrick ho n ad zamezte p stupu d t a dal ch osob Budete li vyru ov ni m ete ztratit kontrolu nad pro v d nou innost 2 Elektrick bezpe nost a Vidlice pohybliv ho p vodu elektrick ho n a...

Page 7: ...ad t te v echna bezpe nostn varov n instrukce ilus trace a specifikace dan pro toto elektromechanick n ad Nedodr en v ech n e uveden ch pokyn m e m t za n sledek raz elektrick m proudem po r a nebo v...

Page 8: ...mo nost zp tn ho vrhu nebo prasknut kotou e b Nest jte sv m t lem v p mce s a za rotuj c m kotou em V oka m iku kdy se kotou v pracovn m bod pohybuje od va eho t la mo n zp tn vrh m e vrhnout prot ej...

Page 9: ...T men 19 op t zaklapn te zp t T men sm b t vyklopen pouze k upnut pop uvoln n kotou e Jinak se m e kotou uvolnit z brusn ho v etene Pozor Rychloup nac matici neutahujte bez kotou e moh lo by doj t k...

Page 10: ...pou it m v rozporu s n vodem k obsluze nebo kody kter byly p i n kupu zn my jsou ze z ruky vylou eny Reklamace mohou b t uzn ny pouze tehdy pokud bude stroj v neroze bran m stavu zasl n zp t dodavatel...

Page 11: ...ach alebo v pary c Pri pou van elektrick ho n radia zabr te pr stupu det a al ch os b Ak budete vyru ovan m ete strati kontrolu nad vy kon vanou innos ou 2 Elektrick bezpe nos a Vidlica pohybliv ho pr...

Page 12: ...u Zvl tn bezpe nostn pokyny Bezpe nostn upozornenia spolo n pre pracovn innosti br senia rovinn br senie br senie dr tenou kefou alebo abraz vne rezanie a Toto elektromechanick n radie je ur en pre po...

Page 13: ...ieho n radia a m u praskn Doplnkov bezpe nostn varovania pecifick pre pracovn innosti abraz vneho rezania a Netla te na rezac kot a nep sobte nadmern m tlakom Ne sna te sa dosiahnu nadmern h bku rezu...

Page 14: ...matice 15 smerovalo od kot a Zatla te blokovac ap vretena 3 Pozor Blokovac ap pou vajte iba ak je vreteno v pokoji a stroj je vytiahnut z nap jacej siete Ot ajte kot om vretenom dokia blokovac ap 3 ne...

Page 15: ...nice 2002 96 ES o star ch elektrick ch a elektro nick ch zariadeniach a jej presaden v n rodn ch z konoch mus by neupotrebite n rozobran elektron radie zhroma den k op tovn mu zhodnoteniu ktor nepo ko...

Page 16: ...dify the plug in any way Do not use any adapter plugs with earthed ground ed power tools Unmodified plugs and matching outlets will re duce risk of electric shock b Avoid body contact with earthed or...

Page 17: ...and may cause loss of control g Do not use a damaged accessory Before each use inspect the accessories such as abrasive wheels for chips and cracks back ing pads for cracks tear or excess wear wire br...

Page 18: ...bristles can easily penetrate light clothing and or skin b If the use of a guard is recommended for wire brushing do not allow any interference of the wire wheel or brush with the guard Wire wheel or...

Page 19: ...running secures device acceleration without back thrust Due to starting current limitation in the device 16 A protection is suffi cient Switching off during back thrust During sudden drop of revolutio...

Page 20: ...e suppliers or to an authorised NAREX customer support workshop Store the operating instructions safety notes spare parts list and proof of purchase in a safe place In addition the manufacturer s curr...

Page 21: ...die den Staub oder die D nste anz nden k nnen c Bei der Verwendung des elektrischen Werkzeuges d rfen sich keine Kinder und andere Personen im Arbeitsbereich aufhalten Wenn Sie gest rt werden k nnen...

Page 22: ...ann die Arbeit mit ihnen besser kontrollieren g Verwenden Sie das elektrische Werkzeug Zubeh r Arbeits werkzeuge etc im Einklang mit diesen Anweisungen und auf solche Weise wie es f r das konkrete ele...

Page 23: ...ngen die f r die Arbeitst tigkeiten wie Schleifen und abrasives Schneiden spezifisch sind a Verwenden Sie nur solche Typen von Scheiben die vom Herstel ler empfohlen sind und eine spezifische f r die...

Page 24: ...Leitans tze 9 in die Nuten am Spannhals einf hren Stellen Sie die Schutzhaube 8a 8b in die gew nschte Stellung ein Bemerkung Die Bauform der Schutzabdeckung wurde so entworfen dass beim Einstellen de...

Page 25: ...usch des Schmierfett im Getriebegeh use und in den Lagern Achtung Hinsichtlich der Sicherheit bei einem Unfall durch einen Stromschlag und Einhaltung der Schutzklasse m s sen alle Wartungs und Service...

Page 26: ...a l quidos inflamables gases o polvo En la herramienta el ctrica se producen chispas que pueden infla mar polvo o vapores c Al utilizar la herramienta el ctrica impida el acceso de ni os y otras perso...

Page 27: ...ramienta el ctrica para realizar otras actividades que no sean las concebidas pueden originar situaciones de peli gro 5 Servicio de reparaci n a Conf e la reaparici n de su herramienta el ctrica a un...

Page 28: ...no podr n ser cubiertos de for ma adecuada por lo tanto son un peligro b La cubierta protectora tiene que quedar bien fija a la herra mienta electromec nica y puesta en posici n correcta para ga rant...

Page 29: ...nes de seguridad el tornillo de compresi n 10 se aprieta en la producci n con un momento de 3 5 Nm a fin de que la cubierta protectora no quede libre en el cuello de suje ci n 6 pero el mismo se puede...

Page 30: ...s los trabajos de mantenimiento y reparaci n que re quieran del desmontaje de la cubierta de la herramienta tienen que ser realizados solamente en un centro de servicio autorizado La lista actual de l...

Page 31: ...RU 1 2 3 4 5 6 7a 7b 8 9 10 11 12 13 14 15 16 17 4 mm 18 EBU 115 9 EBU 115 11 230 230 50 60 50 60 900 1 100 1 10 000 10 000 115 115 SOFTGRIP 80 80 M 14 M 14 1 8 1 9 II II 1 2 a 31 31 31 32 34 34 34 3...

Page 32: ...o 32 RCD RCD 3 a 4 a 5 a a...

Page 33: ...o 33 a...

Page 34: ...2 A LwA 101 2 A K 2 A ah 20 25 2 K 1 5 5 2 EN 60745 EN EN 55014 00 763 301 115 NAREX 8a 8b 6 9 8a 8b 10 3 5 6 10 4 18 3 5 SOFTGRIP 17 5 5 17 11 13 11 7 12 11 13 7 12 15 12 15 3 3 3 14 16 11 13 14 11...

Page 35: ...ES 12 24 NAREX 60745 1 60745 2 3 2006 42 EC 55014 1 55014 2 61000 3 2 61000 3 3 2014 30 EU RoHS 2011 65 EU Narex s r o Chel ick ho 1932 470 01 esk L pa Czech Republic 1932 470 01 2016 Narex s r o Chel...

Page 36: ...wem wybuchu gdzie znajduj si ciecze palne gazy lub proch W narz dziach elektrycznych powstaj iskry kt re mog zapali proch lub wypary c Podczas u ywania narz dzi elektrycznych ograniczy dost p dzieci i...

Page 37: ...ane warunki pracy i rodzaj przeprowadzanej pracy U ywanie narz dzi elektrycznych do przeprowadzania in nnych czynno ci ni do jakich s przeznaczone mo e prowadzi do niebezpiecznych sytuacji 5 Serwis a...

Page 38: ...do na rz dzia elektromechanicznego oraz umieszczona we w a ciwej pozycji dla maksymalnego bezpiecze stwa w taki spos b aby by a odkryta jak najmniejsza cz tarczy w kierunku do u yt kownika Os ona ochr...

Page 39: ...est fabrycznie doci gni ta momentem 3 5 Nm w taki spos b aby os ona ochronna nie by a na szyjce mocuj cej 6 poluzowana ale mo na by o j po pokonaniu ustawionego oporu przekr ca r k Nale y sprawdzi na...

Page 40: ...a gaj demonta u obudowy maszyny musz by przeprowadzane tylko w uprawnionych warsztatach Aktualn list uprawnionych warsztat w mo na znale na naszej stro nie internetowej www narex cz w sekcji Miejsca s...

Page 41: ...bban svesz lyes anyagokat berobbant hatj k c Az elektromos k ziszersz m haszn lata k zben a gyerekeket s az illet ktelen szem lyeket tartsa t vol a munkahelyt l Ha megzavarj k a munk j ban akkor elves...

Page 42: ...kak r lm nyeket s a munka t pus t is figyelembe v ve hasz n lja A rendeltet st l elt r g phaszn lat vesz lyes s v ratlan helyzeteket hozhat l tre 5 Szerviz a Az elektromos k ziszersz m jav t s t b zz...

Page 43: ...ieg sz t biztons gi figyelmeztet s abraz v v g shoz a A v g t rcs t ne nyomja s ne hasson r nagy nyom ssal Ne akarjon nagyobb v g sm lys get el rni A t rcsa t lterhel se n veli a t rcsa csavarod s t s...

Page 44: ...p nyugalmi helyzetben van s a h l zati dug ki van h zva a h l zatb l Forgassa a t rcs t ors t addig m g a blokkol csap 3 kattan be Helyez ze a kulcsot 16 a lefog any ra 13 s j l h zza meg VIGY ZZ A g...

Page 45: ...alapanyagokra szelekt lva sz t kell bontani s a k r nyezetet nem k ros t m don jra kell hasznos tani Garancia Az elektromos k ziszersz maink anyag s gy rt si hib ira az adott or sz g t rv nyi el r sai...

Page 46: ...46...

Page 47: ...47...

Page 48: ...ctual de los centros de servicio autorizados se puede encontrar en nuestro sitio web www narex cz en la secci n Puntos de servicio www narex cz Aktualn list uprawnionych warsztat w mo na znale na nasz...

Reviews: