18
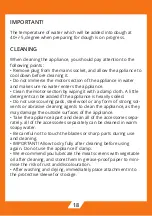
IMPORTANT!
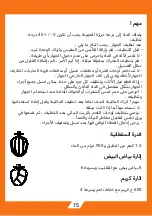
The temperature of water which will be added into dough at
40+/-5 ,degree when preparing for dough is on progress.
CLEANING
When cleaning the appliance, you should pay attention to the
following points:
• Remove plug from the mains socket, and allow the appliance to
cool down before cleaning it.
• Do not immerse the motor section of the appliance in water
and make sure no water enters the appliance.
• Clean the motor section by wiping it with a damp cloth. A little
detergent can be added if the appliance is heavily soiled.
• Do not use scouring pads, steel wool or any form of strong sol-
vents or abrasive cleaning agents to clean the appliance, as they
may damage the outside surfaces of the appliance.
• Take the appliance apart and clean all of the accessories sepa-
rately. all of the accessories separately can be cleaned in warm
soapy water.
• Be careful not to touch the blades or sharp parts during use
and cleaning.
• IMPORTANT! Allow to dry fully after cleaning before using
again. Do not use the appliance if damp.
• We recommend you lubricate the meat screens with vegetable
oil after cleaning, and store them in grease-proof paper to mini-
mise the risk of rust and discolouration.
• After washing and drying, immediately place attachment into
the protective sleeve for storage.
Summary of Contents for NS-973
Page 1: ...1 NS 973...
Page 2: ...2...
Page 3: ...3 1 2 3 4 5 6 7 8 9 11 11 12 13 1 2 3 4 5 6 7 8 9 10 11 12 13...
Page 4: ...4...
Page 5: ...5 0 6 1 1 6 p...
Page 6: ...6 2 1 03 1 5 2 133 533 2 4 7 6 7 0 1 2...
Page 7: ...7 1 2 1 2 1 3 1 12 2 4 3 4 1 11 9 8 11 6 1 2 11 11 9 3 5 1 8 12 2 1 3 1 6 4 6 1 0 2 2 1 7 1 2...
Page 8: ...8 40 5...
Page 9: ...9 900 5 1 6 8 4 600 100 200 15 28 28 40 5 500 1300 60 240 220...
Page 10: ...10 1 2 3 4 5 6 7 8 9 10 11 12 13 1 2 3 4 5 6 7 8 9 11 11 Khmyrzn 12 13...
Page 11: ...11...
Page 12: ...12 0 6 1 1 6...
Page 13: ...13...
Page 15: ...15 40 5 900 1 5 6 8 4 600...
Page 16: ...16 100 200 15 28 28 40 5 500 1300 60 240 220...
Page 25: ...25...
Page 26: ...26 NS 973 Professional bowl mixer Read instruction carefully before using...


