Actual product may vary slightly from photo. Nasco Healthcare reserves the right to change
product color, materials, supplies, or function as needed.
6.
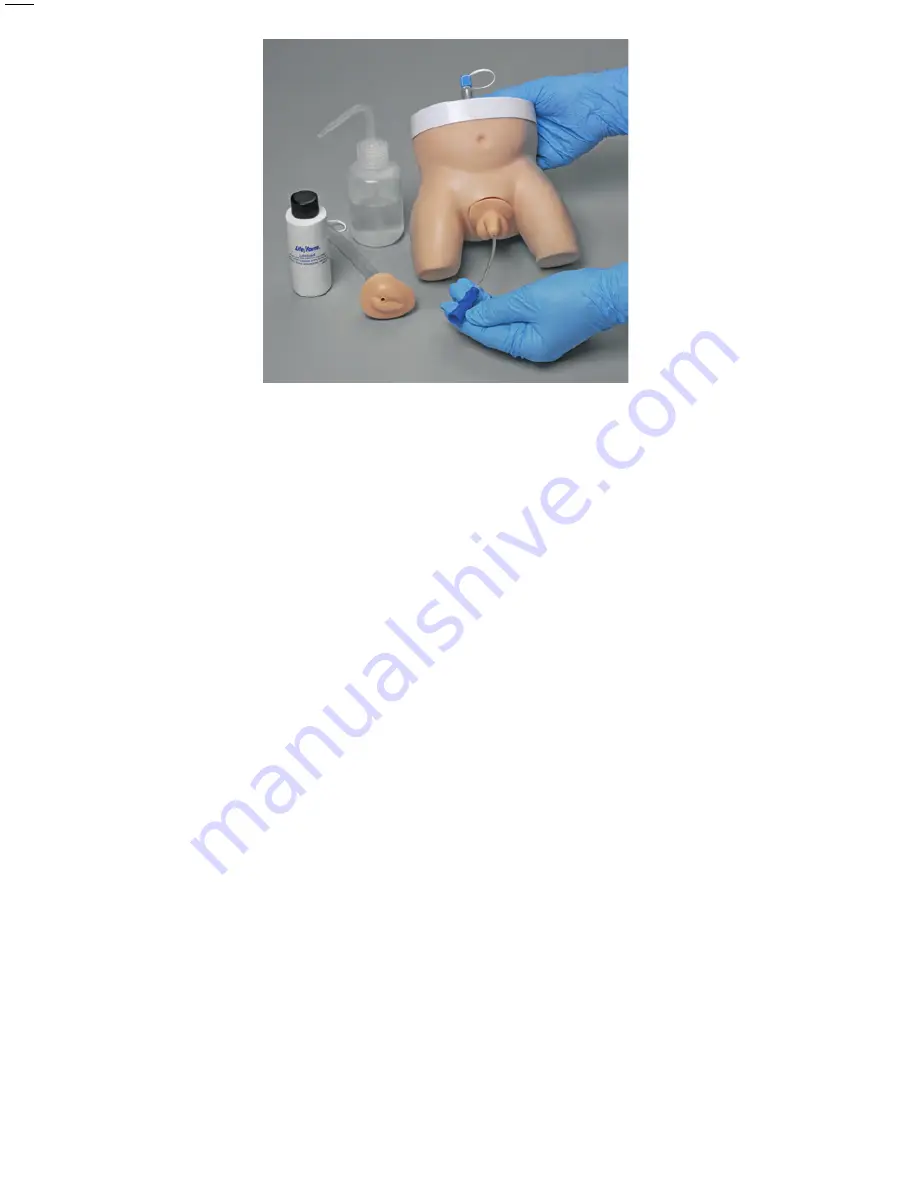
Gently and slowly insert the catheter. Squeezing and releasing the tubing with your thumb
and finger as you do so may help to start the flow. Stop insertion as soon as flow begins,
and leave the catheter in place until it stops completely.
(See Figure 3.)
7.
Always remove the catheter immediately after training.
Leaving the catheter in place
for extended periods, especially if it is the latex type, may permanently damage
both the catheter and the simulator.
8.
When storing the trainer, allow the bladder tube to air dry by removing the luer cap.
Note:
The soft material of the trainer’s catheter valve may sometimes fail to return to its
fully closed position after catheterization, resulting in some leakage if the bladder tube is
refilled immediately. If so, you may wish to begin catheter insertion before opening the luer
cap. If leakage persists, remove the bladder tube cap and insert the catheter into the tube
from the top. Gently tap the tip against the valve several times. Continued leaking may
require replacement of the bladder tube.
CARE OF THE SIMULATOR
1.
Normal surface soil can be removed with a mild soap and lukewarm water. Use Nasco
Cleaner (LF09919U) to remove stubborn stains. Simply apply the cleaner to the soiled
area and wipe with a clean, soft paper towel. DO NOT clean the simulator with
solvents or corrosive materials, as they will cause damage.
2.
NEVER place the simulator on any kind of printed paper or plastic. These materials, as
well as ballpoint pens, will transfer indelible stains.
REPLACEMENT PARTS
LF01035(A)U
Replacement Genital Insert — Female
LF01035(B)U
Replacement Genital Insert — Male
LF01074U
Infant Intermittent Catheter (8 FR, 6”)
LF01074(A)U
10 Infant Intermittent Catheters (8 FR, 6”)
LF00985U
Life
/
form
®
Lubricant Kit, 2-oz. Bottles (Pkg. of 6)
LF01221U
Replacement Bladder Tube
LF09919U
Nasco Cleaner
Figure 3
Actual product may vary slightly from photo. Nasco Healthcare reserves the right to change
product color, materials, supplies, or function as needed.
6.
Gently and slowly insert the catheter. Squeezing and releasing the tubing with your thumb
and finger as you do so may help to start the flow. Stop insertion as soon as flow begins,
and leave the catheter in place until it stops completely.
(See Figure 3.)
7.
Always remove the catheter immediately after training.
Leaving the catheter in place
for extended periods, especially if it is the latex type, may permanently damage
both the catheter and the simulator.
8.
When storing the trainer, allow the bladder tube to air dry by removing the luer cap.
Note:
The soft material of the trainer’s catheter valve may sometimes fail to return to its
fully closed position after catheterization, resulting in some leakage if the bladder tube is
refilled immediately. If so, you may wish to begin catheter insertion before opening the luer
cap. If leakage persists, remove the bladder tube cap and insert the catheter into the tube
from the top. Gently tap the tip against the valve several times. Continued leaking may
require replacement of the bladder tube.
CARE OF THE SIMULATOR
1.
Normal surface soil can be removed with a mild soap and lukewarm water. Use Nasco
Cleaner (LF09919U) to remove stubborn stains. Simply apply the cleaner to the soiled
area and wipe with a clean, soft paper towel. DO NOT clean the simulator with solvents
or corrosive materials, as they will cause damage.
2.
NEVER place the simulator on any kind of printed paper or plastic. These materials, as
well as ball-point pens, will transfer indelible stains.
REPLACEMENT PARTS
LF01035(A)U
Replacement Genital Insert — Female
LF01035(B)U
Replacement Genital Insert — Male
LF01074U
Infant Intermittent Catheter (8 FR, 6”)
LF01074(A)U
10 Infant Intermittent Catheters (8 FR, 6”)
LF00985U
Life
/
form
®
Lubricant Kit, 2-oz. Bottles (Pkg. of 6)
LF01221U
Replacement Bladder Tube
LF09919U
Nasco Cleaner
Figure 3
HC190001INM42.indd 5-6
5/1/19 9:54 AM


