background image

17

BR

EN

Dispose of batteries according to the regulations. If battery acid has leaked avoid contact to
skin, eyes and mucous membranes. Rinse affected areas immediately after contact with the 

acid and wash with plenty of clean water. Visit a physician.
Swallowed batteries are lethal. Keep batteries out of reach of children and pets. Immediately 

ask for medical assistance if a battery is swallowed.
Remove exhausted batteries from the remote control. Remove the batteries from the remote 

control, if you will not use it for an extended period of time.

Overheat protection:

The motor will automatically go into overheat-protection mode after two 

consecutive extending (down) and retracting (up) operations

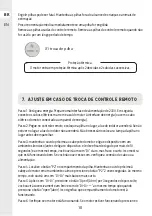
7.  ADJUSTMENT WHEN CHANGING THE REMOTE 

CONTROL

Step 1: Prepare a power interface of 230V, turn off the power firstly. Then connect brown and 

blue electric cords of motor to the power interface (Or with electric cord of motor plugged in a 

power panel, but firstly need to cut the power off).
Step 2: Take out the controller and keep the battery in place, the inductor light will be on. If not 

in place, the inductor light will not be on. No need to cover the battery lid before well-coding.
Step 3: Keep ear close to the head of motor and then turn on the power under a quite 

environment (before turn on the power it must be off more than 10 seconds), Then at the same 

time, you will hear a clear but small and short sound «Di». This shows it work well. If without 

that sound, you need to check the cord-connecting or the power.
Step 4: 1. Find «P2» button in the battery slot firstly 2. Keep ear near to the head of motor under 

quite environment and then press «P2» button 2 times successively. At the same time you will 

hear «Di-Di», small and more shorter.

X1 Changing batteries

Summary of Contents for NORI 2

Page 1: ...Instrukcja Monta u U ytkowania Konserwacji RU KZ UA RO Manual asamblare utilizare i ntre inere EN Assembly Use Maintenance Manual NORI2 Traduction de la version originale du mode d emploi Traducci n...

Page 2: ...200 cm x3 395x300 cm x4 495x300 cm x4 295x200 cm x6 395x300 cm x8 495x300 cm IP54 x8 295x200cm x12 395x300cm x16 495x300cm Conte do Ferramentas Necess rias n o Inclusas DC90CONTROLEREMOTO Elementos de...

Page 3: ...12 295x200 cm x8 395x300 cm x12 O14x100 295x200 cm x2 395x300 cm x3 n o Inclusas 295x200cm x 8 395x300cm x 12 495x300cm x 16 295x200cm x2 395x300cm x 3 495x300cm x 4 295x200cm x2 395x300cm x 3 495x300...

Page 4: ...BR Instala o EN Assembly 18 24 BR Uso EN Use 25 26 BR Manuten o EN Maintenance 27 28...

Page 5: ...material de sua parede Esses acess rios de fixa o n o est o incluidos Para obter conselhos sobre os parafusos e acess rios adequados para sua parede entre em contato com um revendedor espercializado E...

Page 6: ...nico qualificado CUIDADO Instru es importantes de seguran a Siga todas as instru es pois uma instala o inadequada pode causar ferimentos graves Observe as instru es de seguran a para evitar danos por...

Page 7: ...onformidade com NCF15 100 Para sua seguran a antes de qualquer opera o de instala o e conex o certifique se de que a alimenta o esteja desligada Antes de conectar o toldo a uma fonte de energia verifi...

Page 8: ...e se de deixar espa o suficiente ao redor do toldo ao enrol lo ou desenrol lo N o coloque uma churrasqueira sob o toldo nem acenda fogo nas proximidades Verifique o toldo uma vez a cada 3 meses para s...

Page 9: ...lo usu rio n o devem ser realizadas por crian as sem vigil ncia Observe suas crian as para ter certeza de que elas n o brincam com o toldo 6 PILHAS SE CONTROLE REMOTO Perigo de explos o NUNCAincinere...

Page 10: ...r N o necess rio colocar a tampa da pilha no lugar antes de emparelhar Passo 3 mantenha o ouvido pr ximo ao cabe ote do motor e ligue o dispositivo em um ambiente silencioso antes de ligar o dispositi...

Page 11: ...xplos o N o provoque curto circuito nos terminais da pilha N o misture pilhas novas com velhas N o use acumuladores baterias recarreg veis neste produto N o recarregue pilhas que n o sejam recarreg ve...

Page 12: ...3 95X3 Lona acr lica 3780mm X 3200 mm AW2 RM 4 95X3 Lona acr lica 4780mm X 3200 mm 10 PROTE O DO MEIO AMBIENTE ATEN O Este produto est marcado com um s mbolo relacionado ao descarte de res duos de pr...

Page 13: ...L WARNING Important safety instructions Please follow all the instructions because a faulty setup may result in serious injuries FFollow all safety instructions to avoid damage through improper use Fo...

Page 14: ...lease use all the screws and nuts correctly during installation as it is very dangerous if you leave it loose Be careful with your fingers around moving parts of the product during installation 3 ELEC...

Page 15: ...mage or personal injury Do not use this appliance in adverse weather conditions If wind speeds are stronger than 4 on the Beaufort wind force scale retract the awning Never use the appliance on rainy...

Page 16: ...from children The awning is not Intended for use by persons including children with reduced physical sensory or mental capabilities or lack of experience and knowledge unless they have been given supe...

Page 17: ...ce of 230V turn off the power firstly Then connect brown and blue electric cords of motor to the power interface Or with electric cord of motor plugged in a power panel but firstly need to cut the pow...

Page 18: ...out half cycle and check if the setting you satisfied WARNING The replacement and installation of batteries must be done by an adult Remove the worn out batteries of this product Do not expose the bat...

Page 19: ...ntrol DC90 Protection against electric shock Classe I Emission sound pressure level 70 db A AW2 RM 2 95X2 Acrylic fabric 2780mm X 2200 mm AW2 RM 3 95X3 Acrylic fabric 3780mm X 3200 mm AW2 RM 4 95X3 Ac...

Page 20: ...70 90 70 90 p 88 p 94 Altura final C altura de fixa o Altura final C altura de fixa o p 21 p 27...

Page 21: ...21 70 90 88 Altura final C altura de fixa o...

Page 22: ...22 89 2300 60 70 60 295 x200 cm 3 2 3 1 3 2...

Page 23: ...23 90 3 3 3 3...

Page 24: ...com o aux lio de uma furadeira com broca de 14 e comprimento de 100 mm Coloque as buchas na parede e os elementos de fixa o Aperte os parafusos com o aux lio de uma chave de boca Buchas e demais eleme...

Page 25: ...25 6 X1 A X1 G 1 2 3 92...

Page 26: ...26 7 D D 295x200 cm x8 395x300 cm x12 495x300 cm x16 A 2 1 93 Encaixeotoldonoselementos de fixa o Encaixe o pino e fixe a rosca conforme figura...

Page 27: ...5 x300 cm 295 x200 cm 2300 mm 60 mm 60 mm 80mm 90mm 1640 mm 1640 mm 60 mm 60 mm 60 mm 90mm 80mm 495 x300 cm 60 mm 1270 mm 1270 mm 1270 mm 60 mm 60 mm 60 mm 90mm 80mm 2 4 M10x30 10 M10 Altura final C a...

Page 28: ...28 3 50 mm 95 Fure a parede com o aux lio de uma furadeira com broca de 14 e comprimento de 100 mm Fixe e aperte com uma chave at bloquear...

Page 29: ...29 4 M10x30 10 M10 96 p 92 Parafuse os suportes p 25...

Page 30: ...30 3 2 1 1 2 X1 C 97...

Page 31: ...ligue a correte el trica do local de instala o Instale com altura m nima conforme figura Fa a as marca es para fura o com aux lio de um l pis Ap s isso utilizando se de uma furadeira com broca de di m...

Page 32: ...32 7 5 6 A B C D E F IP54 F E D C B A 7 5 6 A B C D E F IP54 99 Instale os condu tes Fa a a conex o el trica utilizando um conector Passe a fia o...

Page 33: ...33 8 9 11 10 IP54 100 Feche a tampa da caixa de prote o parafusando a Ligue a correte el trica do loca Abra a tampa do controle remoto DC90 e insira n o Inclusas tipo CR2450 3V...

Page 34: ...34 101 Abra o toldo com auxilio do controle remoto Com auxilio de uma chave de boca ajuste nas laterais a abertura do toldo conforme a gura...

Page 35: ...35 102 Pe a ajuda para ambos os lados sejam ajustados ao mesmo tempo Aten o para n o atingir os limites dos parafusos Existem dois para fusos nas laterias...

Page 36: ...7 103 Quando aberto o tecido do toldo deve ficar esticado Para ajudar utilize uma chave de fenda conforme figura e pressione a dire o de abertura no controle remoto do toldo at que este fique esticad...

Page 37: ...8 104 Quando fechado o tecido deve ser totalmente guardado Para ajudar utilize uma chave de fenda conforme figura e pressione a dire o de fechamento no controle remoto do toldo at que este fique estic...

Page 38: ......

Page 39: ......

Page 40: ...ento Leroy Merlin Capitais 4020 5376 Demais Regi es 0800 0205376 IMAGENS ILUSTRATIVA Garantia 5 anos 5 year guarantee Para maiores informa es consulte o s te da Anatel www anatel gov br Este equipamen...

Reviews: