
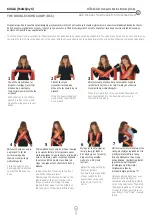
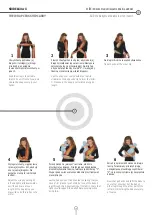
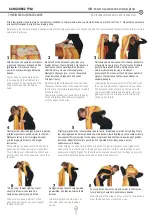
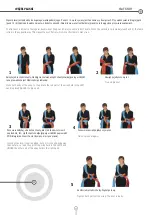


Przytrzymując dziecko,
posadź je na powstałym
skrzyżowaniu tkaniny.
Rozłóż kolejno obie części chusty najpierw na jego pupie (od
jednego dołu podkolanowego do drugiego), a następnie na plecach.
Najpierw rozkładamy część wewnętrzną, czyli "od ciała",
Jeśli wiązanie jest zbyt luźne, popraw
je. Chusta jest prawidłowo zawiązana,
jeśli dziecko siedzi prosto, a Ty nie
musisz Tworzyć przeciwwagi dla
dźwiganego dziecka poprzez
odchylanie się w przeciwnym kierunku
do biodra, na którym siedzi Twoja
pociecha.
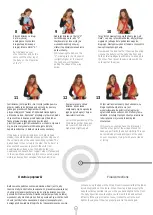
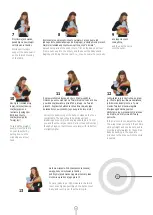
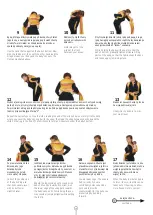
Popraw ułożenie dziecka, aby było Wam wygodnie.
Dziecko powinno siedzieć na Twoim biodrze. Jedna nóżka
powinna znajdować się przed Tobą, druga - na Twoich
plecach. Popraw też ułożenie nóżek dziecka, aby jego
kolanka były na wysokości jego pupy lub nieco wyżej.
Aby ciężar rozkładał się
lepiej, skrzyżuj tkaninę
znajdującą się na
ramieniu (pociągnij w
dół brzeg chusty
znajdujący się przy
Twojej szyi).
a następnie część
zewnętrzną.
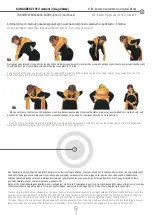
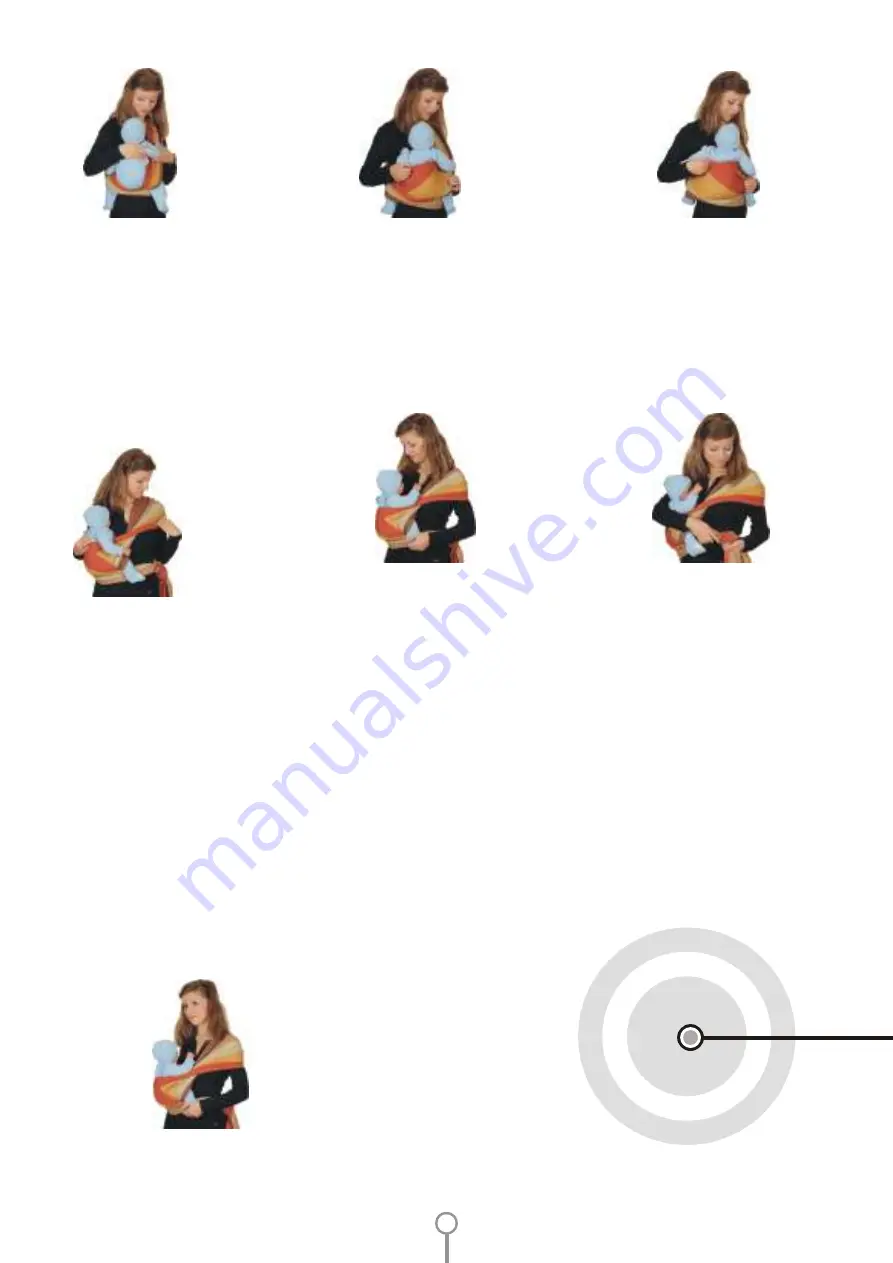
Gotowe wiązanie. Podczas noszenia zwracaj
uwagę, żeby skrzyżowanie tkaniny
podtrzymujące dziecko sięgało przez cały czas
możliwie wysoko na jego plecach.
9
10
11
12
13
7
8
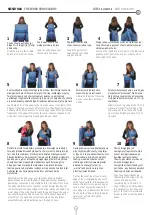
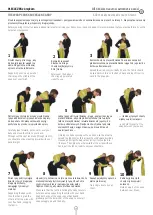
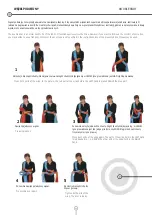
While continuing to
support the baby, seat it
on the formed crossing
of the fabric.
Spread both parts of the wrap in turn, first on the baby's bottom
(from one knee pit to the other), and then over the baby's back.
Begin by stretching the inner part, i.e., the one nearer to your body
If the tie is too loose, adjust the fabric.
The wrap is tied correctly if the child is
sitting straight and you do not need to
provide counterweight for the carried
baby by bending in the opposite
direction to the hip on which the child
is seated.
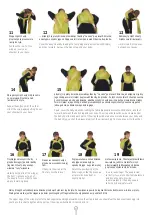
Correct the positioning of the baby, to make both of you
comfortable. The baby should be sitting upright,
straddling on your hip, with one leg should be in front of
you and the other at your back. Correct the positioning of
the baby's legs, so that its knees are level with its bottom
or slightly higher.
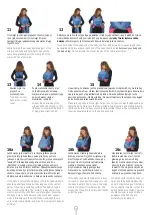
To spread the weight
evenly, cross the fabric
on your shoulder by
pulling down on the
wrap edge near your
neck.
and then do the same
with the outer.
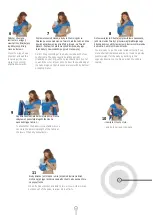
You are ready to go. Still, make sure the fabric
reaches as high as possible up the back of your
baby, and never lower than the armpits.
15
Summary of Contents for Woven Wrap
Page 23: ...Come with us Come with us...


