
INSTALLATION AND OWNER’S MANUAL
N936 LIGHTBAR for
KAWASAKI
®
NOMAD Motorcycle
PARTS LIST
Hex Key, 5mm
Wrench, 10mm
Screwdriver, #2 Phillips
Pliers
Description
Qty.
Lightbar Assembly, N936
1
Wire Connectors
6
Spacer
2
Screws, Hex, M6 x 35
2
Make certain the motorcycle is securely posi-
tioned for this installation. Cover the front fender
with a protective cloth to avoid scratches.
1.
Remove the headlight ring assembly from the
headlight shell (screwdriver), retain the screws for
re-use. Set the headlight ring assembly safely aside.
2.
Disconnect the turnsignals wires, inside the head-
light shell.
3.
Remove the turnsignal mounting bar (hex key, 5mm
and wrench, 10mm), retain the end screws for re-use
PREPARATION
INSTALLATION
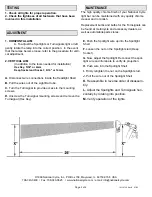
A. Mount the Lightbar
1.
Position the National Cycle Lightbar assembly in the
same location as the original turnsignal mounting bar.
2.
Thread the original end screws, through the Lightbar
mount holes, into their original locations.
3.
Position the Spacers between the Lightbar center
bracket and the turnsignal mounting bar center mount-
ing location.
4.
Thread the M6 x 35 Hex Head screws through the
Lightbar center bracket, the spacer, then into the lower
triple-clamp.
5
. Tighten the end screws to 15 ft/lbs (14Nm).
6.
Tighten the center screws to 6 ft/lbs (6Nm).
7.
Route the Lightbar wires into the headlight shell.
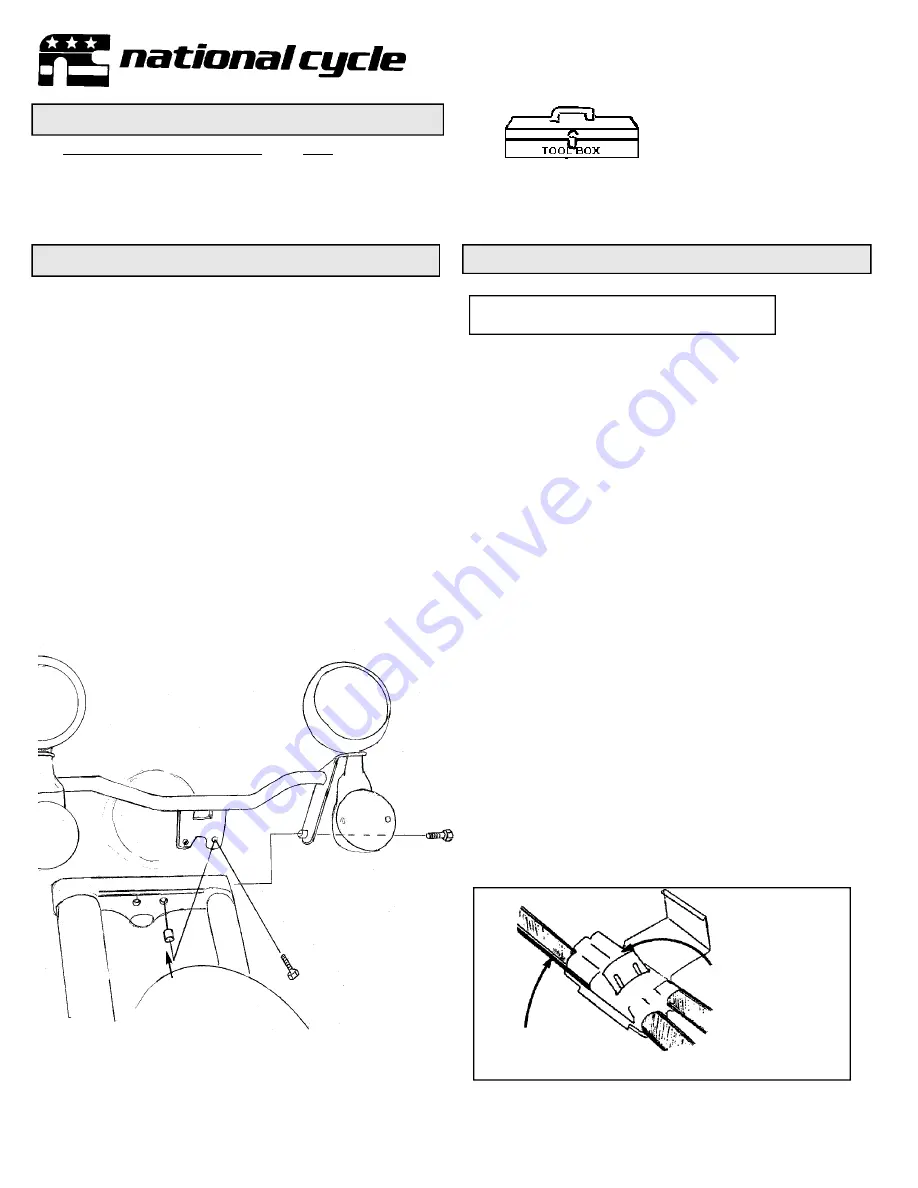
B. Wire the Lightbar.
1.
Attach the wires according to the following list: (Wire
Connectors and Pliers)
Turnsignal, Left
= RED
Turnsignal, Right
= RED
Running Lights
= BLACK
Passing Lamps
= BLUE
2.
Grounding occurs through the frame.
3.
Reinstall headlight.
Page 1 of 2
10-110736 Rev.B 07/02
Note: an assistant may be helpful
during the installation.
Wire from
Light Bar
insert to stop.
Through Wire
M6 x 35
Screw
Original
Screw
Spacer


