background image


8

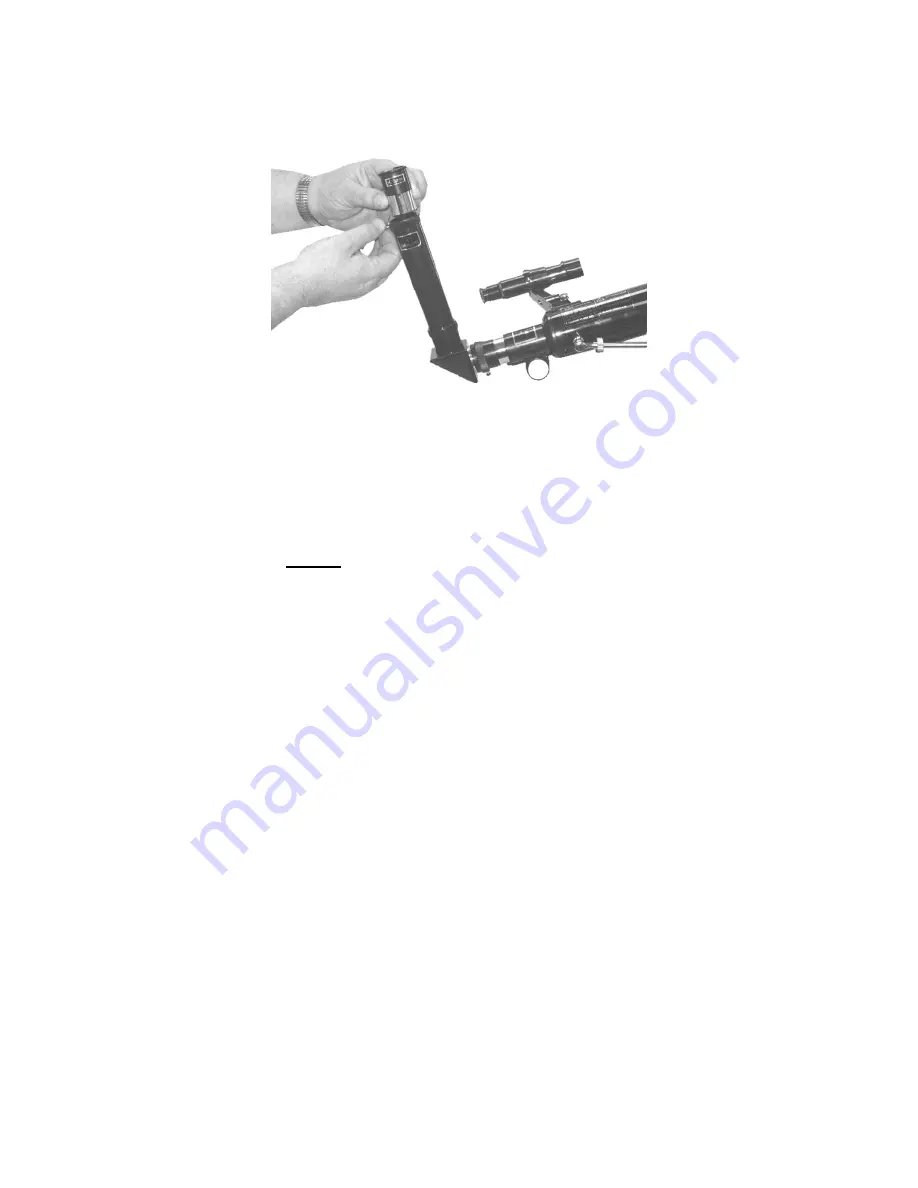
11) A 3X Barlow lens is supplied to triple the basic magnifying power provided by an 
eyepiece. In viewing situations where very high magnifying powers are desired, insert 
the 3X Barlow lens between the eyepiece and the focusing tube (See Fig. 15). 


(Fig. 15) 

 
FINDER SCOPE ALIGNMENT 
 

Since a telescope has a narrow field of view by design, it can be challenging to locate a  
particular star or planet. For this reason the telescope is fitted with a low-power, wide- 
field miniature telescope called a finder scope. Always use your finder scope to locate  
the object you want to view FIRST. 

The finder scope should be aligned with the  

main telescope tube


before you begin using the telescope,

 in order that both  

scopes are positioned to always provide exactly the same angle and view.  
 
Note: Objects in the finder scope are upside down. This is normal and is common to all  
astronomical telescopes. 
 
Complete the following settings in daylight: 
 
 1) Insert the 25-mm eyepiece into the diagonal mirror. Look at an easily recognizable, 

stationary object that is at least 300 feet away. Slightly loosen the two altitude control 
locking knobs, the azimuth locking knob (See Fig. 2 on page 4), and the vertical fine 
adjustment rod. Turn the telescope on both its horizontal and vertical axis until the 
object is in the center of the field of view. Then bring the image into focus.  

 
 2) Firmly retighten the adjusting knobs and the vertical fine adjustment rod so that the 

telescope is locked in position. 


 3) Look through the finder scope. If the object is not visible or centered in the finder 

scope, simply release one of the three small adjusting screws holding the finder scope 
and reposition the finder scope until the object is centered within the X-shaped 
crosshairs. 

  
 4) All screws should be completely tightened as soon as the view through the finder 

scope coincides with the view of the main telescope. 

 
 5) You may need to repeat this procedure to ensure a perfect alignment. 
 

Summary of Contents for NG60AZ

Page 1: ...NG60AZ Telescope Instructions and Owner s Manual...

Page 2: ...sory tray B Finder scope C Finder scope bracket D Diagonal mirror E 3X Barlow lens F Image erector G Eyepieces H Eyepiece cases I Yoke J Tripod support bracket K Vertical fine adjustment rod L Screwdr...

Page 3: ...ews of the moon s craters Jupiter s major moons and Saturn s rings in addition to dozens of galaxies star clusters and nebulae As a terrestrial land telescope the NG60AZ delivers great views of mounta...

Page 4: ...desired height with the supplied tripod adjustment knob See Fig 1 Fig 1 3 Connect all three tripod legs to the yoke with the supplied tripod leg attachment bolts washers and wing nuts See Fig 2 Fig 2...

Page 5: ...nsert the bolt to attach the tripod support bracket to the tripod leg and tighten the nut Repeat this procedure with the other two legs Fig 3 Fig 4 5 Fasten the accessory tray to the tripod support br...

Page 6: ...e hole facing the focusing assembly tighten the large locking knob just enough to prevent the rod from falling out Locate the chromed post on the side of the telescope tube near the focusing assembly...

Page 7: ...ig 11 Secure by tighten ing the small chrome set screw located on the focusing tube See Fig 12 Fig 11 Fig 12 10 Insert the 25 mm eyepiece into the diagonal mirror See Fig 13 Tighten the small chrome s...

Page 8: ...telescopes Complete the following settings in daylight 1 Insert the 25 mm eyepiece into the diagonal mirror Look at an easily recognizable stationary object that is at least 300 feet away Slightly loo...

Page 9: ...t being observed Optimal performance is obtained if the magnification is typically not more than about 30X for every 10 mm of objective lens diameter Magnification of around 175X or less is ideal for...

Page 10: ...e avoid sudden temperature changes as the moisture in the air will condense on the objective lens Should this occur after bringing your telescope inside leave the lens cap off the objective lens tilt...

Page 11: ...ts you cannot remove the particles take the telescope to an optical professional for cleaning If you keep the dust caps on your telescope when it is not in use and avoid handling the lenses or mirrors...

Page 12: ...arth Jupiter is the largest planet in our solar system and the second brightest next to Venus Jupiter has many moons four of which are often visible through your telescope when viewing conditions perm...

Page 13: ...cope increases brightness diminishes Conversely brightness increases when magnification is reduced If an image appears too dark or unclear use a lower powered eyepiece Views of small bright objects ar...

Reviews: