

2
|
ni.com
|
NI 9211 Calibration Procedure
Documentation
Consult the following documents for information about the NI 9211, NI-DAQmx, and your
application software. All documents are available on
ni.com
and help files install with the
software.
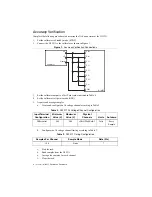
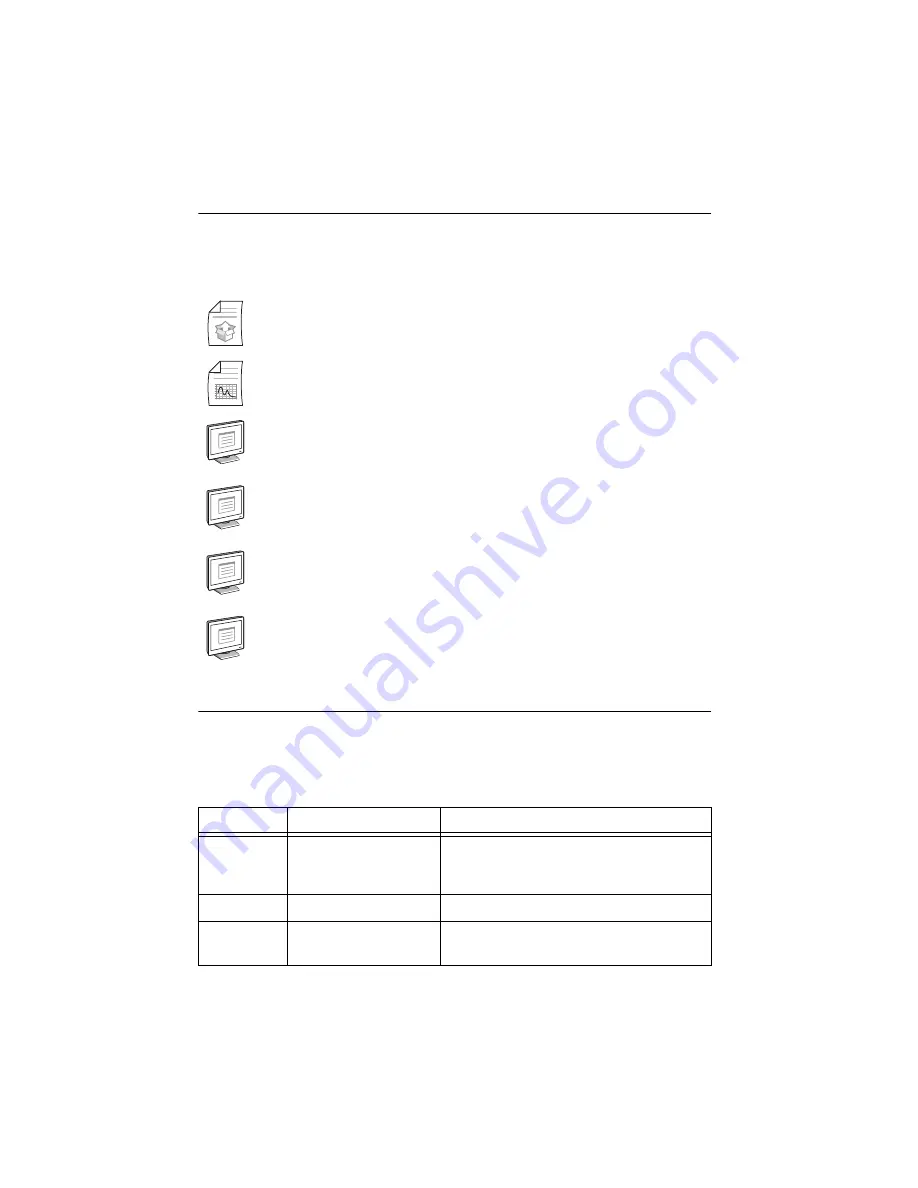
Test Equipment
Table 1 lists the equipment recommended for the performance verification and adjustment
procedures. If the recommended equipment is not available, select a substitute using the
requirements listed in Table 1.
NI cDAQ-9174/9178 Quick Start
NI-DAQmx installation and hardware setup
NI 9211 Operating Instructions and Specifications
NI 9211 specific information, specifications, and calibration interval
NI-DAQmx Readme
Operating system and application software support in NI-DAQmx
LabVIEW Help
LabVIEW programming concepts and reference information about NI-DAQmx VIs and
functions
NI-DAQmx C Reference Help
Reference information for NI-DAQmx C functions and NI-DAQmx C properties
NI-DAQmx .NET Help Support for Visual Studio
Reference information for NI-DAQmx .NET methods and NI-DAQmx .NET properties, key
concepts, and a C enum to .NET enum mapping table
Table 1.
Recommended Equipment
Equipment
Recommended Model
Requirements
Calibrator
Fluke 5520A locked in
the 3.3 V range
A high-precision voltage source with
≤
7
μ
V of
uncertainty at 75 mV and
≤
2
μ
V of uncertainty
at 0 V and an output impedance <5
Ω
.
Chassis
NI cDAQ-9178
—
Connection
Accessory
NI 9932
—


