background image

4

|

ni.com

|

NI 9211 Calibration Procedure

Accuracy


Verification

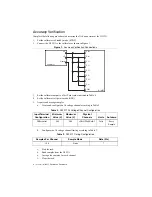
Complete the following procedure to determine the As-Found status of the NI 9211.
1.

Set the calibrator to Standby mode (STBY).

2.

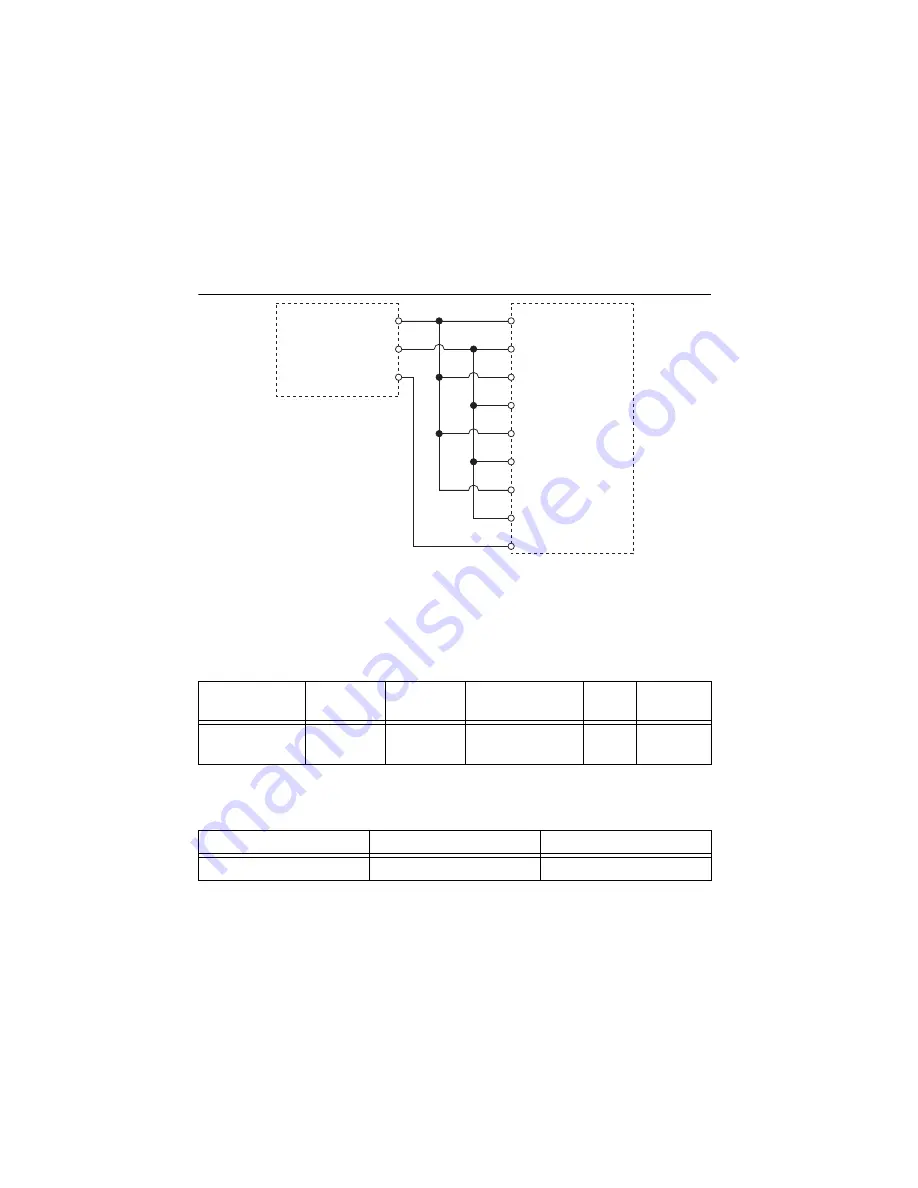
Connect the NI 9211 to the calibrator as shown in Figure 1.

Figure 1.  

Accuracy Verification Connections

3.

Set the calibrator output to a Test Point value indicated in Table 4.
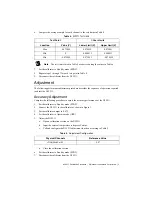
4.

Set the calibrator to Operate mode (OPR).

5.

Acquire and average samples.
a.

Create and configure an AI voltage channel according to Table 2.

b.

Configure the AI voltage channel timing according to Table 3.

c.

Start the task.

d.

Read samples from the NI 9211.

e.

Average the samples for each channel.

f.

Clear the task.

Table 2.  

NI 9211 AI Voltage Channel Configuration

Input Terminal 

Configuration

Minimum 

Value (V)

Maximum 

Value (V)

Physical 

Channels

Units

Autozero

Differential

-0.08

0.08

cDAQMod8/ai0:3

Volts

Every 

Sample

Table 3.  

NI 9211 Timing Configuration

Samples Per Channel

Sample Mode

Rate (S/s)

100

Finite

7

C

a

li

b

r

a

tor

NI 9211

TC

3

COM

TC

3

+

TC2–

TC2+

TC1–

TC1+

TC0–

TC0+

LO

HI

G

ua

rd

Summary of Contents for 9211

Page 1: ...erification 3 Accuracy Verification 4 Adjustment 5 Accuracy Adjustment 5 EEPROM Update 6 Re Verification 6 Accuracy Under Calibration Conditions 6 Where to Go for Support 7 Software Calibrating the NI...

Page 2: ...c information specifications and calibration interval NI DAQmx Readme Operating system and application software support in NI DAQmx LabVIEW Help LabVIEW programming concepts and reference information...

Page 3: ...set up the NI 9211 1 Install NI DAQmx 2 Make sure the NI cDAQ 9178 power source is not connected 3 Connect the NI cDAQ 9178 to the system safety ground a Attach a ring lug to a 14 AWG 1 6 mm wire b C...

Page 4: ...and average samples a Create and configure an AI voltage channel according to Table 2 b Configure the AI voltage channel timing according to Table 3 c Start the task d Read samples from the NI 9211 e...

Page 5: ...of the NI 9211 1 Set the calibrator to Standby mode STBY 2 Connect the NI 9211 to the calibrator as shown in Figure 1 3 Set the calibrator output to 0 07 V 4 Set the calibrator to Operate mode OPR 5 A...

Page 6: ...adjustment verify that you have met the Test Conditions before returning your device to NI Refer to Where to Go for Support for assistance in returning the device to NI Accuracy Under Calibration Cond...

Page 7: ...de compliance policy and how to obtain relevant HTS codes ECCNs and other import export data Where to Go for Support The National Instruments Web site is your complete resource for technical support A...

Reviews: