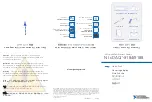


Measurement &
Automation
Explorer
(NI MAX)
DISABLE RT
SAFE MODE
CONSOLE OUT
IP RESET
NO APP
USER1
OFF
ON
x1
+
–
C
V2
C
V1
C
V2
C
V1
+
–
55
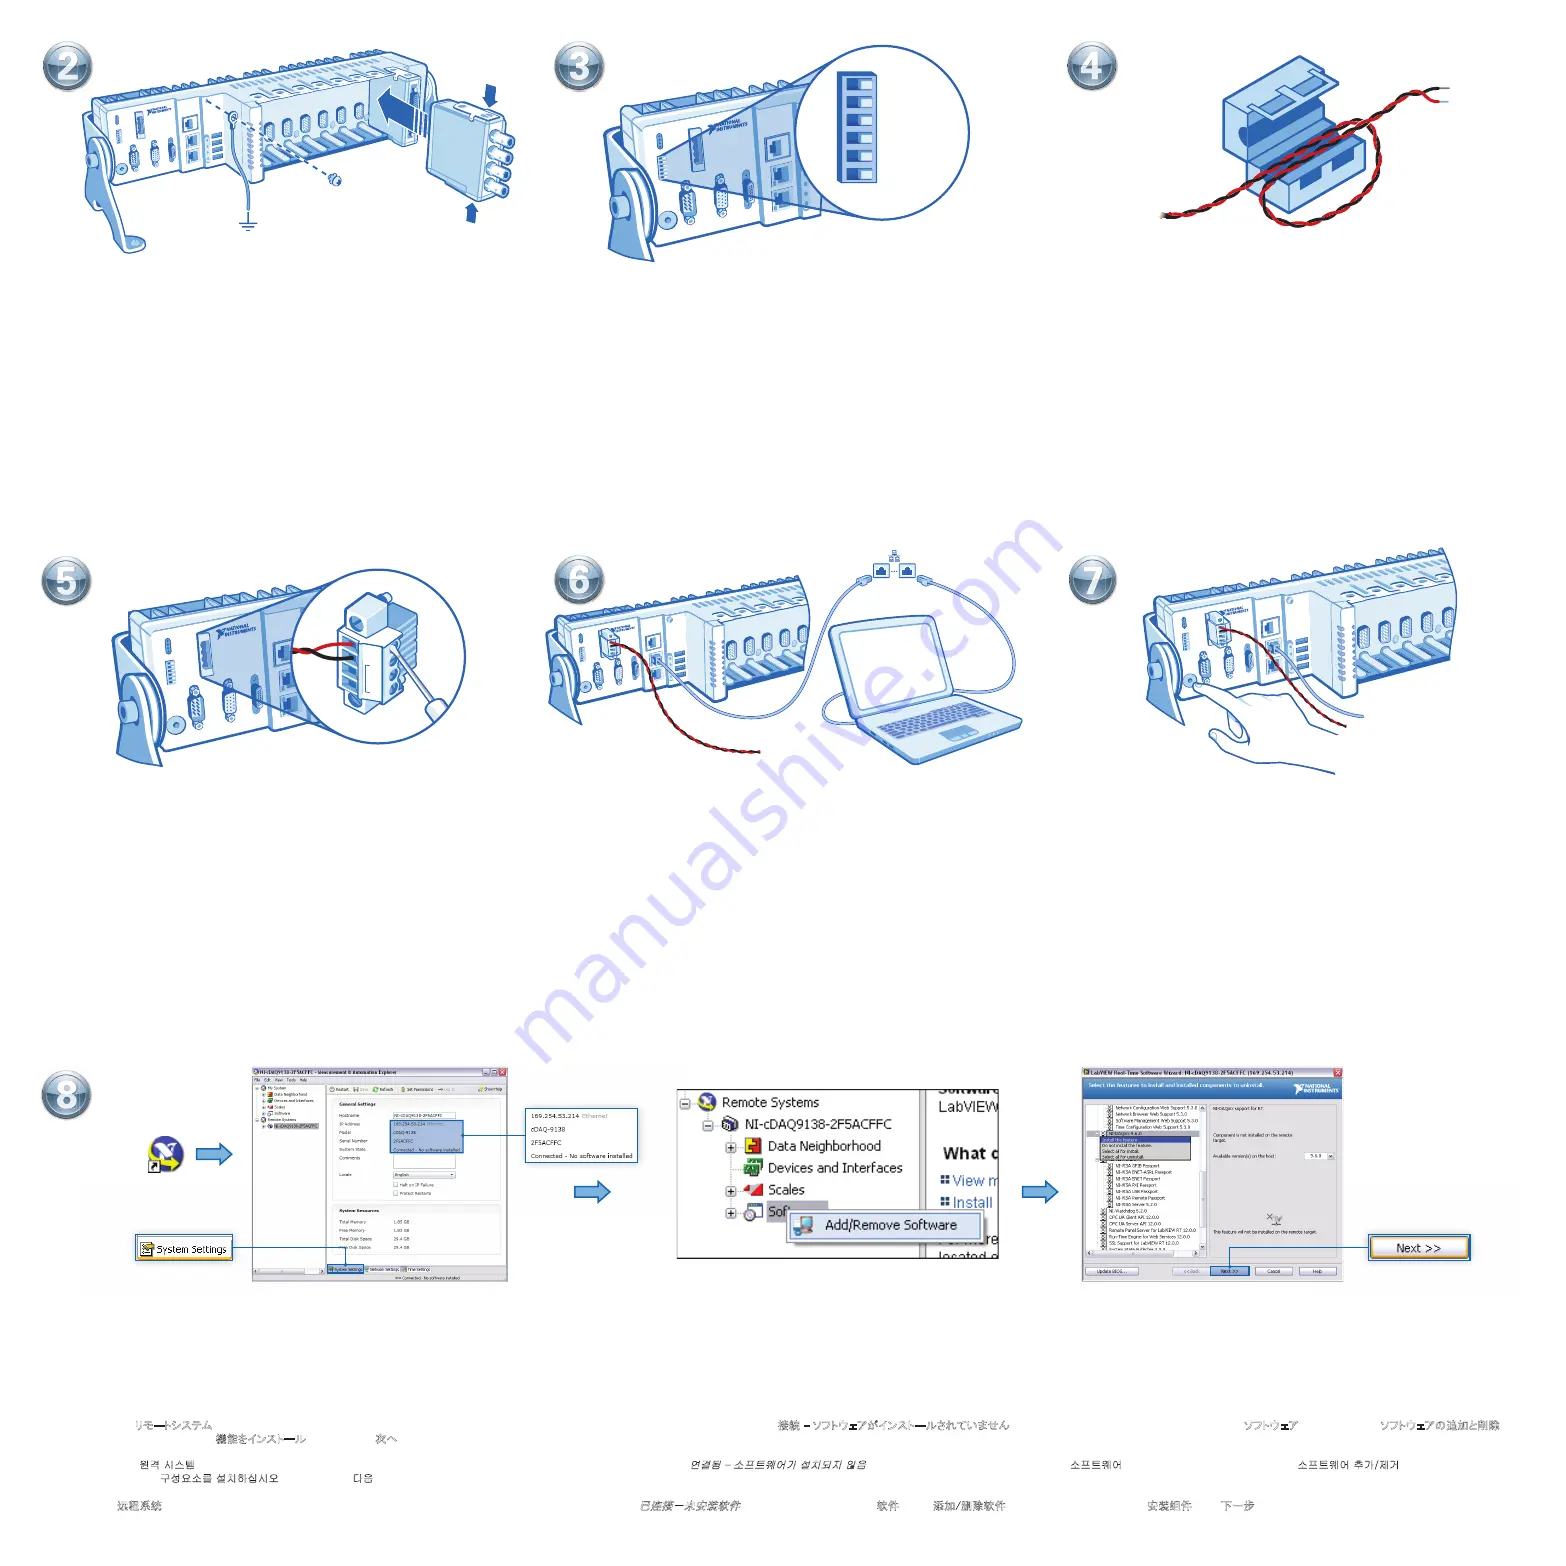
Launch MAX. Expand
Remote Systems
and select the cDAQ chassis. On the System Settings tab, verify that the chassis has an Ethernet IP address and the System State reads
Connected – No software installed
. Expand the cDAQ chassis, right-click
Software
, and select
Add/Remove
Software
. Select
NI-DAQmx
and then select
Install the feature
. Click
Next
to confi rm the requested software features.
Lancez MAX. Développez l’élément
Systèmes déportés
, puis sélectionnez le châssis cDAQ. Sur l’onglet Paramètres système, assurez-vous que le châssis a une adresse IP Ethernet et que l’État du système indique
Connecté – Aucun logiciel installé
. Développez le châssis cDAQ, puis cliquez
avec le bouton droit sur
Logiciels
et sélectionnez
Ajouter/Supprimer des logiciels
. Sélectionnez
NI-DAQmx
et sélectionnez
Installer la fonctionnalité
. Cliquez sur
Suivant
pour confi rmer les fonctionnalités logicielles demandées.
Öffnen Sie MAX. Erweitern Sie die Kategorie
Netzwerkumgebung
und wählen Sie das cDAQ-Chassis aus. Prüfen Sie auf der Registerkarte “Systemeinstellungen”, ob das Chassis eine Ethernet-IP-Adresse hat und der Systemstatus
Verbunden – Keine Software installiert
lautet. Erweitern Sie die
cDAQ-Chassis-Kategorie, klicken Sie mit der rechten Maustaste auf
Software
und wählen Sie
Software hinzufügen/entfernen
. Wählen Sie
NI-DAQmx
und dann
Komponente installieren
. Klicken Sie auf
Weiter
, um die Software-Auswahl zu bestätigen.
MAX
を起動します。リモートシステムを展開して、
cDAQ
シャーシを選択します。システム設定タブで、シャーシにイーサネット
IP
アドレスがあり、システム状態が接続 – ソフトウェアがインストールされていませんであることを確認します。
cDAQ
シャーシを展開し、ソフトウェアを右クリックして、ソフトウェアの追加と削除を選
択します。
NI-DAQmx
を選択した後に機能をインストールを選択します。次へをクリックして、要求されたソフトウェア機能を確認します。
MAX
를 시작합니다. 원격 시스템을 확장하고
cDAQ
섀시를 선택합니다. 시스템 셋팅 탭에서 섀시에 이더넷
IP
주소가 있고 시스템 상태가
연결됨 – 소프트웨어가 설치되지 않음인지 확인합니다.
cDAQ
섀시를 확장한 후
,
소프트웨어에서 마우스 오른쪽 버튼을 클릭하고 소프트웨어 추가/제거를 선택합니다.
NI-DAQmx
를 선택한 후 구성요소를 설치하십시오를 선택합니다. 다음을 클릭한 후 설치할 소프트웨어 구성요소가 맞는지 확인합니다.
启动
MAX,
展开远程系统并选择
cDAQ
机箱。在
“
系统设置
“
选项卡上
,
验证机箱是否具有以太网
IP
地址
,
且
“
系统状态
“
为
已连接-未安装软件。展开
cDAQ
机箱
,
右键单击软件并选择添加/删除软件。选择
NI-DAQmx,
然后选择安装组件
,
单击下一步确认所需的软件功能。
88
66
Power on the host computer and connect it to an Ethernet network. Connect Port 1 of the
cDAQ chassis to the same network as the computer.
Mettez l’ordinateur hôte sous tension et connectez-le à un réseau Ethernet. Connectez le
Port 1 du châssis cDAQ au même réseau auquel est connecté l’ordinateur.
Schalten Sie den Host-Computer ein und schließen Sie ihn an ein Ethernet-Netzwerk an. Verbin-
den Sie Port 1 des cDAQ-Chassis mit demselben Netzwerk, in dem sich der Computer befi ndet.
ホストコンピュータに電源を投入して、イーサネットネットワークに接続します。
cDAQ
シャーシのポ
ート
1
をコンピュータと同じネットワークに接続します。
호스트 컴퓨터의 전원을 켠 후
,
이더넷 네트워크에 연결합니다.
cDAQ
섀시의 포트
1
을 호스트 컴
퓨터가 연결된 네트워크에 연결합니다.
为主控计算机上电并将其连接至以太网。
cDAQ
机箱的端口
1
连接至计算机所在的网络。
77
33
22
44
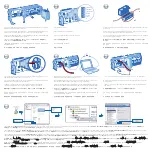
Connectez le châssis cDAQ à la terre. Ensuite, installez les modules d’E/S. Reportez-vous
aux instructions d’utilisation du module pour effectuer les connexions de signal.
Erden Sie das cDAQ-Chassis. Bauen Sie anschließend die I/O-Module ein. Die Verkabelung
des Moduls ist in der Modulanleitung beschrieben.
cDAQ
シャーシをアースに接続します。 続いて、
I/O
モジュールを取り付けます。 信号接続につ
いては、モジュールの操作手順を参照してください。
cDAQ
섀시를 접지에 연결합니다. 그런 다음
I/O
모듈을 설치합니다. 신호 연결은 해당 모듈의 사용
설명서를 참조하십시오.
Connect the cDAQ chassis to earth ground. Then install I/O modules. Refer to the module
operating instructions for signal connections.
将
cDAQ
机箱接地。安装
I/O
模块。关于信号连接
,
见模块使用说明。
Vérifi ez la position des commutateurs DIP.
Prüfen Sie, ob die DIP-Schalter richtig eingestellt sind.
DIP
スイッチの位置を確認します。
DIP
스위치의 위치를 확인합니다.
Verify DIP switch positions.
检查
DIP
开关位置。
Assurez-vous que la source d’alimentation est hors tension. Installez la ferrite le long des
fi ls conducteurs négatif et positif de la source d’alimentation.
Stellen Sie sicher, dass die Stromversorgung ausgeschaltet ist. Bringen Sie einen Ferritblock
an die Stromversorgungsleitung an.
電源がオフになっていることを確認します。 電源の正極および負極リードにフェライトを取り
付けます。
전원 공급 장치의 전원이 꺼져 있는지 확인합니다. 전원 공급 장치의 양극과 음극 도선에 자성체를
설치합니다.
Verify power source is turned off. Install ferrite across the negative and positive leads of the
power source.
检查并确保电源已关闭。在电源正负极线上安装磁箍。
Connectez le fi l conducteur positif de la source d’alimentation au terminal V1 du connecteur
d’alimentation, et le fi l négatif à l’un des terminaux C.
Verbinden Sie die positive Ader der Stromversorgung mit dem V1-Anschluss des
Stromversorgungssteckers und die negative Ader mit einem der C-Anschlüsse.
電源の正極リードを電源コネクタプラグの
V1
端子に、負極リードを
C
端子の
1
つに接続します。
전원 공급 장치의 양극 도선을 전원 커넥터 플러그의
V1
터미널에 연결하고
,
음극 도선을
C
터미널
중 하나에 연결합니다.
Connect the positive lead of the power source to the V1 terminal on the power connector
plug, and the negative lead to one of the C terminals.
将电源正极导线连接至电源连接器插头的
V1
端子
,
负极导线连接至
C
端子。
Mettez la source d’alimentation externe sous tension. Puis appuyez sur le bouton marche
du châssis cDAQ.
Schalten Sie die externe Stromversorgung ein. Betätigen Sie dann den Netzschalter des
cDAQ-Chassis.
外部電源の電源を入れます。
cDAQ
シャーシの電源ボタンを押します。
외부 전원 공급 장치의 전원을 켭니다. 그런 다음
cDAQ
섀시의 전원 버튼을 누릅니다.
Turn on the external power source. Then press the power button on the cDAQ chassis.
打开外部电源。按下
cDAQ
机箱的电源按钮。
C
V2
C
V1
C
V2
C
V1