


©
National Instruments Corporation
3
NI 9925 Installation Guide
5.
Fasten the DIN rail clip to the cDAQ chassis using two FLH #6-32
×
5/16” screws
(included in the kit) with a number 2 Phillips screwdriver, as shown in Figure 3.
Figure 3.
Attaching DIN Rail Clip to NI cDAQ-9181/9191 Chassis
6.
Insert your C Series I/O module into the NI cDAQ-9181/9191 chassis.
7.
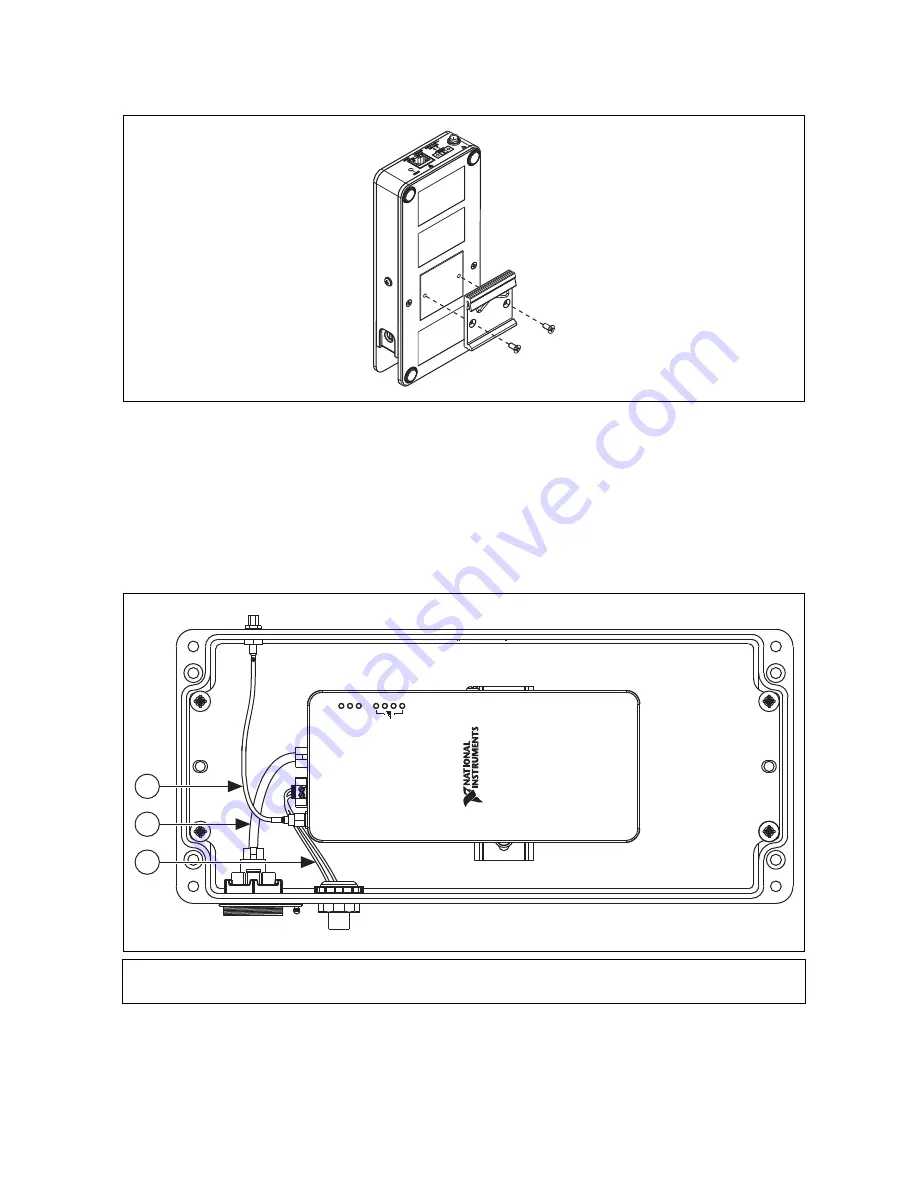
Connect the internal power cable from the NI 9925 to the cDAQ chassis as shown in
Figure 4.
8.
Connect the internal RJ45 Ethernet cable to the NI 9925 and the cDAQ chassis, as shown
in Figure 4.
Figure 4.
Connecting Internal Cables
1
Internal Antenna Cable
2
Internal RJ45 Ethernet Cable
3
Internal Power Cable
PO
WER
S
TAT
U
S
A
C
TIVE
1
2
3


