

1-18
|
ni.com
Chapter 1
Getting Started with the cDAQ Chassis
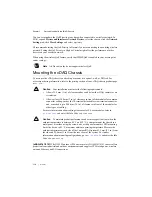
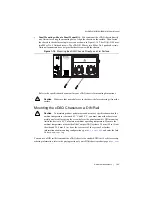
You can use a panel mount kit to mount the cDAQ chassis on a panel, or mount directly to the
panel with your own screws. For kit accessory ordering information, refer to the pricing section
of your cDAQ chassis product page at
cDAQ-9181/9191
You can panel mount the cDAQ chassis with or without a panel mount kit.
Note
The threaded holes on cDAQ chassis for panel or DIN rail mounting cannot
be used more than five times. Unscrewing and reinstalling the screws into the chassis
will produce a compromised connection between the panel and cDAQ chassis.
Caution
Remove the C Series module(s) from the cDAQ chassis before you mount
the chassis to the panel. After the cDAQ chassis is mounted, you can reinsert the
C Series module(s).
•
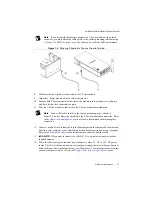
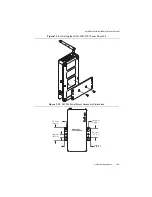
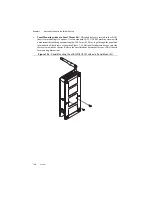
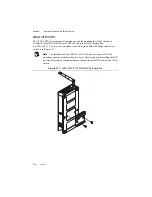
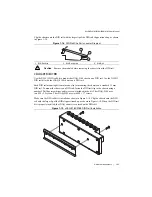
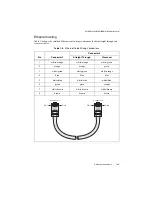
Panel Mounting with a Panel Mount Kit
—Use the NI 9903 panel mount kit to mount the
cDAQ chassis on a panel. Align the panel mount accessory on the cDAQ chassis and attach
the accessory to the chassis with the two FLH #6-32 × 5/16 in. screws (included in the kit),
as shown in Figure 1-12. You
must
use these screws because they are the correct depth and
thread for the panel.
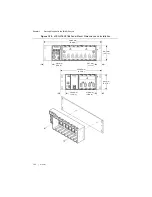
You can then attach the cDAQ chassis to a wall or panel with the two holes or the four keyholes
with M4, M5, No. 8, or No. 10 panhead screws. National Instruments does
not
provide these
screws with the chassis. Refer to Figure 1-13 for panel mount accessory dimensions.


