©
National Instruments Corporation
3
NI WSN-3291 Outdoor IP Enclosure Installation Guide
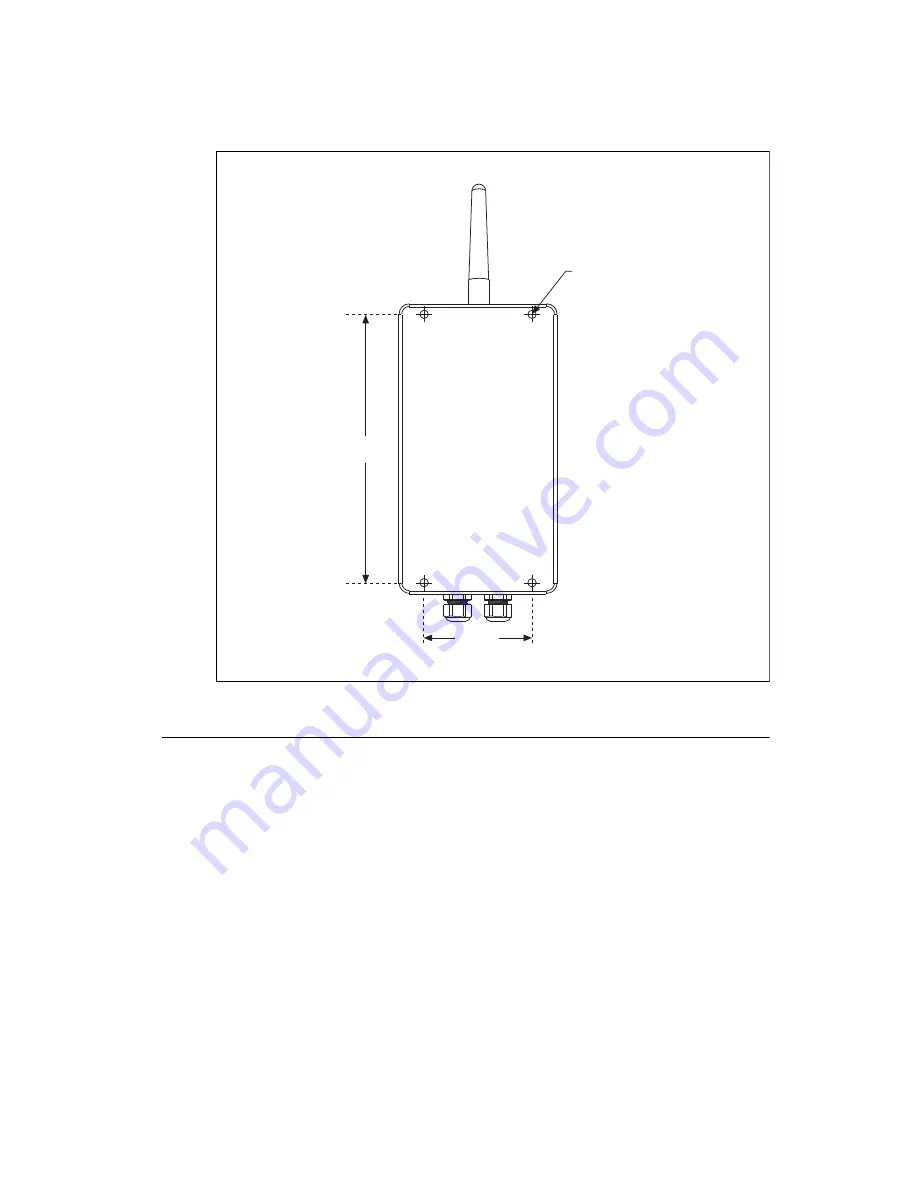
Figure 3.
NI WSN-3291 Mounting Hole Dimensions and Locations
Setting Up and Installing the NI WSN-3291
Complete the following steps to set up and install the NI WSN-3291:
Step 1: Unpack and Inspect the Kit Contents
Remove the device from the package and inspect the device and kit contents. Contact NI if the device
appears damaged. Do
not
install a damaged device or use kit contents that appear damaged.
Step 2: Unscrew and Detach the NI WSN-3291 Cover
The cover of the NI WSN-3291 is equipped with captive screws. Use a #2 Phillips screwdriver to remove
the cover.
Step 3: Connect Antenna Wire Connector
The NI WSN-3291 ships with an internal antenna cable to connect the NI WSN-32
xx
device to the IP
rated antenna connector on the inside of the NI WSN-3291.
3
.22
8
in.
(
8
2 mm.)
8
.0
3
1 in.
(204 mm.)
4X Ø .24
8
in.
(6.
3
mm)


