Chapter 2
Installation and Configuration
2-12
ni.com
4.
Click the
PXI System
controller entry. The chassis (or multiple
chassis, in a multichassis configuration) is listed below it. Identify each
chassis by right-clicking its entry and selecting the appropriate chassis
model through the
Identify As
submenu. Further expanding the
PXI
System
branch shows all of the devices in the system that NI-VISA
can recognize. Once the controller and all of the chassis are identified,
MAX will generate the required
pxisys.ini
file.
5.
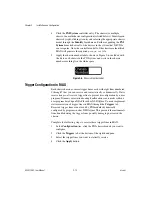
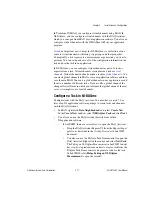
Apply the chassis number labels, shown in Figure 2-6, included with
the kit to each chassis in the PXI system, and write in the chassis
number accordingly in the white space.
Figure 2-6.
Chassis Number Label
Trigger Configuration in MAX
Each chassis has one or more trigger buses, each with eight lines numbered
0 through 7 that you can reserve and route statically or dynamically. Static
reservation
pre-allocates
a trigger line to prevent its configuration by a user
program. Dynamic reservation/routing/deallocation is automatic within a
user program based upon NI APIs such as NI-DAQmx. You can implement
static reservation of trigger lines in MAX through the
Triggers
tab.
Reserved trigger lines are not used by PXI modules dynamically
configured by programs such as NI-DAQmx. This prevents the instruments
from double-driving the trigger lines, possibly damaging devices in the
chassis.
Complete the following steps to reserve these trigger lines in MAX.
1.
In the
Configuration
tree, click the PXI chassis branch you want to
configure.
2.
Click the
Triggers
tab at the bottom of the right-hand pane.
3.
Select the trigger lines you want to statically reserve.
4.
Click the
Apply
button.

