


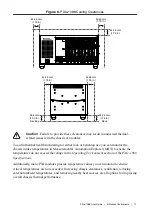
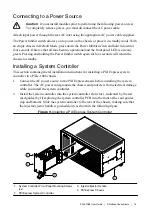

Connecting to a Power Source
Caution
Do not install modules prior to performing the following power-on test.
To completely remove power, you must disconnect the AC power cable.
Attach input power through the rear AC inlet using the appropriate AC power cable supplied.
The Power Inhibit switch allows you to power on the chassis or place it in standby mode. With
an empty chassis in Default Mode, press down the Power Inhibit switch and hold it down for
four seconds. Observe that all fans become operational and the front panel LED is a steady
green. Pressing and holding the Power Inhibit switch again for four seconds will return the
chassis to standby.
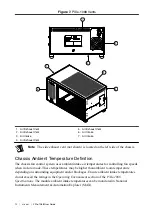
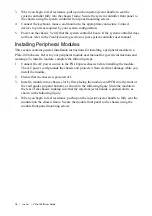
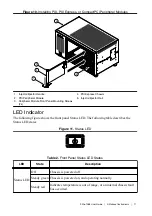
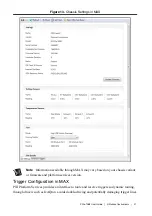
Installing a System Controller
This section contains general installation instructions for installing a PXI Express system
controller in a PXIe-1088 chassis.
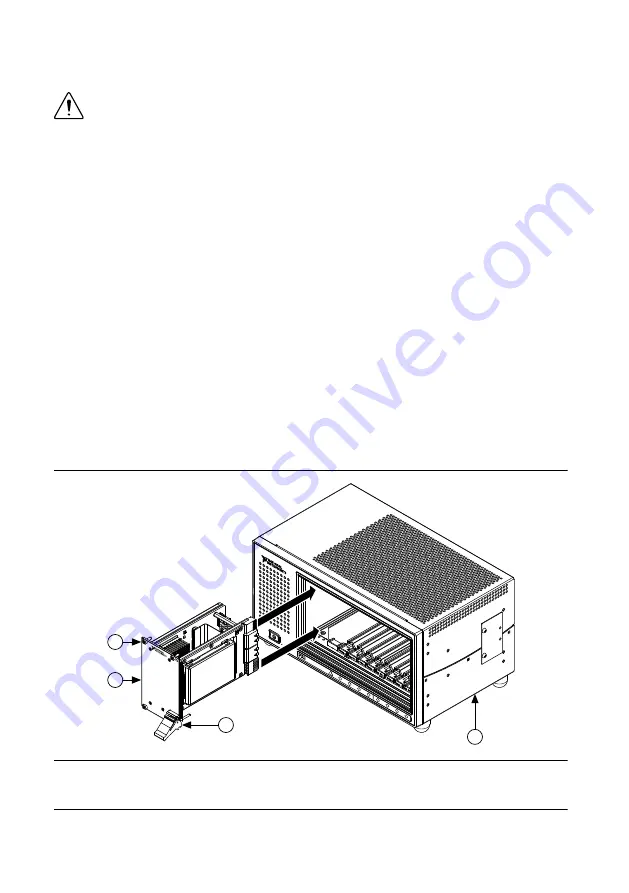
1.
Connect the AC power source to the PXI Express chassis before installing the system
controller. The AC power cord grounds the chassis and protects it from electrical damage
while you install the system controller.
2.
Install the system controller into the system controller slot (slot 1, indicated by the red
card guides) by first placing the system controller PCB into the front of the card guides
(top and bottom). Slide the system controller to the rear of the chassis, making sure that
the injector/ejector handle is pushed down as shown in the following figure.
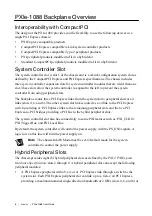
Figure 9. Installing a PXI Express System Controller
8
9
7
6
5
4
3
2
H
H
H
H
H
H
H
H
1
LOW PO
WER
PXI
e-1
088
4
3
2
1
1. System Controller Front Panel Mounting Screws
(4x)
2. PXI Express System Controller
3. Injector/Ejector Handle
4. PXI Express Chassis
PXIe-1088 User Guide
|
© National Instruments
|
15


