
PXIe-4844 Installation Guide and Specifications
|
© National Instruments
|
7
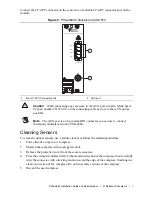
Connect the LC/APC connector on the sensor to an available LC/APC connector port on the
module.
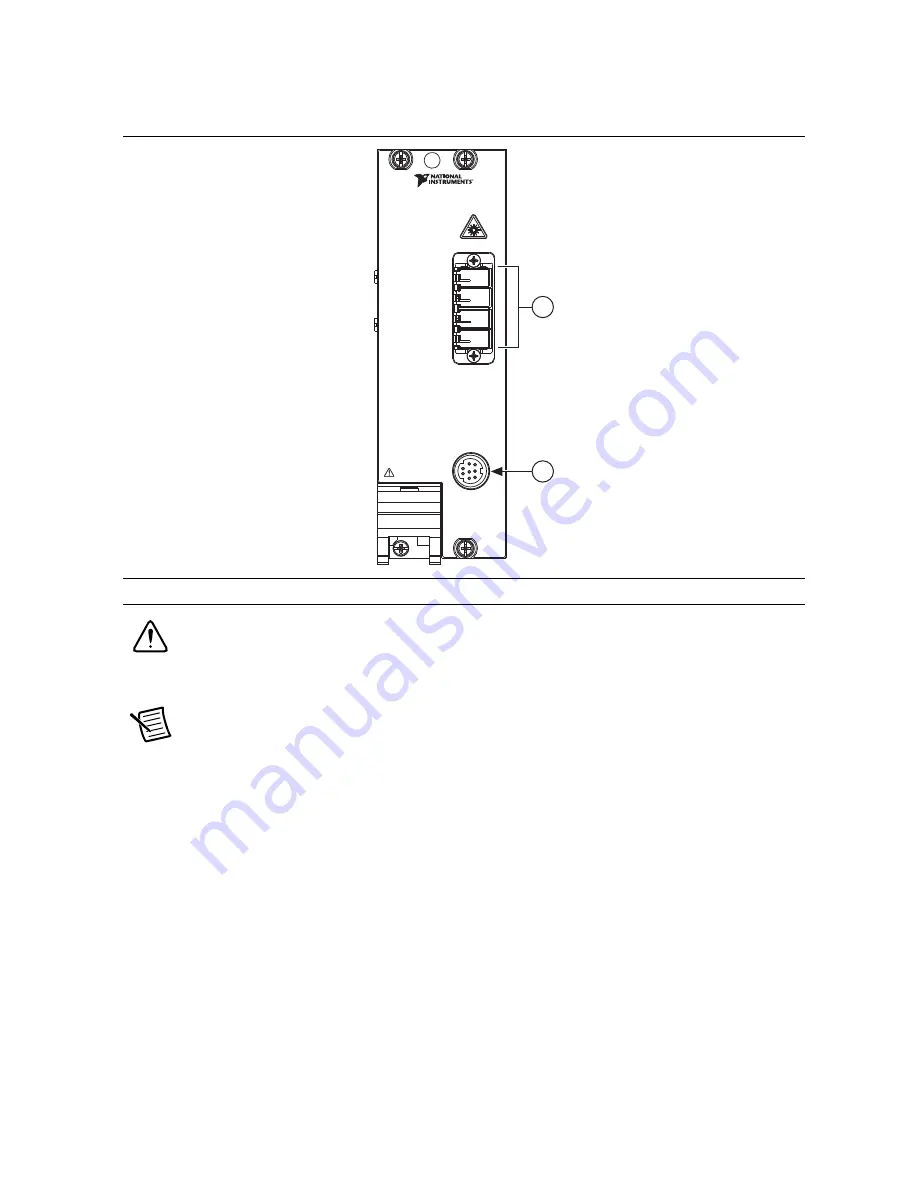
Figure 3.
PXIe-4844 Channels and AUX Port
Caution
When connecting any accessory to the AUX port, install a ferrite bead
(NI part number 781233-01) on the connecting cable as close to the AUX port as
possible.
Note
The AUX port is an 8-pin mini-DIN connector you can use to connect
third-party multiplexers to the PXIe-4844.
Cleaning Sensors
To clean the optical sensors, use a ferrule cleaner or follow the standard guidelines:
1. Fold a lint-free wipe into a compress.
2. Moisten the compress with isopropyl alcohol.
3. Remove the protective cover from the sensor connector.
4. Press the connector endface firmly to the moistened section of the compress, then forcefully
wipe the connector with a twisting motion toward the edge of the compress, finishing in a
clean, dry section of the compress. Do not reuse dirty sections of the compress.
5. Discard the used compress.
1
Four LC/APC Connector ports
2
AUX port
2
1
NI PXIe-4844
4 Channel Optical Sensor Interrogator
INPUT
APC
Connectors
AUX
CH 0
CH 1
CH 2
CH 3