Chapter 3
Configuring and Testing
3-6
ni.com
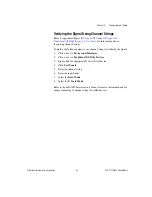
Verifying the Signal in NI-DAQmx Using a Task or Global Channel
You can verify the signals on the SCXI-1102/B/C using NI-DAQmx by
completing the following steps:
1.
Click
+
next to
Data Neighborhood
.
2.
Click
+
next to
NI-DAQmx Tasks
.
3.
Click the task.
4.
Select the channel(s) you want to verify. You can select a block of
channels by holding down the <Shift> key or multiple channels by
holding down the <Ctrl> key. Click
OK
.
5.
Enter the appropriate information on the
Settings
tab.
6.
Click the
Test
button.
7.
Click the
Start
button.
8.
After you have completed verifying the channels, click the
Stop
button.
You have now verified the SCXI-1102/B/C configuration and signal
connection.
Note
For more information on how to further configure the SCXI-1102/B/C, or how to use
LabVIEW to configure the module and take measurements, refer to Chapter 4,
Verifying the Signal in Traditional NI-DAQ (Legacy)
This section discusses how to verify the signal in Traditional NI-DAQ
(Legacy) using channel strings and virtual channels.
Verifying the Signal Using Virtual Channel
If you have already created a virtual channel, complete the following steps
to verify the signal:
1.
Right-click the virtual channel you want to verify and select
Test
.
2.
In
Channel Names
, select the channel you want to verify.
3.
When you have completed verifying the channel, click
Close
.

