Chapter 3
Configuring and Testing
©
National Instruments Corporation
3-5
3.
Click the
Channel
tab. Select the appropriate gain for each channel. If
you want to configure all the channels at the same time, select the
Channel
drop-down list, scroll to the bottom, and select
All Channels
.
Refer to the
SCXI-1102/B/C Software-Configurable Settings
section
for a detailed description of each setting. Click
Apply
.
4.
Click
Accessory
. Select the accessory you connected to the module.
When configuration is complete, click
OK
.
The Traditional NI-DAQ (Legacy) chassis and SCXI-1102/B/C should now
be configured properly. If you need to change the module configuration,
right-click the module and repeat steps 1 through 4. Test the system
following the steps in the
Troubleshooting the Self-Test Verification
section of Chapter 1,
Creating a Virtual Channel
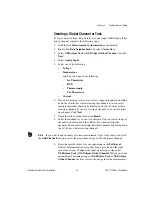
To create a virtual channel, complete the following steps:
1.
Right-click
Data Neighborhood
and select
Create New
.
2.
Select
Traditional NI-DAQ Virtual Channel
and click
Finish
.
3.
Select
Analog Input
from the drop-down menu and click
Next
.
4.
Enter the
Channel Name
and
Channel Description
, and click
Next
.
5.
Select one of the following measurement types from the drop-down
menu:
•
Voltage
•
X
Thermocouple
•
X
RTD
•
Current
6.
Click
Next
.
7.
The next windows ask for information that is dependent upon the
selection made in step 5. Supply the needed information and click
Next
as needed.
8.
Click
Finish
.
Verifying the Signal
This section describes how to take measurements using test panels in order
to verify signal, and configuring and installing a system in NI-DAQmx and
Traditional NI-DAQ (Legacy).

