background image

Chapter 5

Using the SCXI-1102/B/C

SCXI-1102/B/C User Manual

5-10

ni.com

6.

Right-click 

ActiveChans

, and select 

Add Element

. Left-click the new 

ActiveChans

 box. Navigate through the menus, and select the 

property you wish to define.

7.

Change the property to read or write to either get the property or write 
a new value. Right-click the property, go to 

Change To

, and select 

Write

Read

, or 

Default Value

.

8.

After you have added the property to the property node, right-click the 
terminal to change the attributes of the property, add a control, 
constant, or indicator.

9.

To add another property to the property node, right-click an existing 
property and left-click 

Add Element

. To change the new property, 

left-click it and select the property you wish to define.

Note

Refer to the 

LabVIEW Help

 for information about property nodes and specific 

NI-DAQmx properties.

Specifying Channel Strings in NI-DAQmx

Use the channel input of 

DAQmx Create Channel

 to specify the 

SCXI-1102/B/C channels. The input control/constant has a pull-down 
menu showing all available external channels. The strings take one of the 
following forms:

single device identifier/channel number—for example 

SC1Mod1/ch0

multiple, noncontinuous channels—for example 

SC1Mod1/ch0

,


SC1Mod1/ch4

. This mode can affect the SCXI-1102/B/C sample rate. 

NI recommends scanning the channels in order.

multiple continuous channels—for example 

SC1Mod1/ch0:4


(channels 0 through 4)

When you have a task containing SCXI-1102/B/C channels, you can set the 
properties of the channels programmatically using the 

DAQmx Channel 

Property Node

.

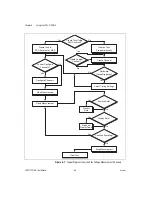
Follow the general programming flowchart or open an example to build a 
basic voltage measurement virtual channel. You can use property nodes in 
LabVIEW to control, configure, and customize the NI-DAQmx task and 
SCXI-1102/B/C. To create a LabVIEW property node, complete the 
following steps:

1.

Launch LabVIEW.

2.

Create the property node in a new Virtual Instrument (VI) or in an 
existing VI.

Summary of Contents for SCXI SCXI-1102

Page 1: ...SCXI TM SCXI 1102 B C User Manual SCXI 1102 B C User Manual April 2006 371975D 01...

Page 2: ...70 Korea 82 02 3451 3400 Lebanon 961 0 1 33 28 28 Malaysia 1800 887710 Mexico 01 800 010 0793 Netherlands 31 0 348 433 466 New Zealand 0800 553 322 Norway 47 0 66 90 76 60 Poland 48 22 3390150 Portuga...

Page 3: ...mechanical including photocopying recording storing in an information retrieval system or translating in whole or in part without the prior written consent of National Instruments Corporation Nationa...

Page 4: ...take precautions to avoid electrical shock When symbol is marked on a product it denotes a component that may be hot Touching this component may result in bodily injury bold Bold text denotes items th...

Page 5: ...1 5 Manually Adding Modules in NI DAQmx 1 5 Installing SCXI Using Traditional NI DAQ Legacy in Software 1 5 Manually Adding Modules in Traditional NI DAQ Legacy 1 6 Verifying and Self Testing the Ins...

Page 6: ...g Input Channels 4 2 Theory of Multiplexed Operation 4 3 Chapter 5 Using the SCXI 1102 B C Developing Your Application in NI DAQmx 5 1 Typical Program Flowchart 5 1 General Discussion of Typical Flowc...

Page 7: ...raditional NI DAQ Legacy CVI Examples 5 17 Traditional NI DAQ Legacy Measurement Studio Examples 5 17 Calibration 5 18 Appendix A Specifications Appendix B Using SCXI Channel Strings with Traditional...

Page 8: ...ure E 1 Bent and Trimmed Resistor E 2 Tables Table 2 1 SCXI 1102 B C Front Signal Pin Assignments 2 2 Table 2 2 Front Connector Signals 2 3 Table 2 3 Rear Signal Pin Assignments 2 7 Table 2 4 SCXI 110...

Page 9: ...and one cold junction sensor channel Each channel also has an amplifier with a selectable gain of 1 or 100 You can multiplex the SCXI 1102 B C inputs to a single output which drives a single DAQ devi...

Page 10: ...1102B SCXI 1102C At least one of the following terminal blocks SCXI 1300 SCXI 1303 SCXI 1308 SCXI 1310 TC 2095 TBX 1303 TBX 96 An SCXI chassis or PXI SCXI combination chassis One of the following E M...

Page 11: ...device Install these before you install the SCXI module The SCXI Quick Start Guide This document contains a quick overview for setting up an SCXI chassis installing SCXI modules and terminal blocks a...

Page 12: ...ts NI DAQ Traditional NI DAQ Function Reference Help You can download NI documents from ni com manuals To download the latest version of NI DAQ click Download Software at ni com Installing Application...

Page 13: ...you have already installed the appropriate software refer to Chapter 3 Configuring and Testing to configure the SCXI 1102 B C module s Verifying the SCXI 1102 B C Installation in Software Refer to th...

Page 14: ...stem should operate properly with your ADE software If the test did not complete successfully refer to Chapter 3 Configuring and Testing for troubleshooting steps Troubleshooting the Self Test Verific...

Page 15: ...the cabled module is not listed in the correct slot and the slot is empty click the drop down listbox next to the correct slot and select the cabled module Configure the cabled module following the st...

Page 16: ...stead found module with ID 0Xxx refer to the Traditional NI DAQ Legacy section of Chapter 3 Configuring and Testing and make sure the correct module is in the specified slot Delete the incorrect modul...

Page 17: ...signal connector This chapter also includes connection instructions for the signals on the SCXI 1102 B C module connectors Refer to the installation guide of the terminal block for detailed informati...

Page 18: ...D AI 8 AI 8 23 NC AI 9 AI 9 22 NC AI 10 AI 10 21 NC AI 11 AI 11 20 NC AI 12 AI 12 19 NC AI 13 AI 13 18 NC AI 14 AI 14 17 NC AI 15 AI 15 16 CH GND AI 16 AI 16 15 NC AI 17 AI 17 14 NC AI 18 AI 18 13 NC...

Page 19: ...urable voltage difference between the positive and negative channel inputs The common mode input signal range of an SCXI 1102 B C module input channel is 10 V This common mode input range for either p...

Page 20: ...nals can be either ground referenced as shown in Figure 2 1 or floating as shown in Figure 2 2 Before you connect the thermocouple or any other signal determine whether it is floating or ground refere...

Page 21: ...2 Connecting the Signals National Instruments Corporation 2 5 SCXI 1102 B C User Manual Figure 2 1 Ground Referenced Signal Connection CH 31 CH 31 Front Signal Connector SCXI 1102 B C CH 0 CH 0 CH 1...

Page 22: ...the MTEMP DTEMP jumper on the SCXI 1300 or SCXI 1303 does not matter The input is overvoltage protected to 15 VDC with power on and off Caution Exceeding the overvoltage protection on the CJ SENSOR i...

Page 23: ...8 NC NC 9 10 NC NC 11 12 NC NC 13 14 NC NC 15 16 NC NC 17 18 NC OUT REF 19 20 NC NC 21 22 NC NC 23 24 D GND SER DAT IN 25 26 SER DAT OUT DAQ D A 27 28 NC SLOT 0 SEL 29 30 NC D GND 31 32 NC NC 33 34 N...

Page 24: ...able 2 4 SCXI 1102 B C Communication Signals Pin SCXI Signal Name NI DAQmx Device Signal Name Traditional NI DAQ Legacy Device Signal Name Direction Description 24 33 DIG GND D GND DGND Digital ground...

Page 25: ...current loop receivers 29 SLOT0SEL P0 2 DIO2 Input Slot 0 select this signal taps into the SCXIbus INTR line to indicate whether the information on MOSI is being sent to a module or Slot 0 36 SCANCLK...

Page 26: ...ble Settings This section describes the most frequently used software configurable settings for the SCXI 1102 B C Refer to Chapter 4 Theory of Operation for a complete list of software configurable se...

Page 27: ...n You also can refer to the DAQ Getting Started Guide and the SCXI Quick Start Guide for more information on installing and configuring the hardware You also can use the DAQ Assistant to graphically c...

Page 28: ...lding down the Ctrl key while selecting channels If you are creating a channel you can only select one channel Click Next 7 Name the task or channel and click Finish 8 Select the channel s you want to...

Page 29: ...plication Most of these settings are available in module properties and or using virtual channels Gain input signal range configure gain using module properties When you set the minimum and maximum ra...

Page 30: ...he system following the steps in the Troubleshooting the Self Test Verification section of Chapter 1 About the SCXI 1102 B C Creating a Virtual Channel To create a virtual channel complete the followi...

Page 31: ...ompleted verifying the channels click the Stop button You have now verified the SCXI 1102 B C configuration and signal connection Note For more information on how to further configure the SCXI 1102 B...

Page 32: ...channel strings Complete the following steps to use channel strings in verifying the signal 1 Click next to Devices and Interfaces 2 Click next to Traditional NI DAQ Devices 3 Right click the appropri...

Page 33: ...les are as follows Rear signal connector SCXIbus connector SCXIbus interface Front Signal Connector CH 0 Gain 0 CH 0 CH 31 CH 31 Lowpass Filter Digital Control Calibration EEPROM Lowpass Filter Lowpas...

Page 34: ...hat are necessary for identifying the module starting calibration information setting the gain and selecting the appropriate channel Analog Circuitry The analog circuitry per channel consists of a low...

Page 35: ...s DAQ device or SCXI chassis The SCXI 1102 B C scanned channels are kept by the NI DAQ driver in a scan list Immediately prior to a multiplexed scanning operation the SCXI chassis is programmed with a...

Page 36: ...of the E M Series DAQ device is the limiting factor on the maximum acquisition rate of the system Since you must scan the SCXI 1102 B C sequentially the driver automatically scans channels not includ...

Page 37: ...sk or global channel in unlicensed mode These messages continue to appear until you install version 7 0 or later of an NI ADE This section describes how to configure and use NI DAQmx to control the SC...

Page 38: ...ask Using DAQ Assistant Further Configure Channels Create Task in DAQ Assistant or MAX Configure Channels Start Measurement Read Measurement Create a Task Programmatically Create Channel Adjust Timing...

Page 39: ...ame task If you are using an ADE other than an NI ADE or if you want to explicitly create and configure a task for a certain type of acquisition you can programmatically create the task from your ADE...

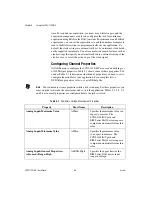
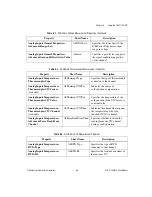
Page 40: ...some of these properties You can use Table 5 1 to determine what kind of properties you need to set to configure the module for your application For a complete list of NI DAQmx properties refer to yo...

Page 41: ...the source of cold junction compensation Analog Input Temperature Thermocouple CJC Value AI Thermcpl CJCVal Specifies the temperature of the cold junction if the CJC source is constant value Analog I...

Page 42: ...the channel such as 2 wire 3 wire or 4 wire Table 5 4 NI DAQmx Thermistor Measurement Properties Property Short Name Description Analog Input Temperature Thermistor R1 AI Thrmistr R1 Specifies the res...

Page 43: ...slide controls and gauge indicators NI ADEs have tools that allow you to easily save the data to files such as spread sheets for easy viewing ASCII files for universality or binary files for smaller f...

Page 44: ...task Select the type of virtual channel based on the measurement you plan to perform Adjust Timing Settings optional DAQmx Timing vi Sample Clock by default This VI is optional if you created and conf...

Page 45: ...tive Channels box and assign the appropriate channel to each list of properties Note If you do not use Active Channels the properties are set on all of the channels in the task Display Data You can us...

Page 46: ...gs in NI DAQmx Use the channel input of DAQmx Create Channel to specify the SCXI 1102 B C channels The input control constant has a pull down menu showing all available external channels The strings t...

Page 47: ...perty go to Change To and select Write Read or Default Value 8 After you have added the property to the property node right click the terminal to change the attributes of the property add a control co...

Page 48: ...DAQmx voltage measurement channel on the SCXI 1102 B C You can use the same functions for Visual Basic 6 NET and C The following text is a function prototype example void AIChannelCollection CreateVo...

Page 49: ...ltage measurements It is a representative sample of important properties to configure voltage measurements For a complete list of NI DAQmx properties and more information on NI DAQmx properties refer...

Page 50: ...ent Studio and LabWindows CVI Refer to the ADE manual and the DAQ analog input examples that come with your application software for more detailed information on programming the SCXI modules for scann...

Page 51: ...SCXI Channel String For LabVIEW and Visual Basic 6 the channel string determines the sequence in which SCXI channels are scanned Refer to Appendix B Using SCXI Channel Strings with Traditional NI DAQ...

Page 52: ...our ADE 2 Enter the appropriate SCXI channel string or virtual channel string into the channels parameter 3 Either enter the input limits for signals connected to the module to adjust the gain setting...

Page 53: ...anning convert the binary data to voltage data using SCXI_Scale Refer to the NI DAQ User Manual for additional information on scanning with E M Series DAQ devices Traditional NI DAQ Legacy CVI Example...

Page 54: ...ifications Calibration constants are stored inside the calibration EEPROM and provide software correction values your application development software uses to correct the measurements for both offset...

Page 55: ...32 differential Input signal ranges 100 mV gain 100 or 10 V gain 1 Input damage level Powered on 42 VDC Powered off 27 VDC Inputs protected CH 0 31 CJ SENSOR Transfer Characteristics Nonlinearity 0 0...

Page 56: ...rrent 1 0 nA CMRR Output range 10 V Output impedance 91 Dynamic Characteristics Bandwidth 2 Hz 1102 200 Hz 1102B 10 kHz 1102C Minimum scan interval per channel any gain 0 012 accuracy 3 s 0 0061 accur...

Page 57: ...MR 60 Hz 40 dB 1102 Step response either gain Stability Recommended warm up time 20 min Offset temperature coefficient Gain 1 20 V C Gain 100 1 V C Gain temperature coefficient 10 ppm C Power Requirem...

Page 58: ...um working voltage refers to the signal voltage plus the common mode voltage Signal common mode Each input should remain within 10 V of CH GND Environmental Operating temperature 0 to 50 C Storage tem...

Page 59: ...ity EN 55011 Emissions Group 1 Class A CE C Tick ICES and FCC Part 15 Emissions Class A Note For EMC compliance operate this device to product documentation CE Compliance This product meets the essent...

Page 60: ...entries configures multiple modules for scanning When the application program runs the channel string is used for programming the channel information into the SCXI system The format of the channel str...

Page 61: ...this case channels n1 and n2 are explicitly repeated in the channel list Note Using parenthesis surrounding multiple channels in a channel string is important for correct scanning operation of the SC...

Page 62: ...ule or chassis you want to delete and click Delete 5 You are presented with a confirmation window Click Yes to continue deleting the module or chassis or No to cancel this action Note Deleting the SCX...

Page 63: ...assis counterclockwise until they are loose but do not completely remove the thumbscrews 5 Remove the SCXI 1102 B C by pulling steadily on both thumbscrews until the module slides completely out Figur...

Page 64: ...1102 B C yet I still cannot correctly test and verify that my SCXI 1102 B C is working What should I do now Unfortunately there is always the chance that one or more components in the system are not...

Page 65: ...y the SCXI 1102 B C for communication and scanning These lines are unavailable for general purpose digital I O if the SCXI 1102 B C is connected to the E M Series DAQ device Table D 1 Digital Signals...

Page 66: ...ling restrictions when using an SCXI 1102 B C module with a plug in E M Series DAQ device Yes If a chassis contains an SCXI 1520 SCXI 1530 1531 or SCXI 1140 module at least one of these modules must b...

Page 67: ...istor for channel 28 is RCL28 Caution Before installing the resistors in the module make sure that there are no signals connected to the module front connector Before installing the module in the SCXI...

Page 68: ...es not extend more than 16 5 mm 0 65 in above the surface of the circuit board Figure E 1 Bent and Trimmed Resistor 7 Insert the resistor into the appropriate pad labeled RCLx 8 Solder the leads to th...

Page 69: ...106 G giga 109 Numbers Symbols Percent Plus or minus Degrees Ohms 5 V 5 VDC source signal A A Amperes A D Analog to digital absolute accuracy The maximum difference between the measured value from a...

Page 70: ...ication A type of signal conditioning that improves accuracy in the resulting digitized signal by increasing signal amplitude relative to noise AO GND DAQ and SCXI analog output ground signal AO REF A...

Page 71: ...are component that controls timing for reading from or writing to groups CMRR Common mode rejection ratio a measure of the ability of a differential amplifier to reject interference from a common mode...

Page 72: ...ted from computer ground whose difference is measured DIO Digital input output DMA Direct memory access a method by which data is transferred to from computer memory from to a device or memory on the...

Page 73: ...eral purpose signal If you want to use or control this signal you must perform register level programming excitation Supplying a voltage or current source to energize an active sensor or circuit EXT C...

Page 74: ...ices and or data acquisition and control interfaces ID Identifier in Inch or inches input damage level The highest voltage level that you can apply to the module without damaging it L lowpass filter A...

Page 75: ...desirable electrical signal noise comes from external sources such as AC power lines motors generators electrical storms welders radio transmitters and internal sources such as semiconductors resistor...

Page 76: ...value of the square of the instantaneous signal amplitude a measure of signal amplitude RSVD Reserved bit pin or signal S s Seconds S Samples sample An instantaneous measurement of a signal normally...

Page 77: ...and SER DAT OUT lines SER DAT IN Serial data input signal SER DAT OUT Serial data output signal signal conditioning The manipulation of signals to prepare them for digitizing Slot 0 Refers to the powe...

Page 78: ...Volts in VOH Volts output high VOL Volts output low W W Watts working voltage The highest voltage with respect to ground that should be applied to an input terminal during normal use normally well und...

Page 79: ...ltiplexed 4 3 analog input specifications amplifier characteristics A 2 dynamic characteristics A 2 input characteristics A 1 transfer characteristics A 1 application software installation 1 4 applica...

Page 80: ...mocouples 2 9 connecting SCXI 1102 B C to E M Series DAQ device See E M Series DAQ devices connections cold junction sensor 2 6 connector front 2 1 front signal pin assignments table 2 2 rear signal 2...

Page 81: ...ed signal connection figure 2 5 H hardware getting started 1 2 removing C 1 SCXI 1102 B C 1 2 I input characteristics specifications A 1 installation application software 1 4 connecting to E M Series...

Page 82: ...I DAQ Legacy 1 6 multiplexed mode operation connecting to SCXI 1102 B C for E M Series DAQ device in PXI SCXI combination 1 5 in SCXI chassis 1 5 theory 4 3 multiplexed scanning channel scanning 5 15...

Page 83: ...2 9 thermocouples 2 9 descriptions 2 8 pin assignments figure 2 7 table 2 7 pin assignments figure 2 7 removing SCXI 1102 B C from Measurement Automation Explorer C 1 from SCXI chassis C 1 RSVD signal...

Page 84: ...igure 2 5 signal connections analog input 2 3 digital signals table D 2 front connector pin assignments table 2 2 signals verifying 3 5 NI DAQmx 3 6 Traditional NI DAQ Legacy 3 6 using virtual channel...

Page 85: ...roubleshooting 1 8 typical SCXI 1102 B C program flow figure 5 14 using SCXI channel strings B 1 verifying signals 3 6 channel strings 3 6 using channel strings 3 7 using virtual channel 3 6 transfer...

Reviews: