NI RF Power Meters Getting Started Guide
4
ni.com
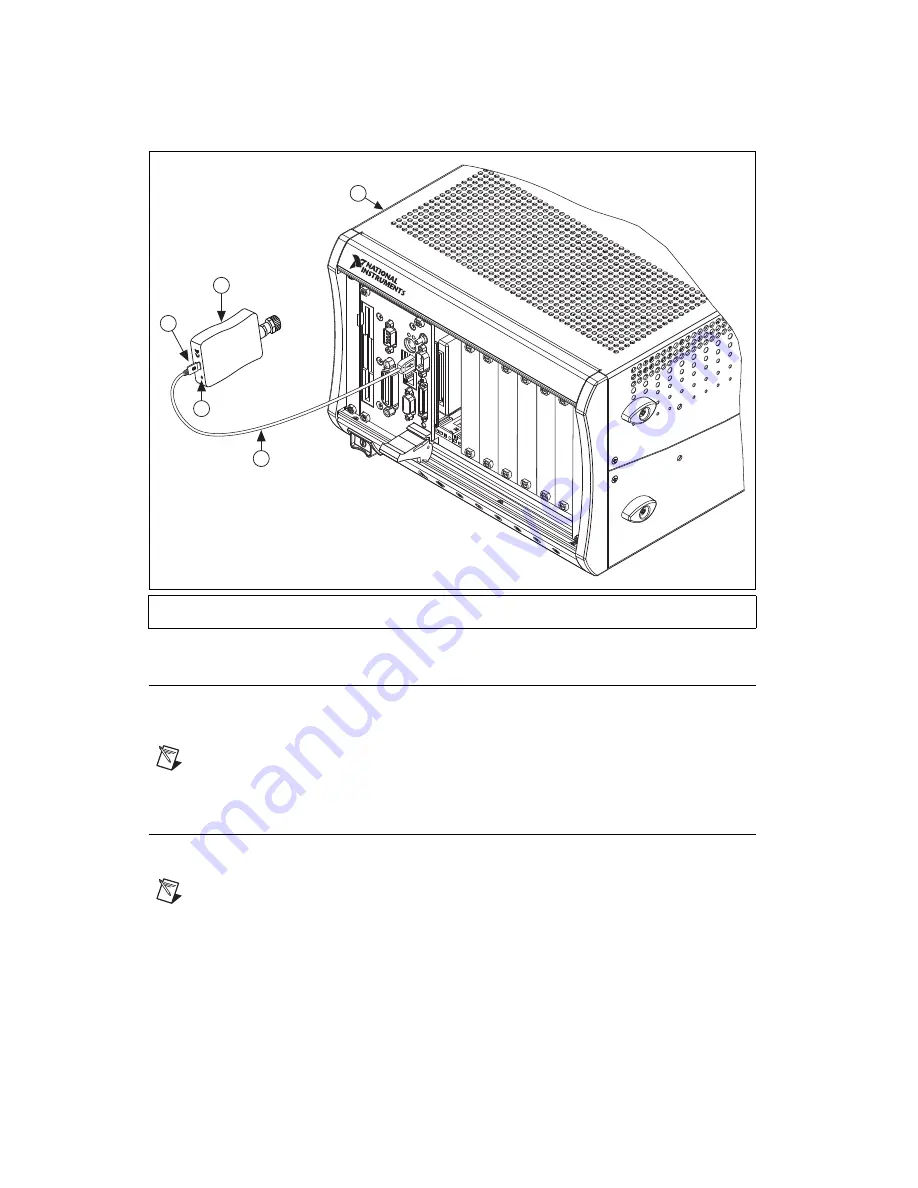
Figure 1.
NI USB Power Meter Installation
6. Windows Device Recognition
After you install the NI RF power meter, Windows automatically recognizes a new device. You will see
a Windows message appear in the Windows task bar that notifies you that a new device has been
installed. You do not need to take any further action for Windows to recognize your device.
Note
During the Windows device recognition process, Windows assigns a COM number to your
device. You can see the COM number that was assigned to your device in Measurement &
Automation Explorer (MAX), under
Devices and Interfaces
.
7. Connecting Signals
Connect signals to the NI RF power meter hardware front panel Type-N connector to perform common
power measurements. You can also use the Type N-to-SMA adapter to make the signal connection.
Note
You must zero the NI RF power meter before you take power measurements, particularly when
the device operates within the lower 20 dB dynamic range of the device. Zero the NI RF power meter
every time you connect it to a USB port. If you make frequent low-power measurements, check the
sensor zeroing often, and repeat as necessary.
1
PXI Chassis
2
USB Cable
3
STATUS LED
4
USB Connector
5
NI RF Power Meter
NI PXI-1042
S
T
A
T
U
S
1
3
2
5
4


