©
National Instruments Corporation
7
NI WSN-3212 User Guide and Specifications
Unpack the Device and Install the Antenna
Remove the device from the package and inspect the device. Contact NI if the device appears damaged.
Do
not
install a damaged device.
Caution
The device is static sensitive. Always properly ground yourself and the equipment when
handling or connecting to the device.
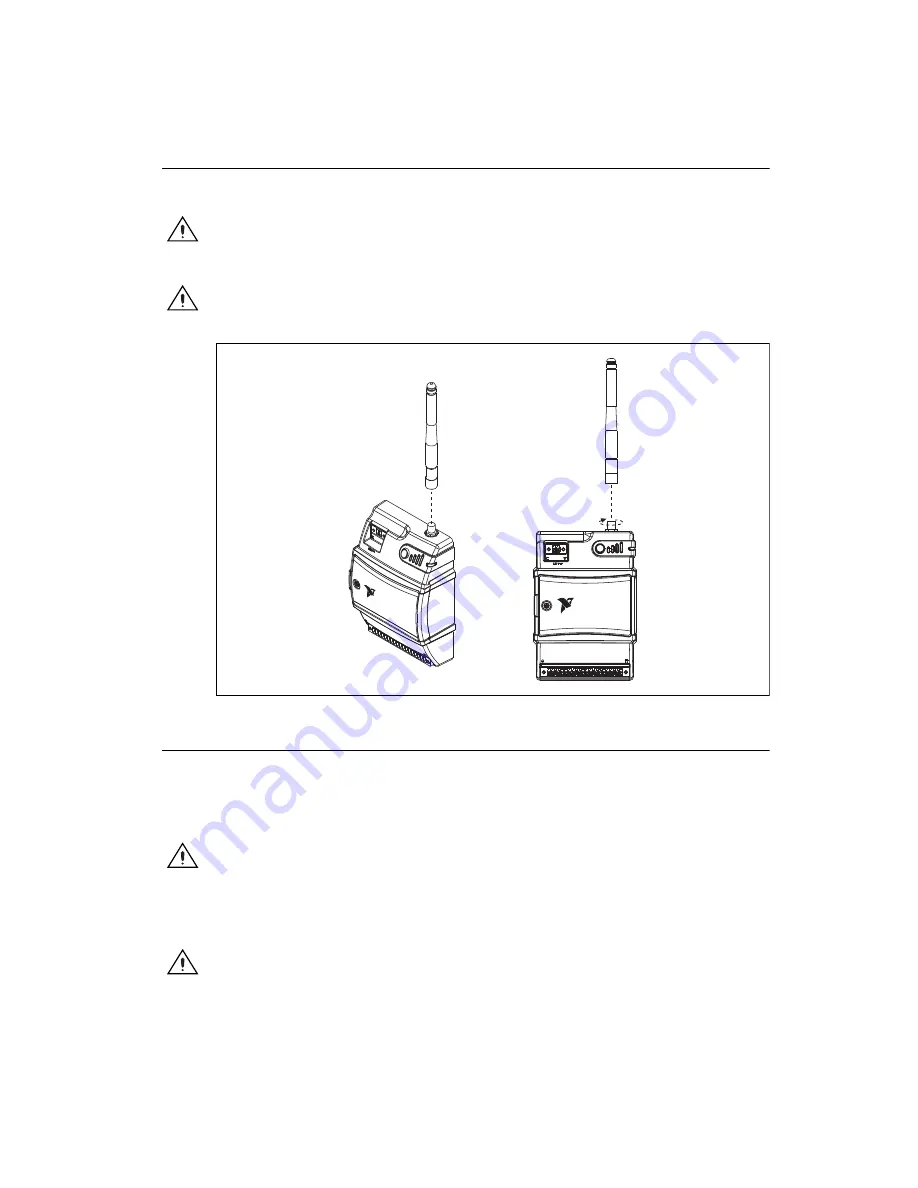
To attach the antenna, align the antenna with the mount and screw it on, as shown in Figure 4.
Caution
The antenna must be attached to the NI WSN devices in order for the NI WSN devices to
function correctly.
Figure 4.
Attach the Antenna to the Device
Mounting the NI WSN-3212 Device
You can mount the NI WSN-3212 on a panel or on a 35 mm DIN rail. For kit accessory ordering
information, refer to the NI WSN product page accessory section at
ni.com
. Before using any of these
mounting methods, remove and save the serial number sticker located on the back of the NI WSN-3212
device for future use when configuring your device in software. For the NI WSN-3212 device
dimensions, refer to Figure 3.
Caution
Your installation
must
allow 50.8 mm (2 in.) of clearance in front of devices for common
connector cabling, such as the 18-terminal detachable screw terminal connector.
Attaching the NI WSN-3282 DIN Rail (Optional)
You can mount the NI WSN-3212 on a standard 35 mm DIN rail using a NI WSN-3282 DIN rail clip,
NI part number 781074-01. Complete the following steps to mount the NI WSN-3212 on a DIN rail:
Caution
Power off the device before mounting it to the DIN rail.
NATIONAL
INSTRUMENTS
NA
TIONAL
INSTRUMENTS


