background image


CHAPTER 4 


R

EPAIR 

P

ROCEDURES


This section presents procedures for repairing the neoBLUE cozy light, referred to as the UUR 
(Unit Under Repair) in this chapter. Only qualified technical personnel should open the light 
enclosure, remove and/or replace components or make adjustments.  If the medical facility does 
not have qualified personnel, please contact Natus Technical Service or your authorized service 
representative for further assistance. 
 

Tools 

Screwdriver -- Phillips, Medium 
Wire cutter  

 
The Biomedical Equipment Technician must complete Performance Verification and Safety 
Testing procedures listed in Chapter 2 after any repair is completed and the UUR is 
reassembled. 
 
The UUR can be disassembled down to all major component parts, including: 
 

  Removing the Plastic Cover (Section 4.1) 

  Removing the LED PCB (Section 4.2) 

  Removing the ON/Standby Switch (Section 4.3) 

  Removing the Temperature Warning LED (Section 4.4) 

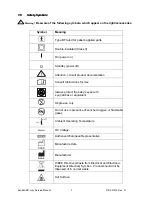
 Warning!


Disconnect the AC power cord before beginning disassembly as high currents 

can be encountered during disassembly. 


CAUTION:  

Approved anti-static measures must be used anytime the UUR is disassembled. 

 
4.1 

Removing the Plastic Cover 

1. 

Place the UUR on a suitable work surface (non-abrasive, non-static). 

2. 

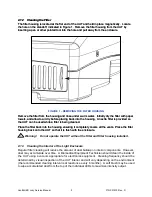
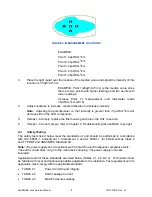
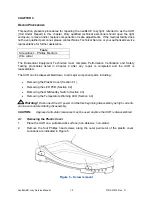
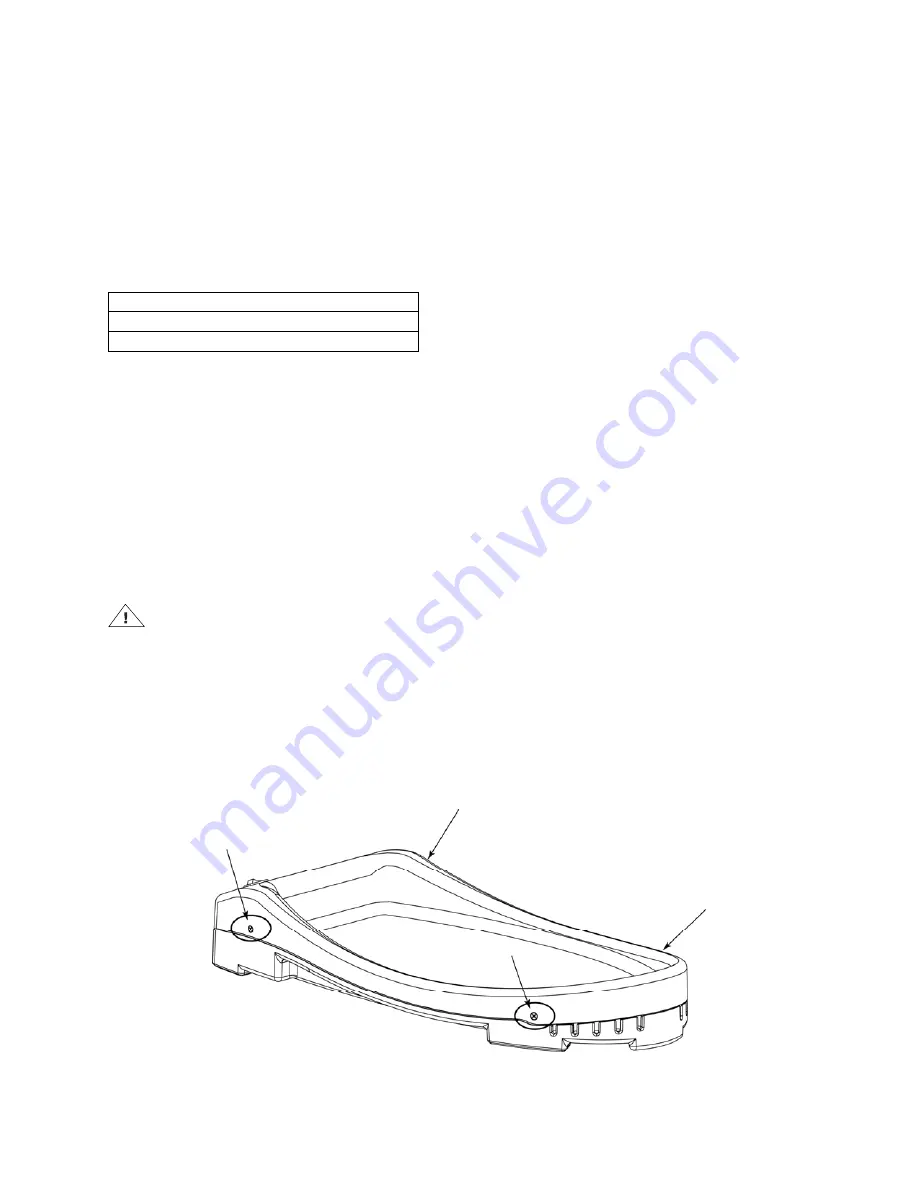
Remove the four Phillips head screws along the outer perimeter of the plastic cover. 
Locations are indicated in Figure 5. 


Figure 5 – Screw removal 

neoBLUE® cozy Service Manual 

15 

P/N 051915 Rev.


D


Summary of Contents for neoBLUE cozy

Page 1: ...SERVICE MANUAL neoBLUE cozy Service Manual i P N 051915 Rev D...

Page 2: ...rt without written consent from Natus Medical Incorporated The content of this manual may change without notice Natus Medical Incorporated 5900 First Avenue South Seattle WA 98108 USA Telephone 1 650...

Page 3: ...ifying General Performance 6 2 2 2 Adjusting Light Intensity 7 2 3 Safety Testing 8 3 Troubleshooting the neoBLUE cozy light 10 4 Repair Procedures 15 4 1 Removing the Plastic Cover 15 4 2 Removing th...

Page 4: ...W cm2 nm Blue LED components emit light in the range of 400 550 nm peak wavelength 450 470 nm This range corresponds to the spectral absorption of light by bilirubin and is thus considered to be the...

Page 5: ...ent to the side of a bassinet or railing A channel on the bottom of the light enclosure provides for safe routing of the power cord 1 4 Additional References Note neoBLUE cozy device User Manual is av...

Page 6: ...nsult Instructions for Use Always protect the baby s eyes with eye patches or equivalent Single use only Do not use in presence of enriched oxygen or flammable gases Ambient Operating Temperature DC V...

Page 7: ...the Exterior of the Light Enclosure and Mattress Section 2 1 1 Cleaning the Filter Section 2 1 2 Cleaning the Interior of the Light Enclosure Section 2 1 3 Warning Disconnect UUT from AC power before...

Page 8: ...he housing An extra filter is provided so the UUT can be used while a filter is being cleaned FIGURE 1 REMOVING THE FILTER HOUSING Place the filter back into the housing ensuring it completely covers...

Page 9: ...before adjusting light intensity Use of a radiometer with a HOLD feature is necessary if the radiometer display cannot be read while the radiometer sensor is faced down Intensity measurements are bas...

Page 10: ...f all previous steps generate satisfactory results the UUT performance has been verified and the UUT can be returned to the user Switch the UUT to stand by and return it to service 2 2 2 Adjusting Lig...

Page 11: ...he UUT to service 6 If steps 1 4 do not comply refer to Chapter 3 Troubleshooting the neoBLUE cozy light 2 3 Safety Testing The safety tests listed below meet the standards of and should be performed...

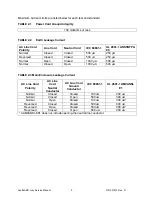
Page 12: ...1000 A 500 A Normal Closed Open 1000 A 500 A TABLE 2 3 Main Enclosure Leakage Current AC Line Cord Polarity AC Line Cord Neutral Conductor AC Line Cord Ground Conductor IEC 60601 1 UL 2601 1 AMI ANSI...

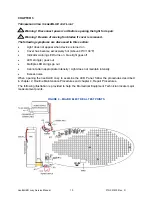
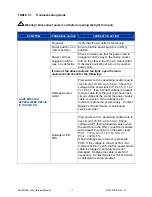
Page 13: ...ning LED turns on blue light goes off LED string s goes out Multiple LED strings go out Cannot attain appropriate intensity Light does not maintain intensity Excess noise When opening the neoBLUE cozy...

Page 14: ...ck for 12 5 11 4 V To 12 6 V If an incorrect voltage is present remove cable from the jack and check open circuit voltage at the end of the power supply cable connector If the voltage is still incorre...

Page 15: ...locked If the infant becomes too warm verify that the fan is functioning correctly To reset Indicator LED turn device off and on again Device not used within specified operating temperature Make sure...

Page 16: ...000 operational hours If the maximum adjustment has been reached replace LED PCB as part of routine maintenance Contact Natus Customer Service or authorized service provider to purchase a replacement...

Page 17: ...ot be reached replace LED PCB see Chapter 4 Contact Natus Technical Service or authorized service provider Internal wires are in contact with the fan Open device and verify that the wires do not come...

Page 18: ...Chapter 2 after any repair is completed and the UUR is reassembled The UUR can be disassembled down to all major component parts including Removing the Plastic Cover Section 4 1 Removing the LED PCB S...

Page 19: ...further repair is required return to Chapter 2 and complete Performance Verification and Safety Tests If further disassembly is required store the plastic cover in a protected area and proceed to Sec...

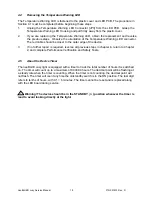
Page 20: ...pleted before beginning these steps 1 The switch is held in the light enclosure by spring tabs two on each side of the switch See Figure 7 Figure 7 Switch Removal 2 Press the tabs against the switch b...

Page 21: ...se all previous steps in chapter 4 return to Chapter 2 and complete Performance Verification and Safety Tests 4 5 About the Device Timer The neoBLUE cozy light is equipped with a timer to track the to...

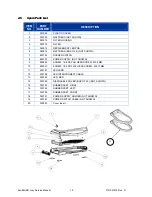
Page 22: ...ER SUPPLY NOT SHOWN 9 800248 SCREW 18 8 SS PAN HEAD SCREW M4 8MM 10 800247 SCREW 18 8 SS FLAT HEAD SCREW M4 10MM 11 400187 LED LENS 12 400188 LED INTERCONNECT CABLE 13 500044 LED RED 14 030760 DISPOSA...

Page 23: ...eakage current 100 A Earth leakage current 250 A Audible Noise 60 dB Dimensions Width x Length x Height Enclosure 12 in 30 5 cm x 25 5 in 64 8 cm x 4 0 in 10 2 cm Weight 11 0 lbs 5 0 kg Enclosure Powe...

Page 24: ...ed to a greater intensity delivering a higher dosage treatment Please refer to the Section 2 2 2 Adjusting Light Intensity The light intensity output of the neoBLUE cozy device is measured with the ne...

Reviews: