ASSEMBLY INSTRUCTIONS
NE 2000 ELLIPTICAL TRAINER
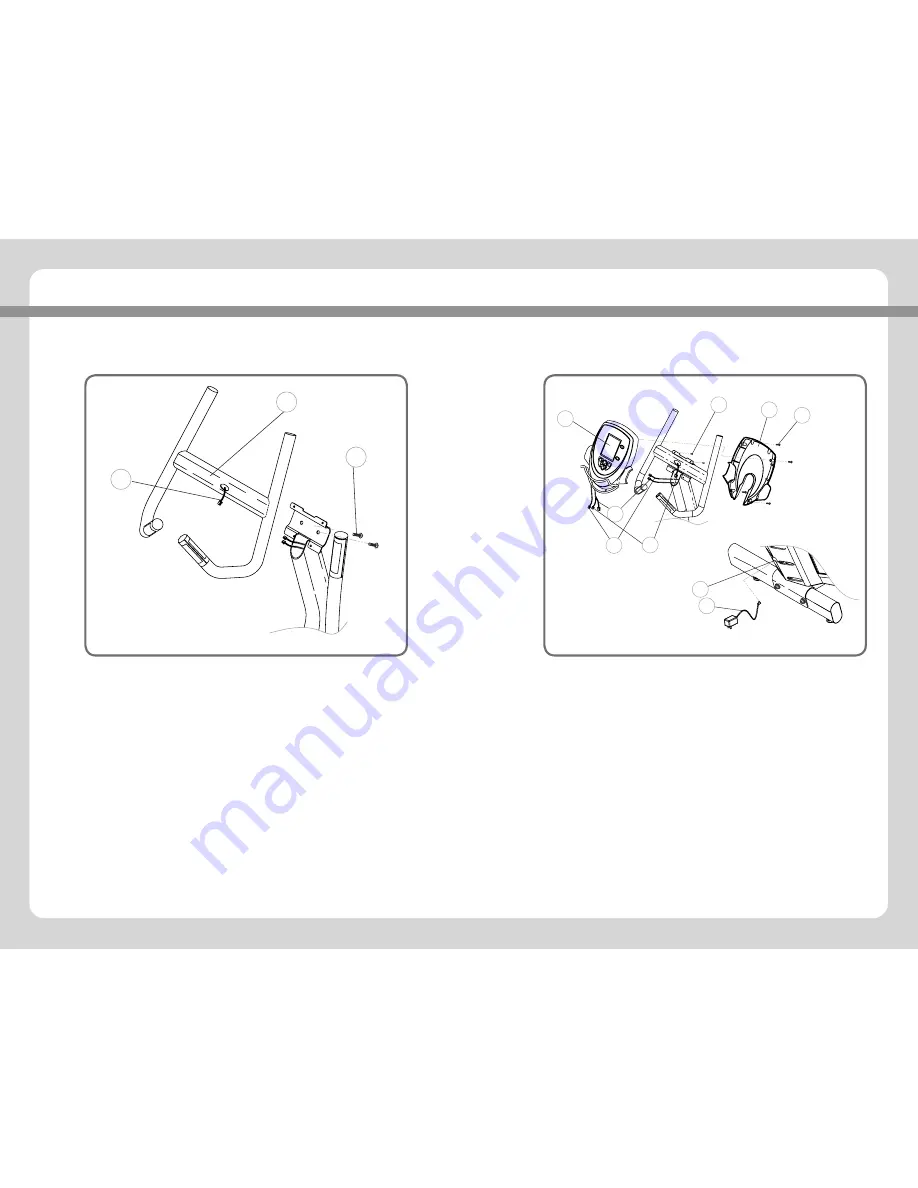
STEP 5: Attaching Handlebar
Attach the handlebar (#20) to the console mast bracket and fasten with two 25mm
pan head screws (#21).
FASTENERS AND ASSEMBLY TOOLS
2
QUANTITY
10
2
4
4
4
2
4
4
2
DESCRIPTION
SKETCH
SPRING WASHER
SOCKET HEAD CAP SCREW(M8x50L)
PAN HEAD SCREW (M5x10L)
PAN HEAD SCREW (M10x25L)
PAN HEAD SCREW(M5x15L)
SOCKET HEAD CAP SCREW(M10x85L)
CURVE WASHER
PAN HEAD SCREW(M4x15L)
NYLON NUT(M10x1.5P)
FLAT WASHER
1
OPEN WRENCH(#17;#13)
4
6
6
1
1
1
1
M5 ALLEN WRENCH
M6 ALLEN WRENCH
M8 ALLEN WRENCH
PAN HEAD SCREW (M5x25L)
PHILLIPS DRIVER
NYLON NUT
CARRIAGE BOLT(M8x100L)
REFERENCE
3
5
11
15
16
17
19
21
22
6
24
34
33
31
20
31
16
34
33
28
28
29
29
28
26
27
1
14
15
16
17
13
12
2
4
3
18
19
21
22
24
25
23
8
6
11
10
9
5
STEP 6: Installing Computer Console
Connect the console cable (#28) and touch heart rate wire (#29) into back of computer
console (#25).
Attach the computer console (#25) to the console mast bracket and fasten with four
10mm pan head screws (#22).
Attach the console bottom cover (#23) to the computer console (#25) and fasten with
four 25mm pan head screws (#24).
Plug in the A/C adapter (#27) into the Jack Plug (#26) and into 110v wall outlet. To
turn computer on simply start exercising. After 5 minutes of non-use, computer will go
into sleep mode and does not need to be unplugged.
FASTENERS AND ASSEMBLY TOOLS
2
QUANTITY
10
2
4
4
4
2
4
4
2
DESCRIPTION
SKETCH
SPRING WASHER
SOCKET HEAD CAP SCREW(M8x50L)
PAN HEAD SCREW (M5x10L)
PAN HEAD SCREW (M10x25L)
PAN HEAD SCREW(M5x15L)
SOCKET HEAD CAP SCREW(M10x85L)
CURVE WASHER
PAN HEAD SCREW(M4x15L)
NYLON NUT(M10x1.5P)
FLAT WASHER
1
OPEN WRENCH(#17;#13)
4
6
6
1
1
1
1
M5 ALLEN WRENCH
M6 ALLEN WRENCH
M8 ALLEN WRENCH
PAN HEAD SCREW (M5x25L)
PHILLIPS DRIVER
NYLON NUT
CARRIAGE BOLT(M8x100L)
REFERENCE
3
5
11
15
16
17
19
21
22
6
24
34
33
31
20
31
16
34
33
28
28
29
29
28
26
27
1
14
15
16
17
13
12
2
4
3
18
19
21
22
24
25
23
8
6
11
10
9
5


