20
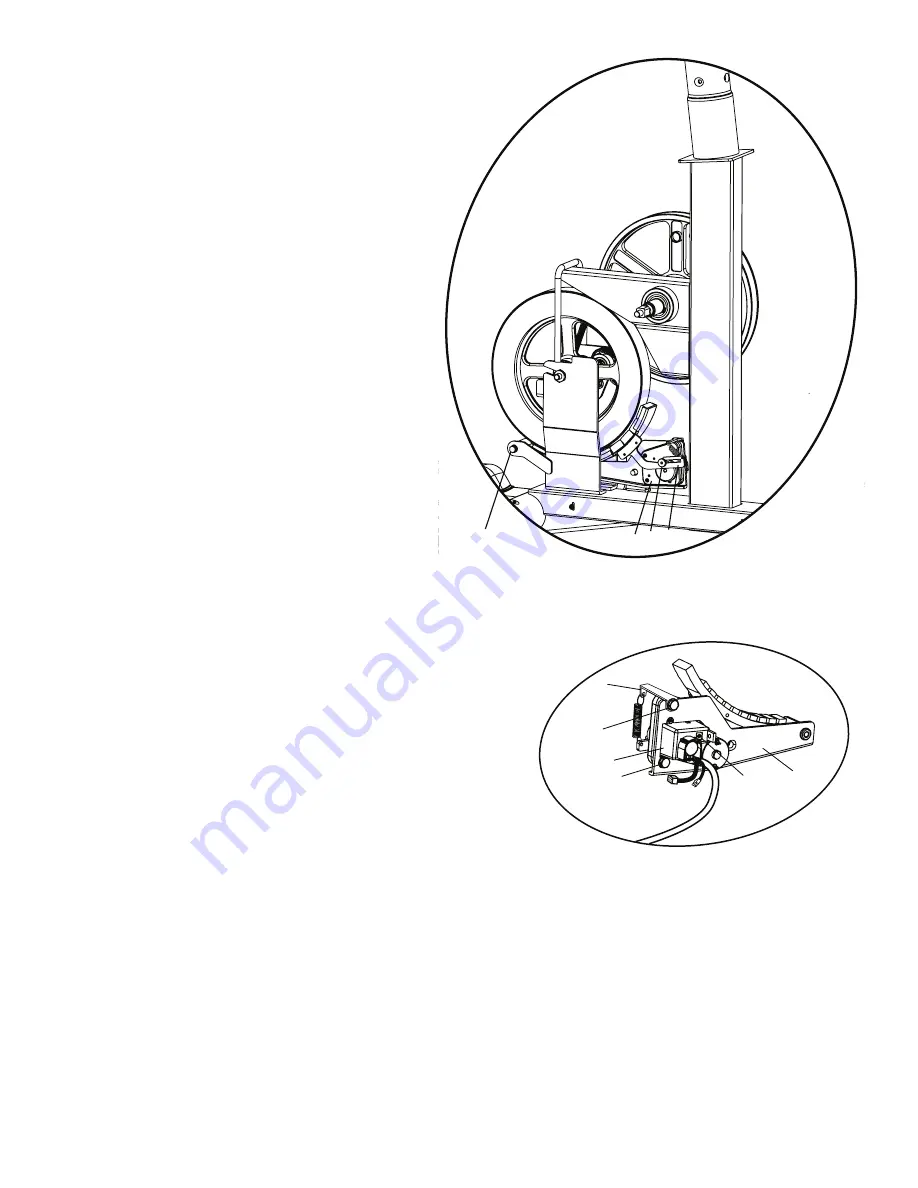
10. Remove the bolt (Item I) from below the Flywheel.
11. Remove the Servo Motor/ Brake Assembly (Item J).
Note:
Do not crimp the cables.
12. Pull downward and release the Magnet Arm (Item L) enough to disengage
it from the Motor Pulley Shaft (Item K).
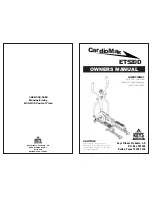
13. Remove the two hex head bolts (Item N) from the Servo Motor (Item O) and the Spring
Tension Arm (Item M).
14. Remove the Servo Motor from the Brake Plate (Item Q).
Note:
Do not touch the Potentiometer (Item P).
15. Installation is the reverse procedure. Be sure the cardboard will completely cover the new
Brake Magnet before installation. Do not crimp any cables when routing through the Brake
Plate.
Note:
Before fully attaching the Shrouds, remove the cardboard from between the Brake
Magnet and the Fly Wheel. Power up the machine to verify that the Magnet Arm can move
freely, and that the Brake Magnet and Fly Wheel are not touching.
After replacing the Brake Assembly, the resistance levels of the machine may be different. The user should adjust their workout levels accordingly.
I
J K L
N
P
N
Q
M
O
Summary of Contents for Schwinn 450
Page 23: ...23 ...


