D1
MAIN
F3
1AT
250V
D2
230V
D2
D1
F3
J2
Wireless module
J3
J4
D8
D7
D6
D5
D4
D3
F2
F1
9
| NAUCON-1000 – QUICK GUIDE
NAUCON-1000 – QUICK GUIDE |
10
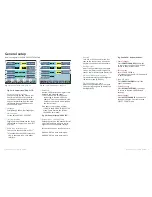
HARDWARE PROBLEMS: Locate the problem with a little help from
the diodes and the illustration below,
Fig. 8
.
Trouble shooting
THE LEDS INDICATE THE FOLLOWING,
WHEN A SCOREBOARD IS WORKING
PROPERLY:
→ D1, D2, D3, D4 and D5 constantly
light green.
→ D6 flashes red rapidly.
→ D7 flashes yellow once per second.
→ D8 flashes red rapidly –
but only if a
radio module is present.
D1
– MAIN
If D1 light is off:
Check fuse F3.
Press and turn F3 at the
same time to check if the fuse is blown
and must be replaced.
D2
– 230VAC LED
If D2 light is off:
Check main power connection.
D3
– 12 VDC HORN
If D3 light is off:
Check fuse F1.
Press and turn F1 at the
same time to check if the fuse is blown
and must be replaced.
D4
–
24VDC DIGIT
If D4 light is off:
Check fuse F2.
Press and turn F2 at the
same time to check if the fuse is blown
and must be replaced.
D5
–
24VDC FOR NAUCON-1000
If D5 light is off:
Remove all plugs connected to J2, J3
and J4. If D5 light turns on, there might
be a chopped circuit in the cables or in
Naucon-1000.
To update to the latest version of software
to Naucon-1000, follow the steps below:
1
– Turn Naucon-1000 off.
2
– Mount the power-supply.
3
– Press and hold the
SETUP
button.
While still holding the
SETUP
botton:
4
– Turn Naucon-1000 on.
5
– Release the
SETUP
button.
6
– The touch screen will display the fol-
lowing text: “BOOTLOADER STARTED,
INSERT USB DRIVE.”
7
– Insert an USB stick with software sup-
ported by Nautronic a/s.
D6
–
DATA COMMUNICATION
If D6 light is off:
There is no data reception.
→ Check the cable connected to the
control panel.
→ Check the wall connector.
D7
–
INTERNAL OPERATION
If D7 light is either off or constantly on:
Internal units in the scoreboard might
be damaged.
D8
–
WIRELESS COMMUNICATION
If D8 light is off:
There is no radio signal reception.
→ Wireless module must be installed for
D8 to function.
→
Check that the Naucon-1000 is turned on.
FUSES:
F1
→ 5AF
F2
→ 5AF
F3
→ 1AT
8
– The touch screen will display the fol-
lowing text: “DISK FOUND.”
After 10-15 seconds:
9
– The touch screen will display the
following text: “PLEASE REMOVE
DRIVE.”
10
– Remove the USB stick.
11
– The Naucon-1000 unit turns off.
→
Software update is done.
When Naucon-1000 is turned on for the
first time after a Software update, it will
take approximately 1 minute longer than
a normal start up.
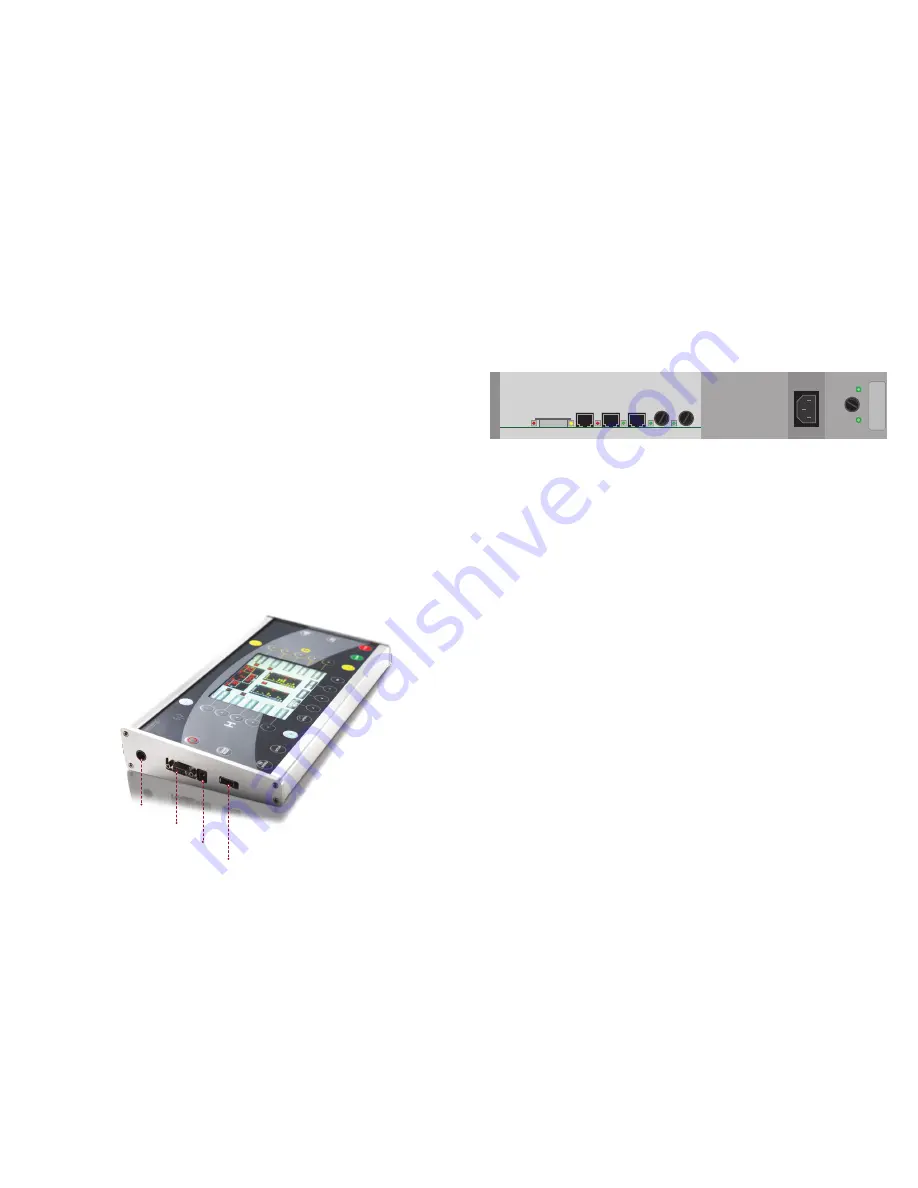
Fig. 8 – The bottom of a scoreboard
Fig. 7 – Naucon-1000,
where does the plugs go
Updating the Naucon-1000 software
WARNING:
WHEN A SOFTWARE UPDATE IS PERFORMED, ALL
SAVED CONFIGURATIONS WILL BE LOST AND SET TO DEFAULT!
Connect to scoreboard
Shot clock handle
Power
Insert USB stick here


