


be pulled out by hand. Rotate the driveshaft 180 degrees and repeat the
procedure to remove the bearing from the opposite side of the yoke. After
separating the U-joint cups, ensure the bearing cups stay matched to the
trunnion from which they were removed. Do not reinstall the bearing caps on any
trunnion other than on their original.
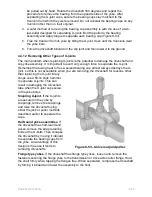
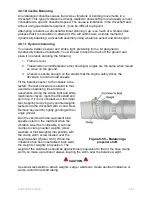
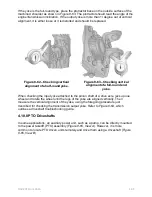
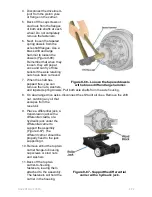
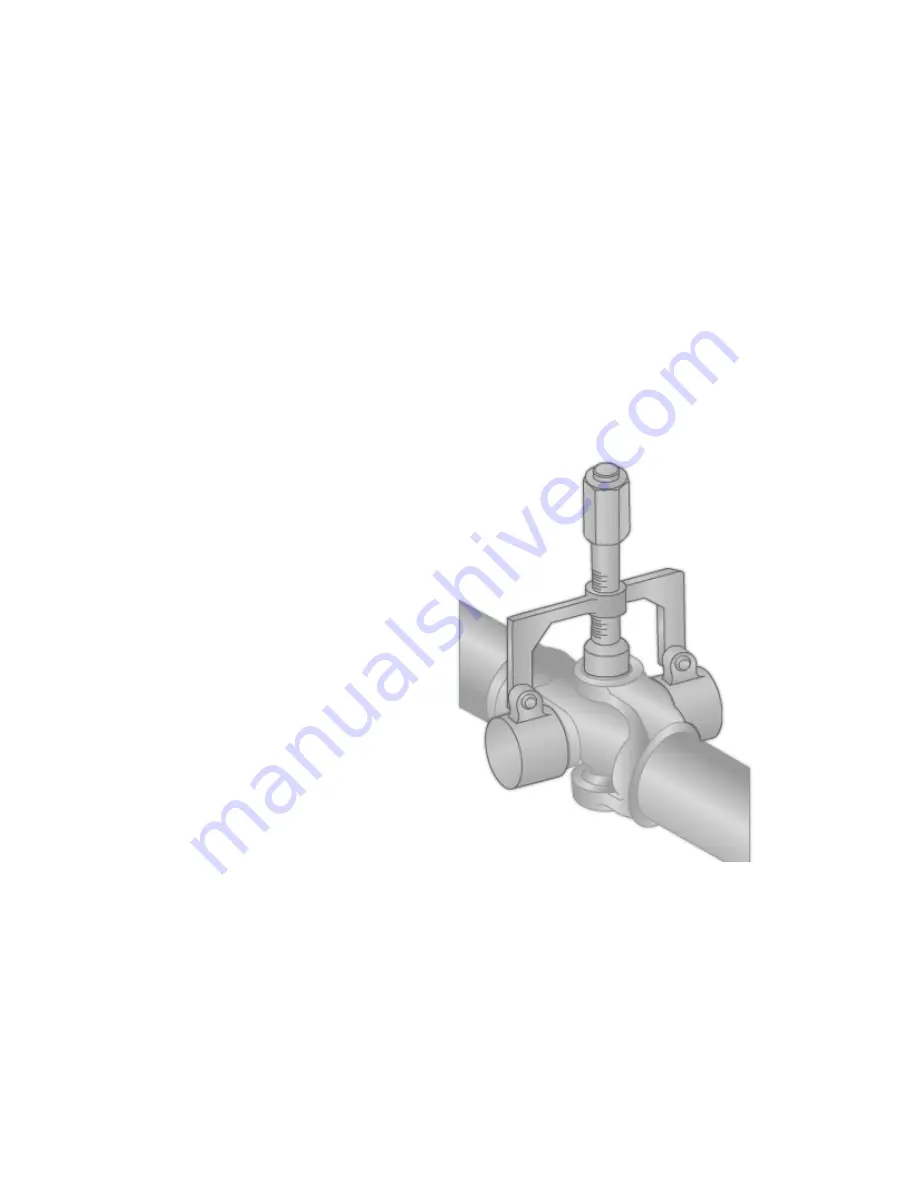
4. A safer method of removing the bearing cup assembly is with the use of a two-
jaw puller designed for separating U-joints. Bolt the puller to the bearing
assembly and apply torque to separate each bearing cap (
Figure 8-53
).
5. Free the trunnion from its yoke by tilting the U-joint cross until the trunnions clear
the yoke bore.
6. Force the driveshaft inboard on the slip joint and then lower it to the ground.
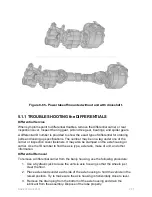
4.4.1.2 Removing Other Types of U-joints
The main problem when replacing U-joints is the potential to damage the driveshaft and
slip yoke assembly. It is important to exert only enough force to separate the U-joint.
Remember that using heat to free a seized bearing cap almost always destroys the U-
joint, so this is not acceptable when you are removing the driveshaft for reasons other
than replacing the U-joint. Many
shops use a 50-lb. slide hammer
to separate U-joints. This can
result in damaging the driveshaft
tube when the U-joint cups seize
in the yoke bores.
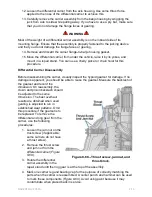
Snapring U-joint.
If the U-joints
are secured in the yoke by
snaprings, remove the snaprings
and raise the driveshaft using
either the jack or puller methods
described earlier to separate the
cups.
Half-round yoke assemblies.
If
the driveshaft has half-round end
yokes, remove the strap retaining
bolts or the U-bolts. Then collapse
the driveshaft by moving it inboard
to separate the bearing cups from
the yoke. An advantage of this
design is the ease it lends to
removing driveshafts.
Figure 8-53 - Universal joint puller.
Flange type yokes.
If the driveshaft has flange type yokes, loosen and remove the
fasteners securing the flange yoke to the transmission or drive axle carrier flange. Hold
the shaft firmly when tapping the flanges free. When separated, compress the driveshaft
by forcing it inboard and lower the assembly to the floor.
NAVEDTRA 14050A
8-58


