4. Disconnect the driveline U-
joint from the piston yoke
or flange on the carrier.
5. Back off the capscrews or
stud nuts from the flanges
of both axle shafts at each
wheel. Do not completely
remove the fasteners.
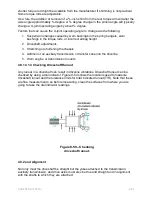
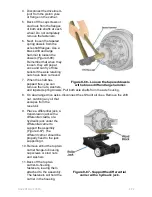
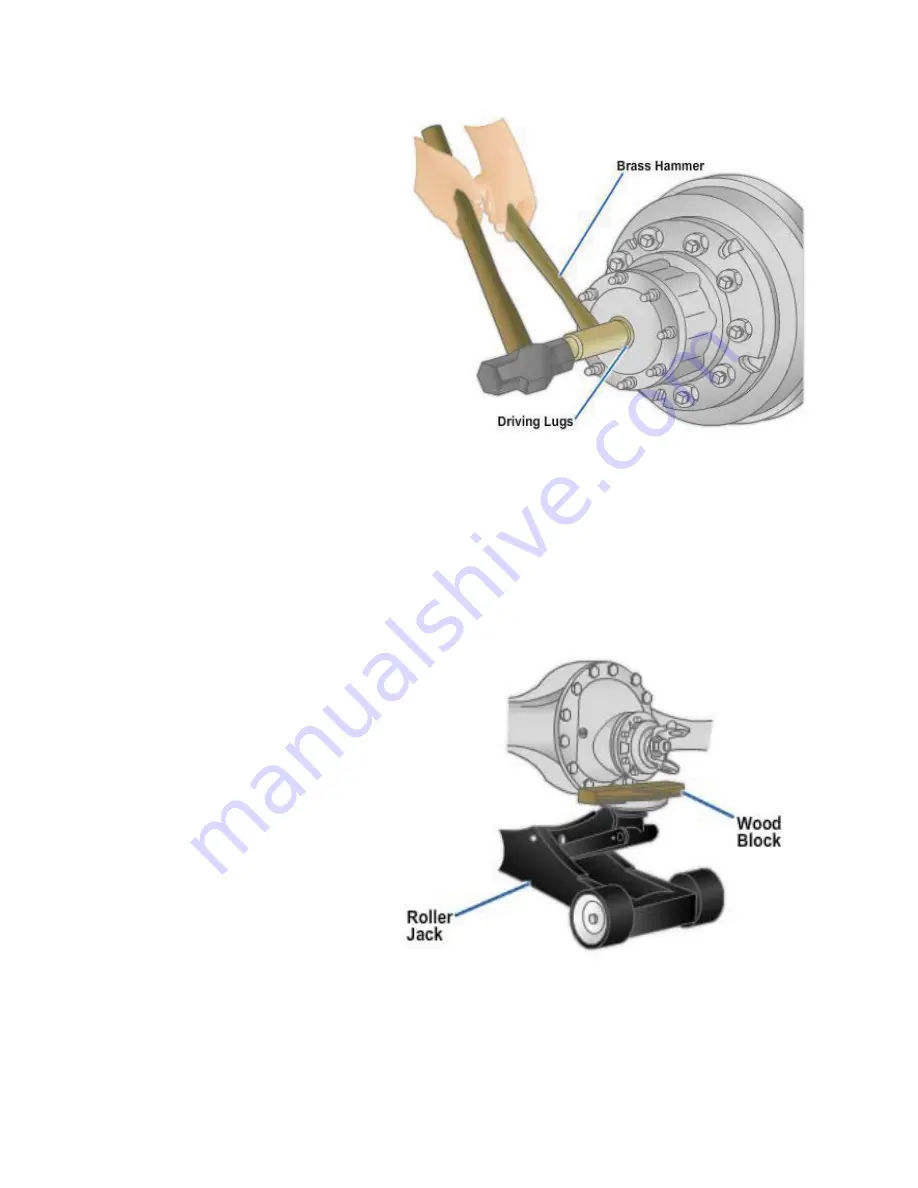
6. Next, loosen the tapered
spring dowels from the
axle shaft flanges. Use a
brass drift and large
hammer to loosen the
dowels (
Figure 8-66
).
Remember that when they
loosen, they will pop at
once and can fly off like
bullets if the axle retaining
nuts have been removed.
7. When the shaft has
popped free, you can
remove the nuts, washers,
Figure 8-66 - Loosen the tapered dowels
with a brass drift and large hammer.
and tapered spring dowels. Pull both axle shafts from the axle housing.
8. On dual range drive axles, disconnect the shift unit air lines. Remove the shift
nut, catching any oil that
escapes from the
reservoir.
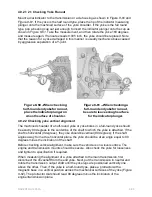
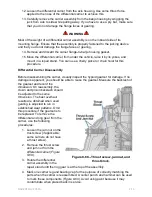
9. Place a differential jack, a
transmission jack with a
differential cradle, or a
hydraulic jack under the
differential carrier to
support the assembly
(
Figure 8-67
). The
different carrier should be
properly fixed to the jack
supporting it.
10. Remove all but the top two
carrier flange-to-housing
capscrews or stud nuts
and washers.
11. Back off the top two
carrier-to-housing
fasteners, leaving them
attached to the assembly.
The fasteners will hold the
carrier in the housing.
Figure 8-67 - Support the differential
carrier with a hydraulic jack.
NAVEDTRA 14050A
8-72

