


9.
Install the outer bearing cone onto the pinion shaft against the spacer(s).
10. At this time, adjust the pinion bearing preload.
11. Once the preload has been set and adjusted, adjust the thickness of the shim
pack in the pinion cage.
Install the Drive Pinion and
Bearing Cage
When the drive pinion and
bearing cage are assembled and
adjusted, install them into the
carrier as follows:
1.
If a new drive pinion and
crown gearset is to be
installed, or if the depth of
the drive pinion has to be
adjusted, calculate the
thickness of the shim pack.
2.
Install the correct shim pack
between the bearing cage
and carrier.
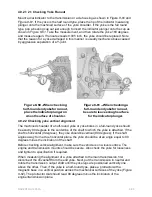
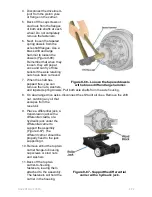
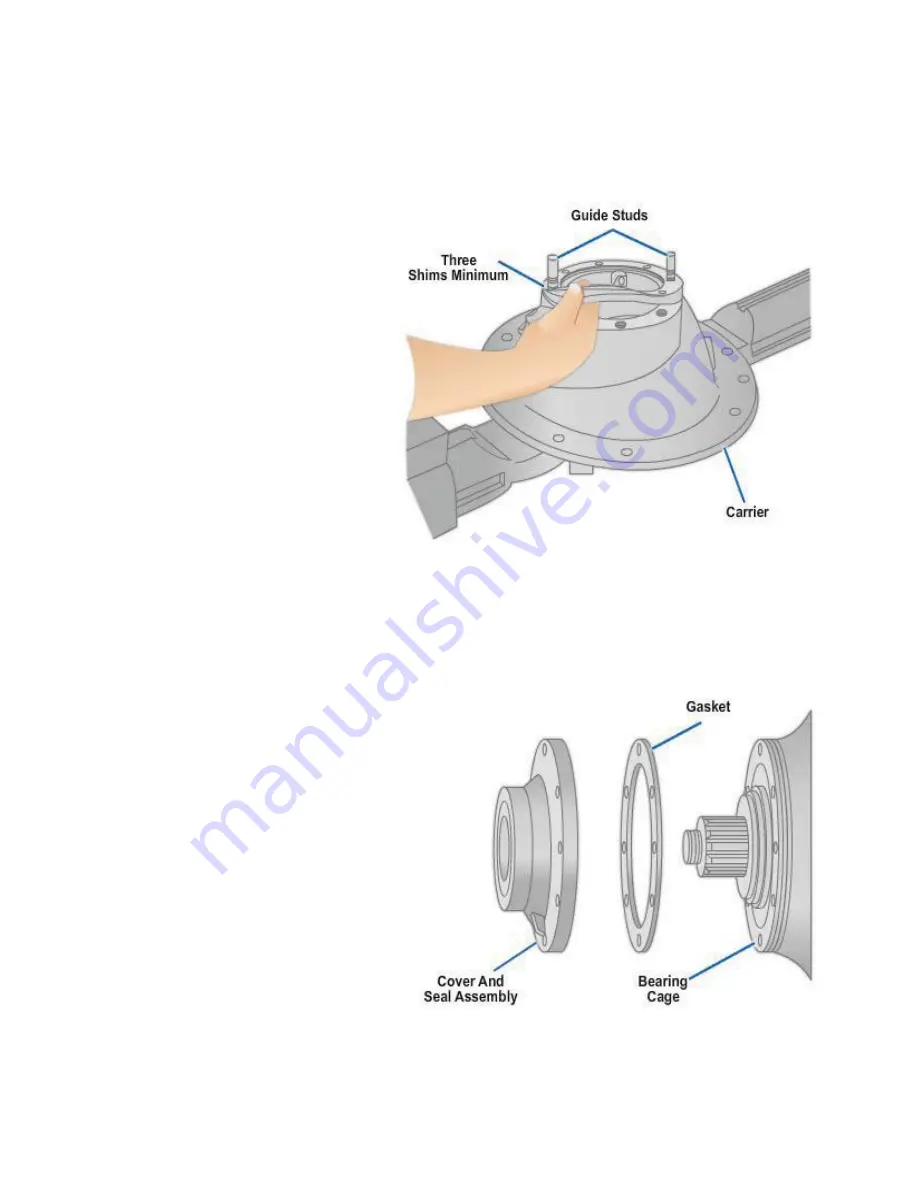
3.
Align the oil slots in the
shims with the oil slots in
the bearing cage and
carrier. The use of guide
studs will help align the
shims (
Figure 8-81)
.
4.
Install the drive pinion and
bearing cage into the
carrier. If necessary, use a
rubber, plastic, or leather
mallet to tap the assembly
into position.
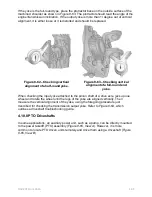
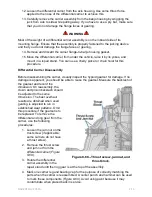
5.
If used, install the cover
and seal assembly and
gasket over the bearing
cage (
Figure 8-82
).
6.
Align the oil slots in the
cover and gasket with the
oil slots in the bearing cage.
7.
Install the bearing cage to
the carrier and tighten all
hardware to correct torque
value.
8.
Install the input yoke or
flange onto the drive pinion.
The yoke or flange must be
against the outer bearing
Figure 8-81 - Shim pack installation.
Figure 8-82 - Cover and seal assembly,
gasket and bearing cage.
NAVEDTRA 14050A
8-80