


for proper installation.
9.
Tighten the pinion nut to the correct torque value. Use the yoke or flange bar
during the torquing operation.
Crown Gear and Differential Assembly
1.
Expand the ring gear by heating it in a tank of water to a temperature of 160-
180°F for 10-15 minutes. Never use a torch for this operation as you could
damage the hardening.
NOTE
During assembly, do not attempt
to press a cold crown gear into
the flange case half. A cold crown
gear will damage the case half
because of the interference fit.
The scraping that results
produces metal particles that
lodge between the components,
resulting in gear runout that
exceeds specifications.
2.
Safely lift the crown gear
onto the flange case half
immediately after the gear
has been heated. If the
crown gear does not fit
easily onto the case half,
reheat it and try again.
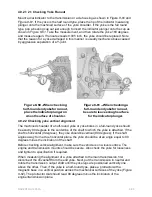
3.
Align the fastener holes of
the crown gear and the
flange case half. Rotate
the crown gear as needed.
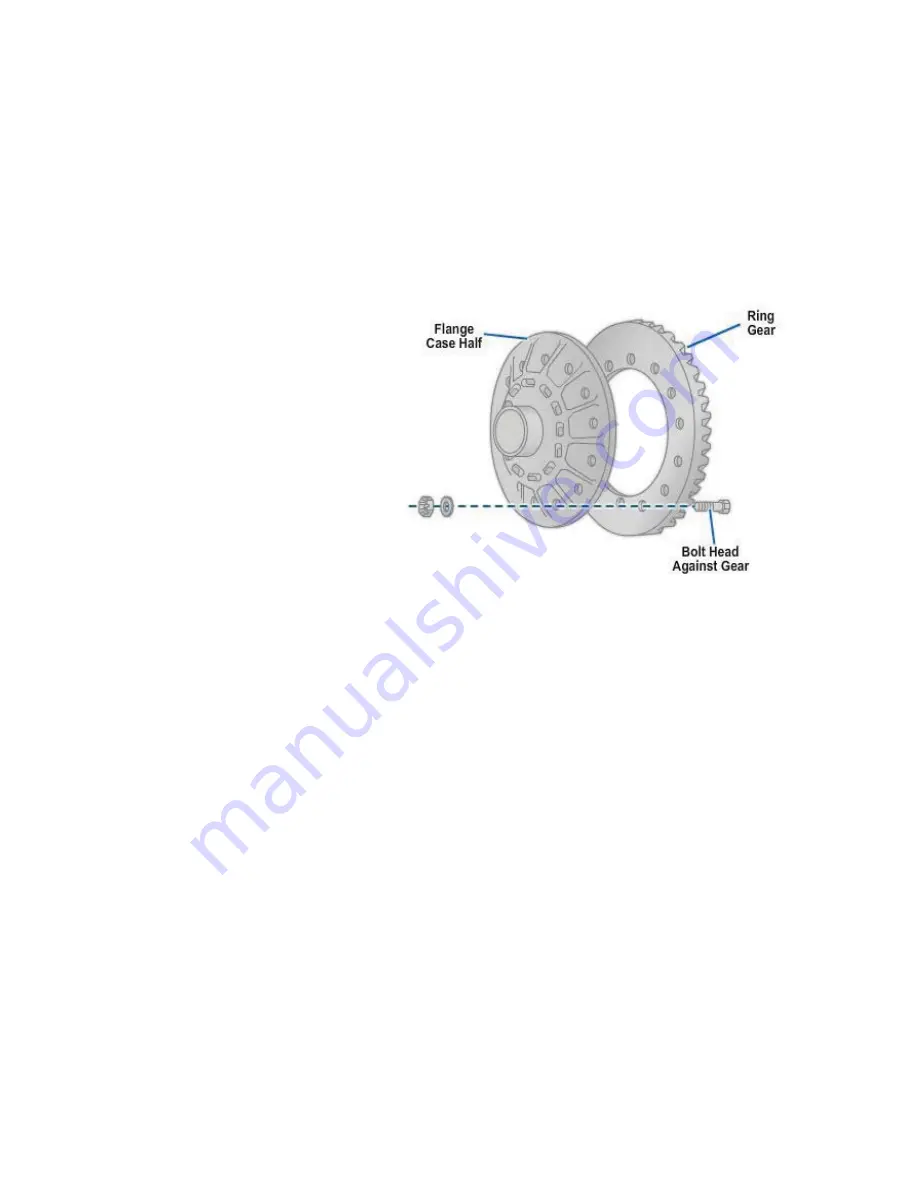
Figure 8-83 - Crown ring gear installation
to flange case half.
4.
Install the fasteners that clamp the crown gear to the flange case half. Install the
bolts from the gear side of the assembly. Bolt heads must be against the crown
(
Figure 8-83
).
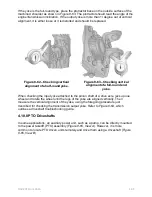
5.
Tighten the bolts to the correct torque value. If rivets are used to hold the crown
gear to the flange case half, install the correct size rivets in pairs opposite each
other from the case half side of the assembly. The rivet heads must be against
the flange case half
(Figure 8-84, View A).
Press the rivets into position from the
crown/ring gear side of the assembly using a riveting pressure for at least 1
minute and check for gaps between the back surface of the ring gear and the
case flange using a 0.003-inch thickness gauge (
Figure 8-84, View B
).
NAVEDTRA 14050A
8-81


