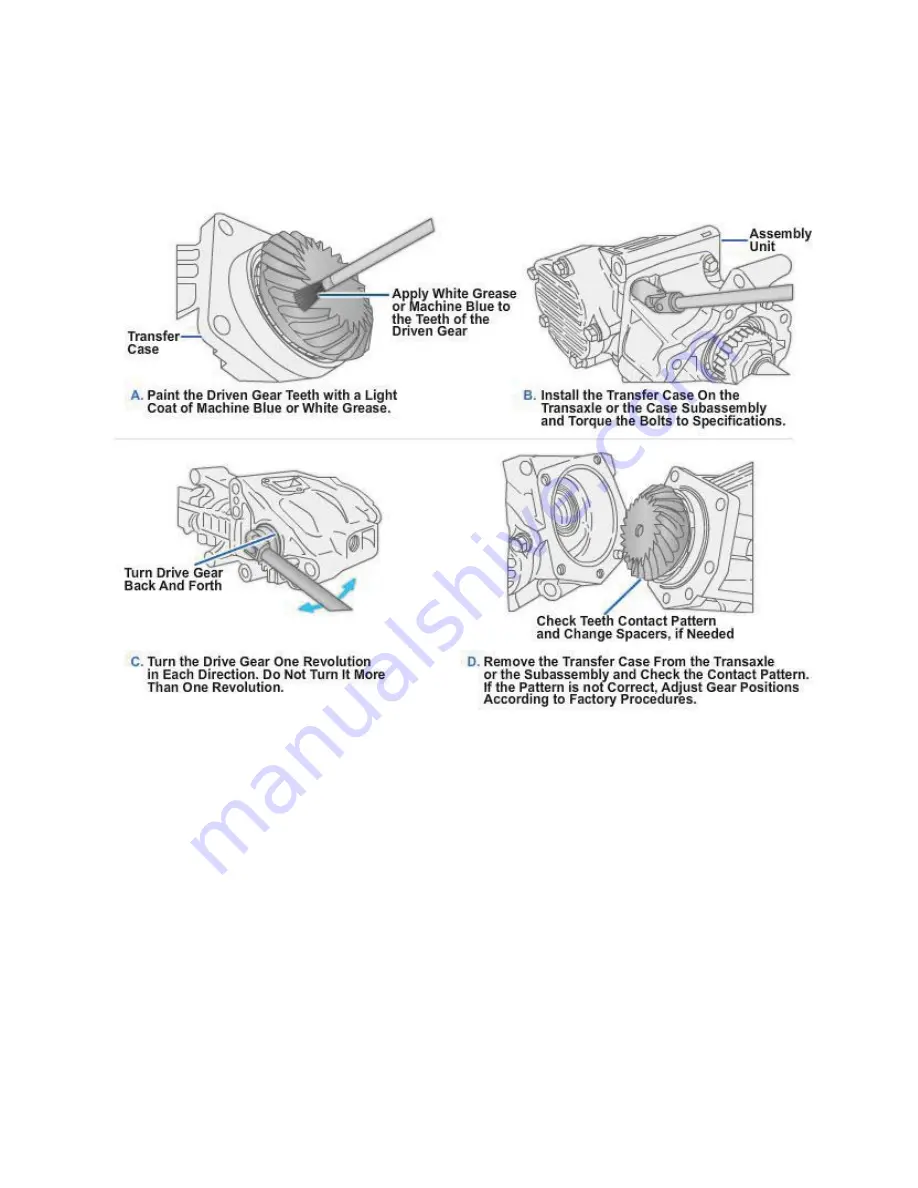
If hypoid drive and driven gears are used in the transfer case, they may require
adjustment. The adjustment procedure is similar to that used for a ring or pinion (
Figure
8-38
). Be sure to refer to the service manual for detailed procedures.
Finally, install the external housing components, such as the speedometer drive gear,
front and rear drive shaft yokes, electrical components, and drain and fill plugs.
Figure 8-38 - Checking the adjustments of the hypoid gear on the transfer.
2.2.5 Installation
The transfer case is installed in the reverse order of removal. Because the transfer case
is heavy and unbalanced, exercise caution when lifting it or working around it.
1. Use a transmission jack or a jackstand to raise the transfer case to the level of
the transmission. Slide the case into alignment with the transmission. Work
carefully to prevent damaging the splines of the transmission or the transfer
case. The transmission case may have alignment lugs to make installation
easier.
2. Install and tighten the bolts that secure the transfer case to the transmission.
Make sure the drive shaft yokes will still turn after the transfer case is tightened.
3. If necessary, install the crossmember and rear engine mount, then remove the
transmission jack.
4. Reconnect both drive shafts to the transfer case output yokes.
NAVEDTRA 14050A
8-44


