14 CONFIGURE THE GATEWAY
6. Then press the “Submit” button to add the Profile to the list of
devices to be configured.
7. Repeat this process until all the devices have been added.
8. Completed additions are listed under “Active profiles” as shown
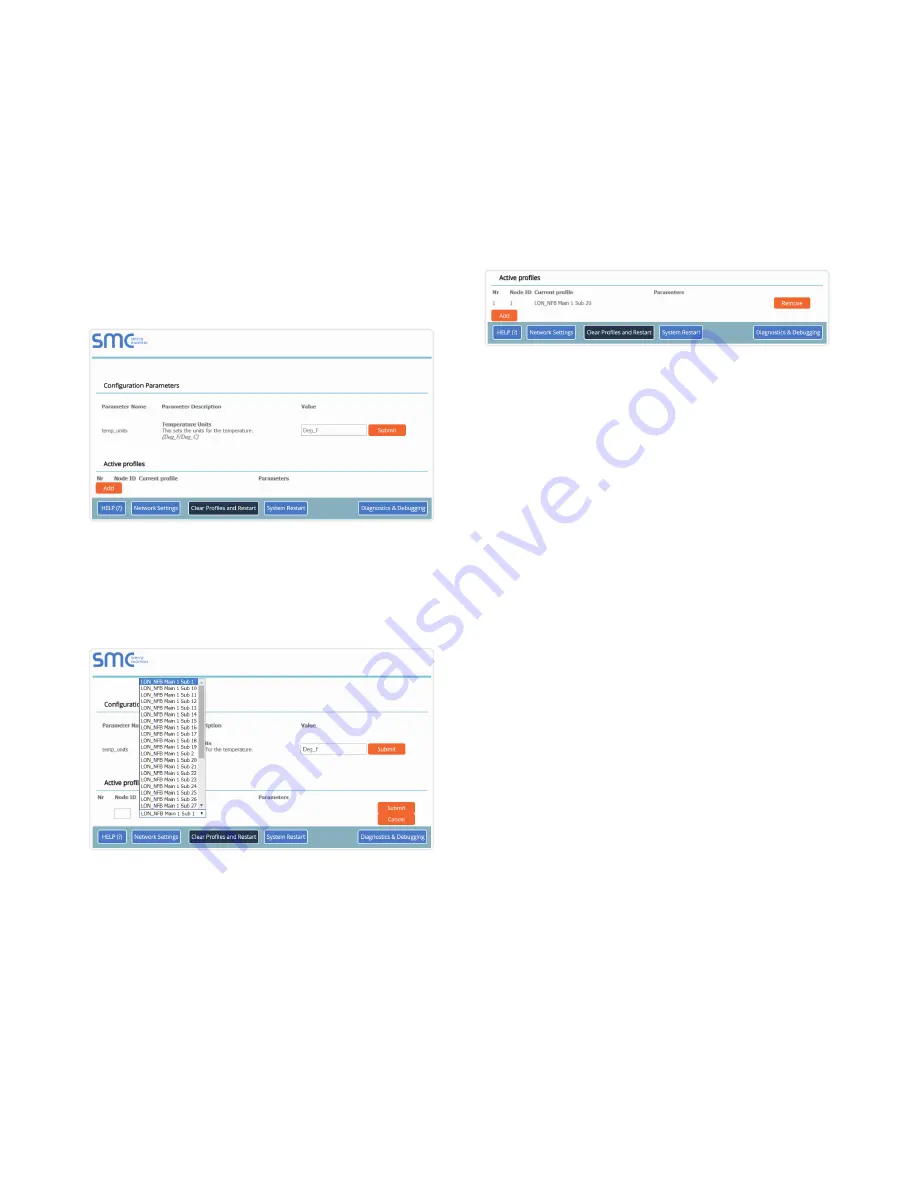
Figure 21: Web Configurator Showing Active Profile Additions
6.2.1 Verify Device Communications
1.
Check that TX and RX LEDs
are rapidly flashing. See
for information and images.
2. Confirm the software shows communication without errors.
Go to
for instructions.
6.2 Selecting Profiles for Devices
Connected to Gateway
1. In the Web Configurator, the Active Profiles are shown below
the Configuration Parameters.
2. The Active Profiles section lists the currently active device
profiles, including previous Web Configurator additions.
This list is empty for new installations, or after clearing all
configurations. (Figure 19)
Figure 19: Web Configurator Showing no Active Profiles
3. To add an active profile to support a device, click the Add
button under the Active Profiles heading. Select a profile
from the drop-down menu field that appears underneath the
Current profile column. (Figure 20)
Figure 20: Profile Selection Menu
4. For every device that is added, assign a unique Node-ID. This
specification must match the device’s network settings.
5. Once the Profile for the device has been selected from the
drop-down list, enter the value of the device’s Node-ID which
was assigned in
.


