USER MANUAL
NAVWATCH-S10
22 |
P a g e
View Track
1.
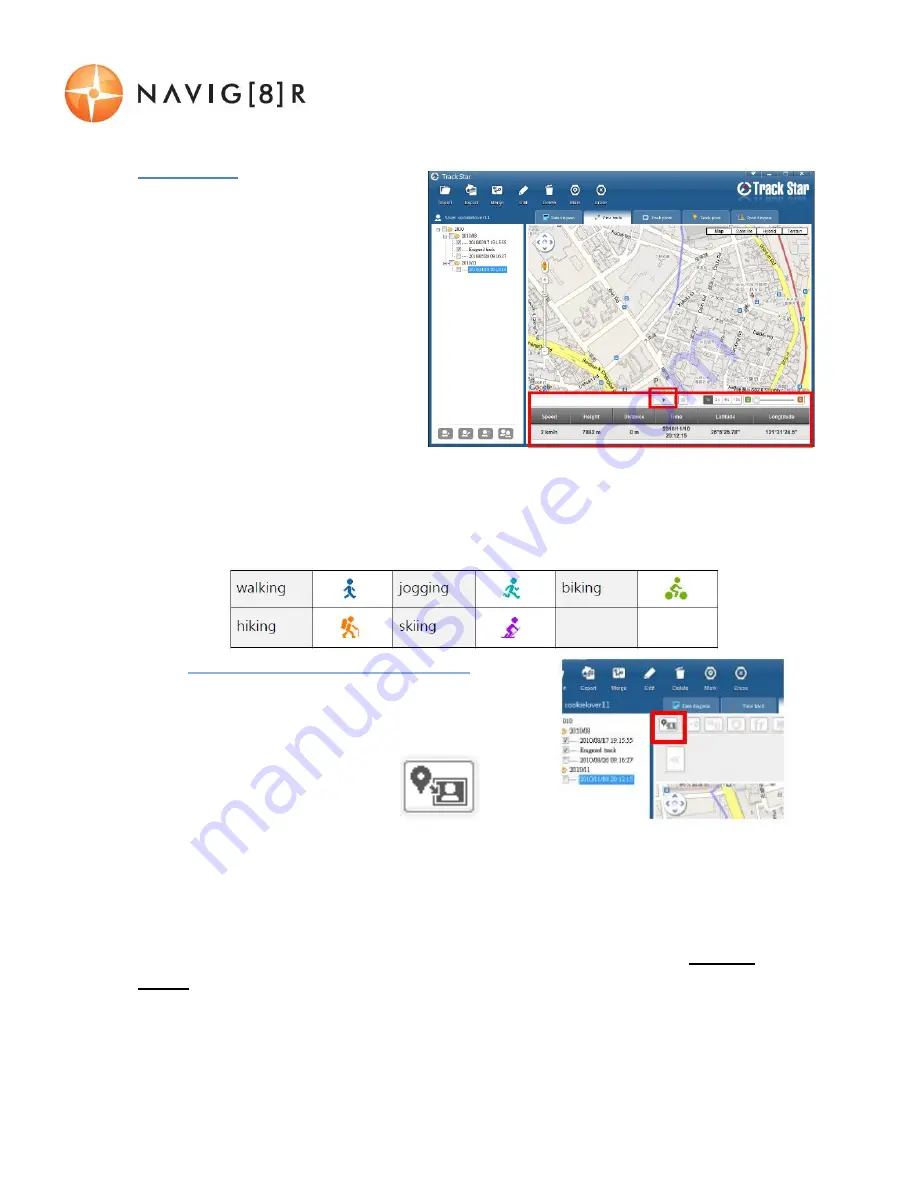
Select a track from the left
hand file explorer view and
press the PLAY button.
2.
The software will then begin
stepping you through your
recorded file on a Google
Map display.
3.
While progressing through the
recording, the details such as
Speed, Height, Distance
(travelled), Time, Latitude and
Longitude are displayed at the bottom of the screen.
4.
Also at the bottom of the screen is also the option to Zoom in or Out of the map.
5.
Use the EDIT feature to adjust the track colour and sport type icon.
Track Photos (Advanced Users)
1.
This feature matches dates and times of photos
and plots them along your track.
2.
Start by selecting a track from the explorer view
and click the photo icon.
3.
You will then be prompted
to choose your files from the file manager
screen. Press the OK button to continue.
Note 1: The times/dates of the photos need to match that of the recorded track,
otherwise this feature will not be able to make the match.
Note 2: We refer to the process of transferring images to your GPS watch as GPSed or
GPSing for easy reference.


