USER MANUAL
NAVWATCH-S10
23 |
P a g e
4.
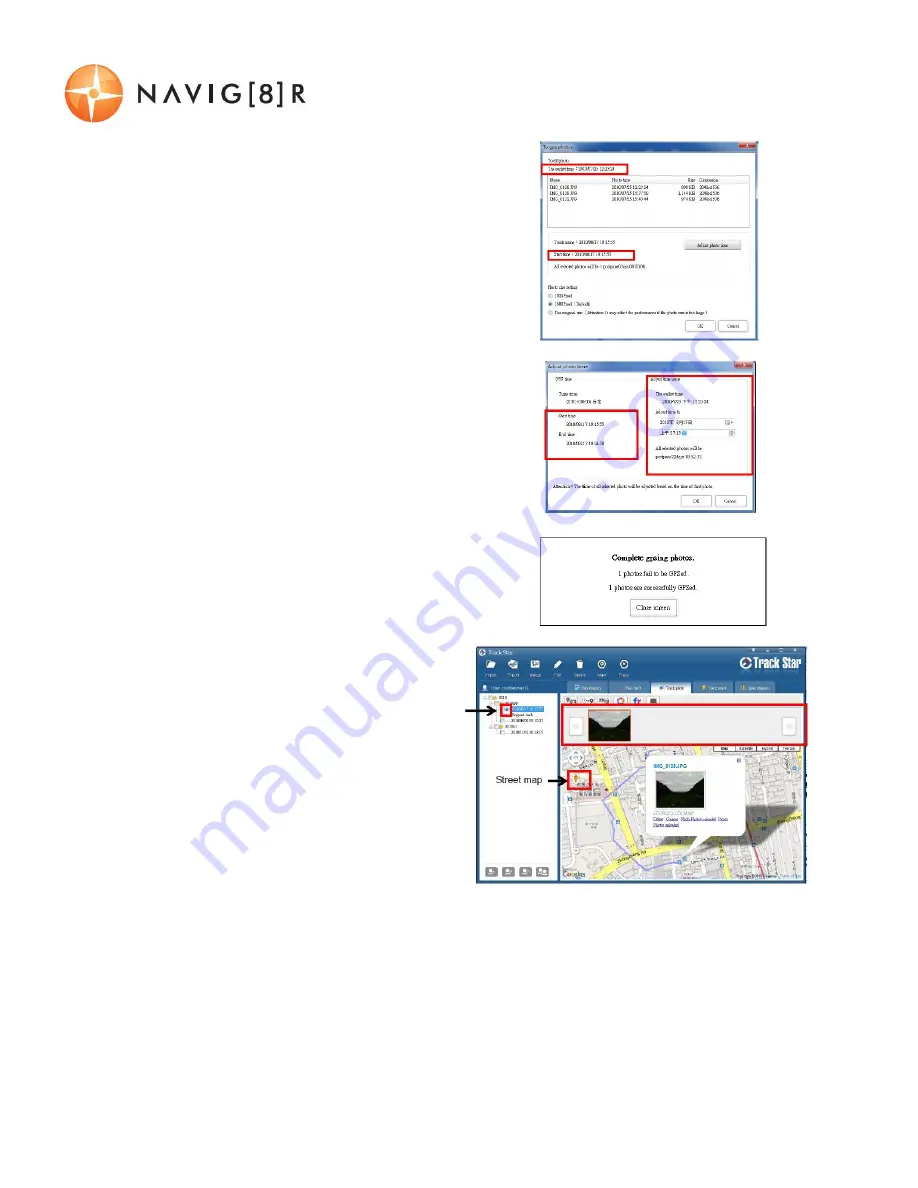
A confirmation screen will then open. This
screen allows you to check photos sizes and
to adjust any known or visible time
discrepancies. Click OK to continue.
5.
If there are still some time discrepancies
with the files, you will be prompted with
another screen to make the required
adjustments, where needed. Alternatively,
you may choose to insert other images such
as designs or archived images etc.
6.
Once complete, a confirmation screen will
be shown showing how many files were
successfully updated and how many were
not. These can be reviewed as required.
7.
Once photos have been
successfully uploaded, they are
embedded directly onto the
map. Once embedded, you can
interact with the images by; a)
clicking the image to see expand
the image, b) use the left and right
arrows to move between images.
Note: Once images are GPSed a small
image of a camera will appear next to the
track record in the file explorer view.


