background image

NAVIN Corporation


www.navin.com.tw 


BEFORE USE


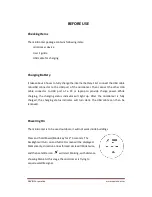
Checking Items 

The 

mini

Homer package contains following items: 

mini

Homer device 

User’s guide 

USB cable for charging 


Charging Battery 

It takes about 3 hours to fully charge the internal battery. First connect the USB cable 

mini-USB connector to the USB port of the 

mini

Homer. Then connect the other USB 

cable  connector  to  USB  port  of  a  PC  or  laptop  to  provide  charge  power.  While 

charging,  the  charging  status  indicator  will  light  up.  After  the 

mini

Homer  is  fully 

charged,  the  charging  status  indicator  will  turn  dark.  The  USB  cable  can  then  be 

removed. 


Powering On 

The 

mini

Homer is to be used outdoors; it will not work inside buildings. 

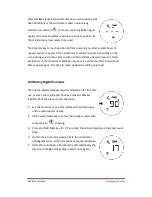
Press and hold Power/Mode key for 2~3 seconds. The 

backlight will turn on and full LCD screen will be displayed. 

Momentarily, direction arrow formed circle will blink twice, 

and then satellite icon 

  will start blinking, with distance 

showing blank. At this stage the 

mini

Homer is trying to 

acquire satellite signal.


Summary of Contents for miniHomerTM

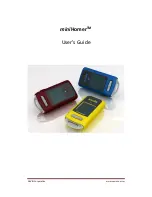
Page 1: ...NAVIN Corporation www navin com tw miniHomerTM User s Guide...

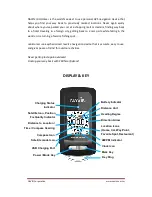
Page 2: ...vorite fishing spot miniHomer is a keychain sized reverse navigation device that is accurate easy to use and gives peace of mind for outdoor activities Never getting lost again outdoors Finding your w...

Page 3: ...to provide charge power While charging the charging status indicator will light up After the miniHomer is fully charged the charging status indicator will turn dark The USB cable can then be removed...

Page 4: ...mer had been previously used within the 2 hour period before powering on the time to reach position fix will be very short Calibrating Digital Compass The internal digital compass requires calibration...

Page 5: ...distance unit will toggle Setting Clock The miniHomer is able to generate satellite time with accurate minute reading However depending on your time zone the hour reading may need to be adjusted 1 Cl...

Page 6: ...avorite Spot and Restaurant are used to help identify the locations 2 Compass mode Use the miniHomer as a compass 3 Clock mode Use the miniHomer as a timepiece 4 Satellite mode Use the miniHomer to ch...

Page 7: ...le of direction arrows will show up Note that the internal digital compass for showing direction works best when the miniHomer is held horizontally Using as a Compass 1 Click Power Mode key to select...

Page 8: ...of each tracked satellite will be displayed 3 After your current position is determined direction triangles will be shown Each triangle represents a used satellite and its quadrant orientation When th...

Page 9: ...tion low Clicking Mark key while not in the clock mode will toggle the PM indicator on and off When the PM indicator is on a bright backlight will be kept constantly on This is useful whenever a brigh...

Page 10: ...e the device outside temperature range of 32 F 113 F 0 C 45 C Do not store the device outside temperature range of 14 F 113 F 10 C 45 C for an extended period of time Do not remove the battery CHARGIN...

Page 11: ...low moving car A4 At speed below 10km hr the miniHomer uses the internal digital compass to calculate direction to the return point if you are inside a car the metallic structure of the car will affec...

Page 12: ...cement or repaired product is warranted for 30 days from the date of the return shipment or for the warranty day s balance from the original date of purchase whichever is longer This limited warranty...

Reviews: