background image

31

English

Press 

GOTO

 and then, by using the joystick, select SETUP,

CALIBRATION and then ON. A message will prompt the user
to move the cursor to the boat’s true position, appropriately
enlarged by the 

ZOOM+ 

key.

Press 

ENTER

 to move the GPS boat’s position to the point indi-

cated by the cursor. This operation will save the calibration
for use in future calculations.

NOTE: When the calibration is enabled, the coordinates (latitude/longitude) in the
General Info window will be marked by (*).

To cancel the calibration, press 

GOTO

, select SETUP, CALI-

BRATION and then OFF.

Local time

This function allows entering local time instead of the Green-
wich time (GMT) supplied by the GPS receiver.
To enter local time, press 

GOTO

 and then, by using the joy-

stick, select SETUP, SET TIME and then LOCAL.

The joystick will allow entering local time as well as confirm-
ing and saving the operation. To cancel local time, press 

GOTO

,

select SETUP, SET TIME and then GMT.

Brightness

Press the 

PWR

 key to display the LIGHT window. Use the

joystick to adjust the brightness level. Press 

ENTER 

to exit.

Color

Besides displaying color nautical charts, the GEONAV allows
selecting the track and marker colors.
Press the 

GOTO 

key to access the menu, select TRACK or

MARKER, then COLORS and confirm by pressing 

ENTER

; choose

the color desired and confirm the selection.

The color of markers can also be selected when entered or
edited, whereas the track segment color can be selected by

Summary of Contents for Geonav 5 Touring

Page 1: ...User and Installation Guide 5Touring...

Page 2: ......

Page 3: ...IONNEEDEDFOR THE SAFETY OF NAVIGATION AND AS ALWAYS THE CAPTAIN IS RESPONSIBLE FOR THEIR PROPER USE The use of the GEONAV implies knowledge and accep tance of this warning by the user NOTE Technical c...

Page 4: ...e GEONAV is ready for connection with the fishfinder black box unit available as an option thus becoming a complete fishfinder instrument thanks to the dedicated windows au tomatically enabled when th...

Page 5: ...r shapes 8 character name Reverse route function Selectable depth units meters feet and fathoms Platinum electronic charts EasyView function X Plain function Heading vector CompactFlash cartridge Stor...

Page 6: ...ed Interface characteristics Standard NMEA 0183 sentences from position sensor GLL VTG GGA RMC GSV ZDA RMA GSA GNS DTM from depth sounder DBT MTW to autopilot APA APB XTE RMB BWC GLL VTG If received f...

Page 7: ...7 English Accessories Bracket for detachable installation Power supply cable User and Installation Guide Protection cap...

Page 8: ...ure that the cartridge replacement is carried out as the unit is perfectly dry and that no water enters the unit Rear connectors when not in use should always be protected by the appropriate rubber co...

Page 9: ...efuse The separate collection is a condition for reuse recycling and utilisation of used electrical electronic devices which ensures the protection of resources Electrical electronic used devices from...

Page 10: ...ATA OUT violet wire 6 DATA OUT white wire 4 Connection to the fishfinder black box unit 7 RESERVED 8 RESERVED 9 RESERVED 10 RESERVED Connection without fishfinder black box unit Use the cable supplied...

Page 11: ...box by the available con nector present in the cable supplied Connect the black box unit to the power supply source by means of the power supply cable provided together with the black box unit NOTE Th...

Page 12: ...at it is perfectly closed in order to avoid any water infiltration NOTE Ensure that the cartridge is correctly inserted Attempts to insert the cartridge upside down with force into the slot may result...

Page 13: ...find some free space in the cartridge in order to work properly Prior to use a new cartridge always make sure that there are at least 2 5MB of free space WARNING Be careful when handling the cartridg...

Page 14: ...ptions from menus and submenus If pressed Displays the chart object attributes ENT ENTER Cursor mode Inserts a waypoint at the cursor s position Inserts a marker at the cursor s position if held press...

Page 15: ...L VRM parameters Selects the several options from the menu windows Scrolls letters and numbers when entering data in the windows If pressed Navigation mode Switches from EBL to VRM Menu Switches from...

Page 16: ...ass to the following test WARNING The unit s internal memory can be cleared by holding the CLR key pressed when switching the unit on This operation will delete all the settings stored in the GEONAV a...

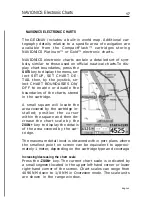
Page 17: ...harts stored in the cartridge A small square will locate the area covered by the cartridge in stalled position the cursor within the square and then de crease the chart scale by the ZOOM key to displa...

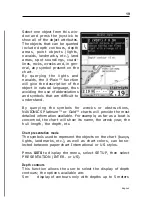
Page 18: ...he navaid selected Description of navaid characteristics Displaying object attributes Move the manual cursor on top of an object on the chart then press the joystick A window will show the description...

Page 19: ...understand By querying the symbols for wrecks or obstructions NAVIONICS Platinum or Gold charts will provide the most detailed information available For example as far as a boat is concerned the chart...

Page 20: ...yed in white Dryline areas are always displayed in green NOTE In NIGHT mode the areas with depths over the limit set and therefore navigable under safety conditions are displayed in black Displaying c...

Page 21: ...splay one of the photographs available for the marina then use the ZOOM key to enlarge or reduce the image and the joystick to pan it Select PILOTS to gain access to the main information on the marina...

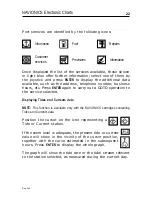
Page 22: ...rents data NOTE This function is available only with the NAVIONICS cartridges containing Tides and Currents data Position the cursor on the icon representing a Tide or Current station If the zoom leve...

Page 23: ...e NAVIONICS Platinum cartridges Press GOTO to display the menu select SETUP PHOTO OVER LAY then LAND or FULL From a given zoom level on wards where available aerial or satellite photographs will over...

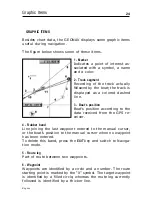
Page 24: ...tion according to the data received from the GPS re ceiver 4 Rubber band Line joining the last waypoint entered to the manual cursor or the boat s position to the manual cursor when no waypoint has be...

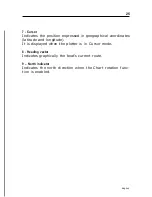
Page 25: ...geographical coordinates latitude and longitude It is displayed when the plotter is in Cursor mode 8 Heading vector Indicates graphically the boat s current route 9 North indicator Indicates the north...

Page 26: ...sounder The GEONAV can be interfaced not only with the optional fishfinder unit but also with a depth sounder via NMEA In this case the instrument will enable the depth sounder mode showing a graph of...

Page 27: ...key Chart rotation Charts are traditionally displayed in north up mode This however does not correspond to reality For example when traveling southwards the chart shows on the right side of the boat...

Page 28: ...available chart scale This function is enabled pro vided that at least one waypoint has been previously entered To enable the Autozoom function press ZOOM until the AUTOZOOM ENTER YES message is disp...

Page 29: ...he knob to switch from the VRM function to the EBL function To insert a waypoint where the EBL and VRM intersect press ENTER to insert a marker hold ENTER pressed Range and bearing values are displaye...

Page 30: ...orary correction press CLR NOTE The Easy Pilot function can be enabled only if a route is present Overzoom The Overzoom function allows expanding the chart range The Overzoom does not provide any addi...

Page 31: ...of the Green wich time GMT supplied by the GPS receiver To enter local time press GOTO and then by using the joy stick select SETUP SET TIME and then LOCAL The joystick will allow entering local time...

Page 32: ...UTBCK02 Fishfinder functions The GEONAV can be connected to a black box unit supplied as an optional device to become a complete depth sounder providing fishfinder functions The fishfinder employs the...

Page 33: ...ained a valid fix it can take a few minutes the boat s position and the relevant area will be displayed at the best scale available The default language is English To change the language press GOTO to...

Page 34: ...be deleted by pressing the CLR key Cursor mode starting from the last en tered To go back to Navigation mode press EXIT If an autopilot is connected to the GEONAV the plotted route is au tomatically...

Page 35: ...the joystick the relative information of the object will be shown Use the joystick to scroll the information list then press EXIT to exit and select another item Press EXIT again to go back to Naviga...

Page 36: ...edit the existing route move the cursor by using the joy stick The GEONAV will display the following data Distance from the boat s position to the cursor Time to arrive to the cursor Bearing from the...

Page 37: ...WAY 3D FISHFINDER The Depth Sounder window is displayed provided that data is received from a depth sounder The Tide Info window is displayed provided that a NAVIONICS cartridge featuring Tides and Cu...

Page 38: ...le level OVZ means the chart is shown in Overzoom mode i e it is overzoomed without adding any further graphic de tail Chart range right hand side ranging between 4096 NM and 1 8 NM The icon aside mea...

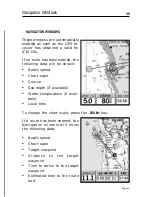
Page 39: ...hown Boat s speed Chart scale Course Sea depth if available Water temperature if avail able Local time To change the chart scale press the ZOOM key If a route has been entered the Navigation window wi...

Page 40: ...40 English Sea depth if available Water temperature if available NOTE To display sea depth and temperature values the GEONAV must be inter faced with a depth sounder Navigation Windows...

Page 41: ...shows the water temperature as well When navigating in waters deeper than sounder operating range or if the boat s speed is too high for depth sounding data ac quisition will be interrupted and the nu...

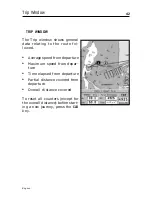
Page 42: ...e fol lowed Average speed from departure Maximum speed from depar ture Time elapsed from departure Partial distance covered from departure Overall distance covered To reset all counters except for the...

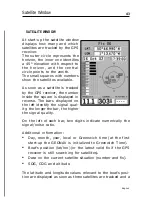
Page 43: ...everse The bars displayed on the left identify the signal qual ity the longer the bar the higher the signal quality On the left of each bar two digits indicate numerically the signal noise ratio Addit...

Page 44: ...As soon as a valid fix is available the GEONAV will automati cally switch to Navigation mode and display the boat s posi tion at the best chart range available the window at the bot tom of the screen...

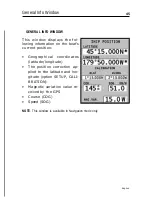
Page 45: ...current position Geographical coordinates latitude longitude The position correction ap plied to the latitude and lon gitude option SETUP CALI BRATION Magnetic variation value re ceived by the GPS Co...

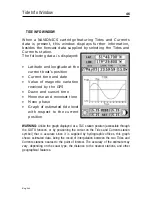
Page 46: ...nset time Moon phase Graph of estimated tide level with respect to the current position WARNING Unlike the graph displayed at a T C station position accessible through the GOTO function or by position...

Page 47: ...Course Steering angle XTD right left distance from the planned route XTD limit runway width The graph shows the boat s position with respect to the route When the XTD reaches the extreme value shown i...

Page 48: ...tion win dow then use the joystick to vary the viewing angle the ZOOM key to enlarge or reduce the image and the knob to rotate the view The knob allows also to raise the view point and change its ang...

Page 49: ...bed the type of material forming the seabed mud rock etc and the possible presence of obstructions banks of fish etc between the boat s keel and the seabed The signal processed by the unit is displaye...

Page 50: ...en The different display modes available from the Fishfinder window can be chosen by selecting SETUP SONAR FEA TURES DISPLAY MODE The display modes available are described below NORMAL The standard mo...

Page 51: ...n red Use the joystick to move the cursor the left side of the screen will show an enlarged view of the area centered on the point indicated by the manual cursor The width of the enlarged area varies...

Page 52: ...and lower limits of the dis play range If the option is set to AUTO the range is adjusted automatically so as to always keep the seabed outline in the lower part of the screen The same applies to the...

Page 53: ...ER To delete markers choose the marker color show the number of markers used and available and save or read marker data from the cartridge GOTO PORT To plan a route to a selected port GOTO NEAREST To...

Page 54: ...tick to position the cursor on the waypoint to delete and press the CLR key Deleting all waypoints in a route Press the CLR key repeatedly until the NO WP PRESENT message is displayed Moving a waypoin...

Page 55: ...S message Press the ENTER key to confirm the deletion or another key to exit FUNCTIONS IN THE ROUTE MENU Route Info Route information is displayed on several adjacent pages con taining general route i...

Page 56: ...CUR RENT SET SPEED and press ENTER Use the joystick to enter the data required and to confirm the operation Storing a route in the CompactFlash Press the GOTO key to display the menu select ROUTE CUR...

Page 57: ...the CLR key pressed for few seconds in Navigation mode Reversing a route Press the GOTO key to display the menu select ROUTE CUR RENT and then REVERSE The waypoint order will be automatically reversed...

Page 58: ...int Stopping a track To disable the Track function press the GOTO key to display the main menu select TRACK STOP and press ENTER to con firm Storing a track in the CompactFlash Press the GOTO key to d...

Page 59: ...the track to delete by the joystick then press ENTER to confirm By selecting CURRENT the track currently displayed will be deleted Setting the track color The track color can be selected from the men...

Page 60: ...ing start date and time as well as the recording duration and length The list can be sorted by using the joystick to select the sort field and ENTER to confirm Use the joystick to select the target se...

Page 61: ...nd is displayed with the same line and color set by default for the user s track To save the automatic track press GOTO select TRACK CUR RENT and SAVE ALL To change the default file name use the joyst...

Page 62: ...A window will display the symbol and a name automati cally assigned to the marker Use the joystick and the ZOOM key to change the marker symbol 8 symbols available name max 8 characters and color acc...

Page 63: ...lect MARKER CURRENT GOTO MARKER by the joystick The catalog displayed will list with respect to each marker the sym bol the name the insertion date time as well as if available the sea depth and tempe...

Page 64: ...e screen Every time a set of markers is stored in the CompactFlash the plotter memory is cleared and the indicator of the markers available is reset to the maximum value Recalling a set of markers fro...

Page 65: ...ick in the four directions form the port name or part of it when the desired port is shown highlight it by the joystick and confirm it by pressing ENTER Once the desired port has been selected the GEO...

Page 66: ...if in Navigation mode or to the cursor s position if in Cursor mode and position automatically on the closest des tination flashing Select one port at a time by us ing the joystick a window will show...

Page 67: ...more accurate being supplied di rectly by tidal surveying stations Press the GOTO key select NEAREST by the joystick choose the Tides or Currents service then press ENTER to confirm The GEONAV will a...

Page 68: ...k time of daily flood and ebb streams Dawn and sunset time Moonrise and moonset time Moon phase Tide level graph 24 hours In both cases above the default date is today A different date can be set by p...

Page 69: ...able for the brightness of the envi ronment Safety Depth OFF 2m 5m 10m 20m Enables the display of the areas corresponding to the depth safety limit Depth Contours ALL 5m 10m 20m Selects the display of...

Page 70: ...n on the screen 3D DISPLAY Names ON OFF Enables disables the display of names in the 3D display Navaids ON OFF Enables disables the display of navaids in the 3D display Photo ON OFF Selects the type o...

Page 71: ...be tween weaker and stronger returns Depth Range AUTO SHIFT MANUAL Chooses the depth display range adjustment between au tomatic mode the range is automatically adapted so that the seabed is always sh...

Page 72: ...alibration see paragraphs below Others Allows accessing the advanced setting menu relative to the sonar see paragraphs below FISHFINDER SONAR FEATURES Sensitivity Sets the scanner sensitivity range 0...

Page 73: ...ng the depth measurement The 0 value dis ables the filter FISHFINDER TRANSMISSION PARAMETERS When the Sonar Function window appears press simulta neously ENTER and GOTO to access the window that allow...

Page 74: ...m the enabled alarm option selected box to the disabled alarm option deselected box move the joystick vertically To adjust the alarm parameter move the joystick horizontally Fish Alarm LARGE ME DIUM S...

Page 75: ...he instrument Restore Setting ON OFF Restores the factory settings of the fishfinder menu Disp SW Release ON OFF Displays the software release present in the black box unit When the OTHERS window appe...

Page 76: ...t NMEA to display the data provided by an external depth sounder via NMEA0183 or select FF to display the data detected by the black box unit supplied as an accessory if available Chart Info By select...

Page 77: ...and select LAT LONG by the joystick En ter the geographical coordinates desired and confirm The GEONAV will move the manual cursor to the position se lected insert a waypoint by pressing ENTER or a ma...

Page 78: ...R B by the joystick Enter the range and bearing values relative to the position desired and con firm The GEONAV will move the manual cursor to the position se lected insert a waypoint by pressing ENT...

Page 79: ...posi tion and show a window with the following data Geographical coordinates of the man overboard position Time elapsed from the fall Distance and bearing of the man overboard with respect to the boat...

Page 80: ...GEONAV will display the PROXIMITY TO WAYPOINT message to warn the user that the boat is about to reach the target waypoint The GEONAV will display the END OF TRIP message to warn the user that the bo...

Page 81: ...IC ITEMS 24 FUNCTIONAL CHARACTERISTICS 26 QUICK TOUR 33 OPERATING MODES 36 RANGE WINDOW 38 NAVIGATION WINDOWS 39 DEPTH SOUNDER WINDOW 41 TRIP WINDOW 42 SATELLITE WINDOW 43 GENERAL INFO WINDOW 45 TIDE...

Reviews:

Related manuals for Geonav 5 Touring