24 |
USER MANUAL
EN
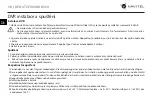
DVR installation and starting
DVR installation
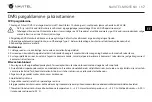
1. Put the SD card into the DVR. Use a high-speed microSD card (Class10 or above); capacity should be within 8-256 GB.
• To avoid malfunctions of the DVR and / or SD-card, don’t insert and remove SD-card during DVR operation.
• Before using a microSD card, please format it inside the DVR to avoid data errors. For formatting the SD-card in Menu mode select
Format SD-card and confirm it.
2.Install DVR on your car mirror with the clamps. Do not use excessive force to avoid any damages.
3.Connect the car charger to the cigarette lighter socket. Connect USB Type-C interface to the car charger with the charger cable.
4.Adjust the camera position.
Starting
1. Turn the power on; check whether the device is installed correctly.
2. If the device is installed correctly, when engine starts, the device will start simultaneously and begin recording automatically.
3. When reverse gear is turned on and properly connected, the image from the rear view camera is displayed, at the same time recording
from the front camera of the DVR stops and recording starts from the rear camera.
Precautions
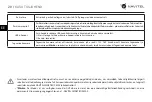
1. The built-in supercapasitor is only designed to properly turn off the device when the power is turned off and save the last recorded file;
For the full operation of the device in any of the modes, a constant power connection is required.
2. Use only the original charger adapter. Using another adapter may negatively affect the device’s work.
3. Do not use the device in humid or hot environment.
4. Keep the lens clean.
5. Do not disassemble the device and do not perform repairs by yourself.
6. Strictly follow the laws and regulatory acts of the region where the device is used. This device can not be used for illegal purposes.
7. Permissible ambient temperature in operating mode: 0 to +35 °С. Storage temperature: +5 to +45 °С. Relative humidity: 5% to 90%
without condensation (25 °С).
Summary of Contents for MR255 N
Page 1: ......
Page 67: ...66 RU 1 microSD U3 8 256 2 SD 3 4 0 35 5 45 5 90 25...
Page 68: ...RU NAVITEL MR255 NV 67 3 3 3...
Page 69: ...68 RU SD STBY 3 3 OK 3 OK F R 12...
Page 71: ...70 RU 1 1 1 2 12 12...
Page 82: ...UA NAVITEL MR255 NV 81 1 microSD Class U3 8 256 SD 2 3 4 Type C 5 6 0 35 5 45 5 90 25...
Page 83: ...82 UA 3 3 3...
Page 84: ...UA NAVITEL MR255 NV 83 SD 3 i 3 OK 3 OK F R...
Page 85: ...84 UA 12 G 180 USB USB 1 Mass Storage 2 Record Navitel Smart Box Max NAVITEL SMART BOX MAX...
Page 86: ...UA NAVITEL MR255 NV 85 1 1 1 2 12 12...
Page 88: ......

