background image

5

Name

Description

Menu key

EntersƒtheƒSettingsƒmenu.
Returnsƒtoƒtheƒpreviousƒscreen.

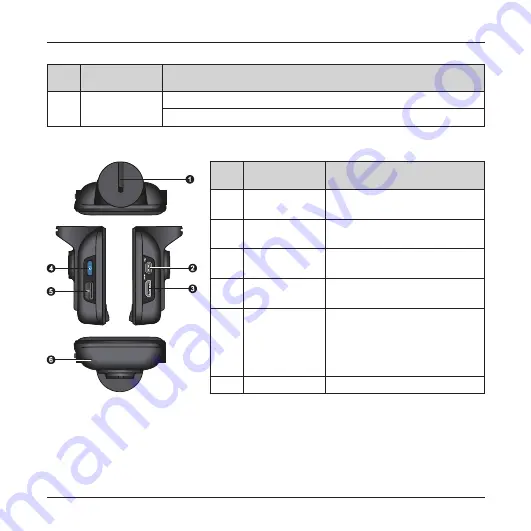
Side components

Name

Description

Device mount 
socket 

Forƒtheƒdeviceƒmount.

Mini-USB 
connector

Connectsƒtoƒtheƒcharger.

HD OUT 
connector

Connectsƒtoƒanƒexternalƒdevice.

Power key

PressƒtoƒturnƒtheƒrecorderƒONƒandƒ
OFF.

Memory card 
slot

DataƒisƒrecordedƒtoƒaƒMicroSDƒ
card.

Note: 

Youƒareƒadvisedƒtoƒuseƒaƒ

Classƒ6ƒmemoryƒcardƒwithƒatƒ
leastƒ8GBƒcapacity.

Microphone

Receivesƒsounds.

Summary of Contents for MiVue 388

Page 1: ...MiVue 388 User Manual...

Page 2: ...ing your recorder in a vehicle 6 Connecting to an external device 8 Operating basics 8 Turning the recorder ON and OFF 8 Hardware reset 9 Setting the date and time 9 Recording in driving mode 9 Contin...

Page 3: ...the recording files 14 Settings menu 17 Caring for your device 17 Regulatory information 18 CE 18 Industry Canada IC 19 WEEE 19 Safety precautions 20 About charging 20 About the charger 20 About the b...

Page 4: ...lens clean If the car s windscreen is tinted with a coating it may impact the recording quality GPS is operated by the United States government which is solely responsible for the performance of GPS A...

Page 5: ...s Speaker Provides sound alerts Status indicator Glows in green when the recorder is turned ON Glows in red when recording is in progress OK key Acts as the ENTER button This key s function may vary o...

Page 6: ...unt socket For the device mount Mini USB connector Connects to the charger HD OUT connector Connects to an external device Power key Press to turn the recorder ON and OFF Memory card slot Data is reco...

Page 7: ...t guarantee the product s compatibility with MicroSD cards from all manufacturers Note Before you start recording please format the MicroSD card to avoid malfunction caused by files not created by MiV...

Page 8: ...1 2 3 4 6 5 Use cable clips to secure the power cord so that it does not interfere with driving To ensure the highest quality recordings you are advised to place the recorder near the rear view mirro...

Page 9: ...ory card while recording Connect the recorder to the car charger according to the installation instructions in the previous Using your recorder in a vehicle section Turning the recorder ON and OFF Onc...

Page 10: ...e OK key 4 Repeat Step 3 until all fields have been changed Recording in driving mode Continuous recording When you connect the car charger to the cigarette lighter in the car the recorder will start...

Page 11: ...while continuous recording is in progress press the OK key To stop recording press the key The event recordings can be found in the Emergency category for file playback Camera mode 1 If the recording...

Page 12: ...he key to switch to the previous next file File management CAUTION Deleted files cannot be recovered Make sure to back up your files before deletion To delete files 1 Press the Menu key to access the...

Page 13: ...the system date and time Time Stamp Shows or hides time and date in the recordings GPS Stamp Sets if and how you want to record the GPS information Resolution Sets the image resolution Screen Timeout...

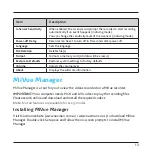
Page 14: ...d Restore to Defaults Restores system settings to factory defaults Volume Adjusts the volume level About Displays the software information MiVue Manager MiVue Manager is a tool for you to view the vid...

Page 15: ...mini USB end of the USB cable not supplied to the recorder and the other end to a USB port on your computer Remove the memory card from the recorder and access the card on the computer via a card read...

Page 16: ...right When a recording file exists you will see the date marked with Click that date to display the files that were recorded on that date You can choose the file type to display Event emergency event...

Page 17: ...es or unmutes the volume Adjusts the volume level Plays the video in full screen Returns to the normal view Displays the playback progress You can click on a point along the track bar to move directly...

Page 18: ...e Manager Check for Update Checks if there is any new version of MiVue Manager Note Internet access is required for this feature About Displays the version and copyright information of MiVue Manager C...

Page 19: ...vice Do not use paper towels to clean the screen Never attempt to disassemble repair or make any modifications to your device Disassembly modification or any attempt at repair could cause damage to yo...

Page 20: ...EC 61000 4 4 2004 A1 2010 IEC 61000 4 5 2005 IEC 61000 4 6 2008 IEC 61000 4 8 2009 IEC 61000 4 11 2004 The manufacturer cannot be held responsible for modifications made by the User and the consequenc...

Page 21: ...tput rated 5 V dc 1 2 A Use a specified battery in the equipment About the charger Do not use the charger in a high moisture environment Never touch the charger when your hands or feet are wet Allow a...

Page 22: ...r burns do not disassemble crush puncture or dispose of in fire or water Important instructions for service personnel only Caution Risk of explosion if battery is replaced by an incorrect type Dispose...

Page 23: ...Technology does not warrant this document is error free Navman Technology assumes no liability for damage incurred directly or indirectly from errors omissions or discrepancies between the device and...

Page 24: ...Navman Australia Navman New Zealand www navman com au www navman co nz P N 5615N4120032 R00...

Reviews: