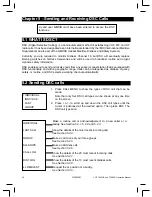
background image

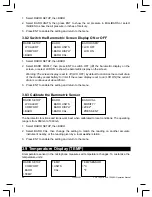
38

VHF 7200 US and 7200 EU Operation Manual

NAVMAN

5.3.1 Receiving an All Ships Call (ALL SHIPS)

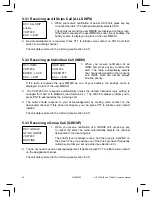
1.  When you receive notifi cation of an ALL SHIP call, press any key 

to cancel the alert. The radio automatically selects CH16.


The priority level and the user MMSID are displayed on the screen. 
If the radio recognises the user MMSID as one of your buddies, the 
buddy’s name is displayed in place of the user MMSID.

2.  No acknowledgement is required. Press PTT to initiate voice contact on CH16 and then 

switch to a working channel.


The call data is stored in the Call Log (see Section 5.2.7). 

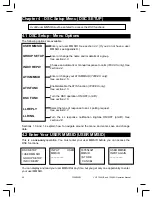
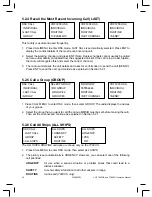
5.3.2 Receiving an Individual Call (INDIV)

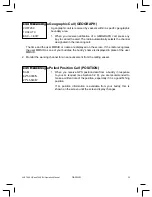
1.  When you receive notifi cation of an 

INDIV call, press any key to cancel the 
alert. The radio automatically selects 
the channel designated in the incoming 
call. INDIV calls are almost always 
Routine priority.


If the radio recognises the user MMSID as one of your buddies, the buddy’s name is 
displayed in place of the user MMSID.

2.  The VHF7200 US responds automatically unless the default individual reply setting is 

changed from AUTO to MANUAL (see Section 4.4).  The 7200 EU always prompts you to 
press ENT to acknowledge the incoming call.

3.  The caller should respond to your acknowledgement by making voice contact on the 

designated channel. If this does not happen, you can press PTT to initiate voice contact 
instead.


The call data is stored in the Call Log (see Section 5.2.7).

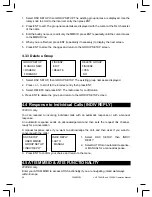
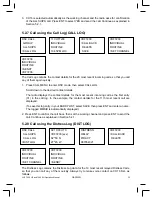
5.3.3 Receiving a Group Call (GROUP)

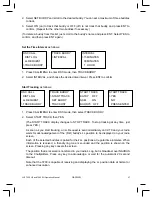
1.  When you receive notifi cation of a GROUP call, press any key 

to cancel the alert. The radio automatically selects the channel 
designated in the incoming call.


The priority level is always routine, and the group is identifi ed  on 
the screen. The group will be one of the three groups of frequently 
called people that you set up earlier (see Section 4.3).

2.  You do not need to send an acknowledgement. If desired, press PTT to initiate voice contact 

on the designated channel.


The call data is stored in the Call Log (see Section 5.2.7). 

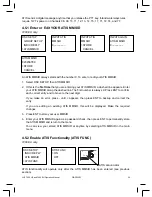
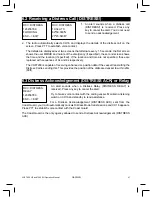
RCV: GROUP

GP: RD GROUP

VHF7200

ROUTINE

RCV: ALL SHIP

priority

VHF7200

ESC –> EXIT

RCV: INDIV

VHF7200

ENTER –> ACK

ESC –> EXIT

INDIV ACK

VHF7200

PRESS PTT

ESC –> EXIT

Summary of Contents for VHF 7200

Page 1: ...NAVMAN w w w n a v m a n c o m Operation Manual VHF 7200 US AND 7200 EU Navman VHF 7200 US Navman VHF 7200 EU ...

Page 2: ...U radios at the time of printing Navman NZ Limited reserves the right to make changes to specifications without notice Copyright Navman NZ Limited New Zealand All rights reserved NAVMAN is a registered trademark of Navman NZ Limited FCC Statement This equipment has been tested and found to comply with the limits for a Class B digital device pursuant to Part 15 of FCC Rules These limits are designe...

Page 3: ...l 16 2 4 2 Set the Contrast Level 16 2 5 GPS DATA and Time GPS DATA 16 2 5 1 Manually Enter Position and UTC Time MANUAL 16 2 5 2 Local Time TIME OFFSET 17 2 5 3 Time Format Options TIME FORMAT 17 2 5 4 Time Display Options TIME DISPLAY 18 2 5 5 Position Display Options LL DISPLAY 18 2 5 6 Course Speed Display Options COG SOG 18 2 5 7 GPS Alert Options ALERT 18 2 6 GPS Simulator simulator 19 2 7 R...

Page 4: ...TION RINGTONE 31 Chapter 5 Sending and Receiving DSC Calls 32 5 1 What is DSC 32 5 2 Sending DSC calls 32 5 2 1 Make a Routine Call INDIVIDUAL 33 5 2 2 Retrying a Routine Call 33 5 2 3 Acknowledgement of an Individual Incoming Call INDIV 33 5 2 4 Recall the Most Recent Incoming Call LAST 34 5 2 5 Call a Group GROUP 34 5 2 6 Call All Ships ALL SHIPS 34 5 2 7 Call using the Call Log CALL LOG 35 5 2 ...

Page 5: ...and 7200 EU Operation Manual NAVMAN Appendix A Technical Specifications 42 Appendix B Troubleshooting 44 Appendix C VHF Marine Channel Charts 45 Appendix D MMSID License Information 57 Appendix E How to Contact Us 58 ...

Page 6: ... right handed use Powerful 4W External Audio Output Access to all currently available Marine VHF Channel Banks USA Canada International including Weather Channels where available Special CH16 or CH16 9 Key for quick access to the Priority International Distress Channel Special 3CH Key to select your three Favorite Channels PSCAN similar to dual watch Facility DSC Digital Select Calling Capability ...

Page 7: ...e active as soon as you exit the screen 1 4 How to Enter Alphanumeric Data If your radio does not have an alphanumeric microphone use the CH key or the rotary knob to enter alphanumeric data Press to count through numbers or hold down to scroll rapidly to the desired number Press to step through the alphabet or hold down to scroll rapidly to the desired character If you make an error press until i...

Page 8: ...favorite channels if any are selected Otherwise blank D Duplex operation Otherwise blank for Simplex operation ATIS Enabled for use in European inland waterways Otherwise blank 7200 EU only Indicates an incoming DSC call or blinks to notify you of any unread Call Log messages Low Battery warning activates at 10 5V 88 Channel selected X Channel is temporarily deleted from the ALL SCAN operation BUS...

Page 9: ...eeper levels and become less active Local weather forecast based on the local temperature and stored barometric pressure data The icons are indicative only and are more accurate close to land rather than in open sea Digital Readout of the current barometric pressure in mb or in Hg or the current temperature in ºC or ºF depending upon your selection Baro Graph A histogram of barometric pressure mb ...

Page 10: ...ons In areas of high noise eg close to large cities reception may improve if sensitivity is reduced Either turn SQL slowly clockwise or use the LOCAL setting See section 2 3 DISTRESS Send DSC Distress Call See Chapter 6 16 9 Priority Channel 7200 US only Also on the microphone Press to cancel all other modes and to tune into the priority channel Press again to return to your original channel The d...

Page 11: ...seconds the scan restarts Press ENT to temporarily skip over lock out an always busy channel when in ALL SCAN mode and resume the scan An X is shown on the screen to designate a skipped channel Note that it is not possible to skip over the priority channel Note also that SCAN functionality is limited in some European countries Press SCAN to stop at the current channel ESC Escape Use ESC when navig...

Page 12: ...ough alphanumeric characters one at a time then press the knob to confirm the selection If you make an error select the character then push the knob to backup INFO Microphone The centre key on the microphone toggles through the INFO display in a loop showing Normal Channel Baro Graph Baro Graph with Temperature and Signal to Noise Ratio SNR with Temperature CH Alphanumeric Entry Microphone only Us...

Page 13: ...ME INT SPEAKER WATCH MODE WX ALERT COM PORT BARO TEMP USER MMSID GROUP SETUP INDIV REPLY DSC FUNC ATIS MMSID ATIS FUNC LL REPLY LL RING LL REPLY MANUAL SETTING Maintain your buddy list See Section 2 2 Set radio sensitivity See Section 2 3 Set backlight level See Section 2 4 Set contrast level See Section 2 4 Set position UTC manually See Section 2 5 Set local time and time format See Section 2 5 D...

Page 14: ...played at the top of your buddy list Note that when the BUDDY LIST is full 20 entries you cannot make a new entry until you have deleted an existing entry 2 2 2 Edit an Entry 1 Select BUDDY LIST Press ENT to display the list of entries 2 Scroll down if required to the incorrect entry and press ENT 3 Select EDIT The cursor is at the first character of the name 4 Edit the buddy name or to edit only ...

Page 15: ...then select DIST 2 Press ENT to activate the DIST setting This disables local sensitivity and the menu is displayed again 2 3 2 Set Local Sensitivity 1 Select LOCAL DIST then scroll to LOCAL 2 Press ENT to activate the LOCAL setting This disables distance sensitivity and the menu is displayed again LOCAL is displayed on the screen in reverse video as a reminder that local sensitivity is selected 2...

Page 16: ...r is disconnected or absent you can specify the vessel position and the local time manually using the GPS DATA option This information is important because it will be used if a DSC distress call is transmitted You can also enter the course COG and speed SOG and select GPS Alert and GPS Simulator options 2 5 1 Manually Enter Position and UTC Time MANUAL Note that this function is available only if ...

Page 17: ...me Format Options TIME FORMAT Time can be shown in 12 or 24 hour format 1 Select GPS DATA then SETTING 2 Select TIME FORMAT 3 Select 12 Hr or 24 Hr as desired In this example 12 hour format has been selected and so the screen shows the AM or PM suffix TIME FORMAT 12 Hr 24 Hr 07 15AM LOC GPS DATA MANUAL SETTING GPS DATA TIME OFFSET TIME FORMAT TIME DISPLY GPS DATA MANUAL SETTING GPS DATA TIME OFFSE...

Page 18: ...ix M However if the time is being updated through a GPS navigation receiver you can switch the vessel position display on the screen on or off as follows 1 Select GPS DATA then SETTING 2 Select LL DISPLAY 3 Select ON on or OFF off as desired In this example OFF has been selected and the screen no longer shows the vessel position 2 5 6 Course Speed Display Options COG SOG Use this option to display...

Page 19: ...ulated Speed Over Ground SOG Course Over Ground COG and LL position appear on the screen This data is updated automatically during the simulation It is not possible to send a DSC transmission when in Simulator mode 2 7 Reset to Factory Defaults RESET Use this to return every setting to the factory defaults except all MMSID settings and the entries in your buddy list 1 Select RESET The radio asks f...

Page 20: ...H NAME TELEPHONE EDIT CH NAME PHONE1 YES NO 3 1 Radio Setup Menu RADIO SETUP and change data CH NAME RING VOLUME BEEP VOLUME INT SPEAKER WATCH MODE WX ALERT COM PORT BARO TEMP Edit or delete channel names See Section 3 2 Set the WX Alert scanning mode on off ON OFF 7200 US only See section 3 6 Selects the operation of Dual or Tri watch scanning See section 3 5 Switch on off ON OFF the radio s inte...

Page 21: ...to the menu 3 4 Internal Speaker Connections INT SPEAKER Switch the radio s internal speaker ON on or OFF off The external speaker is always ON on if a speaker is plugged into the external speaker jack 1 Select RADIO SETUP then INT SPEAKER 2 Select ON on or OFF off then press ENT to enable the setting and return to the menu 3 5 Set the Priority Channel watch MODE If you have a 7200 EU watch mode i...

Page 22: ...atically activated when present so that data such as barometric pressure history temperature DSC polling postions and distress data is available to other Navman instruments However the barometric and temperature readings from this 7200 radio can be switched off if you prefer to use the readings from a different instrument You may select your GPS DATA source from either NMEA or NAVBUS as shown 3 7 ...

Page 23: ...ons particularly when close to large land masses See the information on the Happy Fish icon in Section 1 5 There is a weather icon with five different displays SUNNY PARTLY CLOUDY CLOUDY RAINY SNOWY The local air pressure trends combined with the local temperature determines which icon is displayed Note in open ocean conditions the weather icon predictions can be less accurate than when close to l...

Page 24: ... drain is continuous at about 85mA 3 Press ENT to enable the setting and return to the menu 3 8 3 Calibrate the Barometric Sensor The barometric functions and icons work best when calibrated to local conditions The operating range is from 960mb to 1060mb 1 Select RADIO SETUP then BARO 2 Select BARO CAL then change the setting to match the reading on another accurate instrument nearby or the readin...

Page 25: ...on Manual NAVMAN 1 Select RADIO SETUP then TEMP 2 Press ENT to select UNITS 3 Press ENT to display the temperature in ºC Celsius or select ºF to show the temperature in Fahrenheit 4 Press ENT to enable the setting and return to the menu ...

Page 26: ...MMSID Enter your user MMSID See section 4 2 If you do not have a user MMSID see Appendix D USER MMSID GROUP SETUP INDIV REPLY ATIS MMSID ATIS FUNC DSC FUNC LL REPLY LL RING Enter or change the name and or details of a group See section 4 3 Enter or change your ATIS MMSID 7200 EU only See section 4 5 Enable disable the ATIS function 7200 EU only See section 4 5 Select the type of response to an LL ...

Page 27: ... 1 Select DSC SETUP then GROUP SETUP 2 If this is the first time that you are entering a group name a line of nine zeros appears Otherwise any existing group names are displayed Press ENT to display the input screen 3 Enter the group name along the dashed line It can be alphanumeric Press ENT to confirm each correct entry and to move to the next digit When you have finished press ENT repeatedly un...

Page 28: ...The radio asks for confirmation 4 Press ENT to delete the group and return to the GROUP SETUP screen 4 4 Response to Individual Calls INDIV REPLY 7200 US only You can respond to incoming individual calls with an automatic response or with a manual response An automatic response sends an acknowledgement and then sets the request link channel ready for a conversation A manual response asks if you wa...

Page 29: ... If you make an error press until appears then press ENT to backup and correct the entry If you are editing an existing ATIS MMSID this will be displayed Make the required changes 3 Press ENT to store your user MMSID 4 Enter your ATIS MMSID again as a password check then press ENT to permanently store the ATIS MMSID and return to the menu You can view your stored ATIS MMSID at anytime by selecting...

Page 30: ...nctionality The DSC annunciator appears on the screen It is not possible to have both ATIS ON on and DSC ON on simultaneously When you enable one the other will turn OFF off If DSC and ATIS are both OFF off DSC will have to be switched ON on for normal DSC operation There are two annunciators in the screen to show you the current mode if the DSC annunciator is shown DSC is operational If the ATIS ...

Page 31: ...any buddies the 7200 will notify you of any incoming data by sounding 2 friendly ringtones If desired you can mute this audible notification as follows 1 Select DSC SETUP then LL RING 2 Select OFF off to mute the ringtones 3 Press ENT to confirm your choice and return to the menu DSC SETUP DSC FUNC LL REPLY LL RING LL RING ON OFF ...

Page 32: ...ne and DSC selects a working channel automatically 5 2 Sending DSC calls 1 Press CALL MENU to show the types of DSC call that can be made Note that only four DSC call types can be shown at any one time on the screen 2 Press or to scroll up and down the DSC call types until the cursor is postioned at the desired option Then press ENT The DSC call types are A valid user MMSID must have been entered ...

Page 33: ...sent 5 If the call is acknowledged ACK press PTT to talk If there is no reply retry making the call See Section 5 2 2 5 2 2 Retrying a Routine Call 1 If there is no reply to your call after one minute UNABLE TO ACKNOWLEDGE the radio asks if you want to retry the call SEND AGAIN 2 Select YES and press ENT to retry the call The radio will repeat this cycle twice If the call still cannot be placed th...

Page 34: ...ps 2 Select the group that you want to call the Group MMSID must be set before making the call Then set the channel and continue as explained in Section 5 2 1 5 2 6 Call All Ships ALL SHIPS The ALL SHIPS ROUTINE call option is shown only on the 7200 US 1 Press CALL MENU to enter DSC mode then select ALL SHIPS 2 The priority is set automatically to URGENCY However you can select one of the followin...

Page 35: ...yed To save this log entry in your BUDDY LIST select SAVE then press ENT and enter a name The logged MMSID is automatically displayed 2 Press ENT to confirm the call back then set the working channel and press ENT to send the call Continue as explained in Section 5 2 1 5 2 8 Call using the Distress Log DIST LOG The Distress Log contains the Distress Log data for the 10 most recent relayed Distress...

Page 36: ...ress ENT to send the request See Section 5 3 5 for the acknowledgement 3 The working channel name is displayed while the radio waits for an acknowledgement from your buddy If there is no reply after 1 minute the radio asks if you want to retry Continue as explained in Section 5 2 2 5 2 10 Track Your Buddy TRACK BUDDY Use the TRACKLIST option to select the buddy or buddies whose position you want t...

Page 37: ...t press YES As soon as you start tracking an LL Request is sent immediately on CH70 and your radio waits for acknowledgement of the first buddy s LL position to be displayed on your radio screen Each of the selected buddies is polled for their LL positions at regular time intervals When information is received a friendly ring tone is sounded and the position is shown on the screen Pressing any key...

Page 38: ... VHF7200 US responds automatically unless the default individual reply setting is changed from AUTO to MANUAL see Section 4 4 The 7200 EU always prompts you to press ENT to acknowledge the incoming call 3 The caller should respond to your acknowledgement by making voice contact on the designated channel If this does not happen you can press PTT to initiate voice contact instead The call data is st...

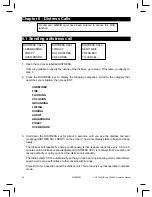
Page 39: ...nises the user MMSID as one of your buddies the buddy s name is displayed in place of the user MMSID 2 Monitor the working channel for an announcement from the calling vessel 5 3 5 Receiving a Polled Position Call POSITION 1 When you receive GPS position data from a buddy in response to your LL request see Section 5 2 9 you are recommended to make a written note of the position especially if it is...

Page 40: ...RES CALL SENT on the screen The whole display starts to flash and beep loudly The distress call repeats five times continuously It then repeats randomly every 3 5 to 4 5 minutes until a distress acknowledgement DISTRESS ACK is received from a search and rescue authority or until you cancel the distress call manually The radio selects CH16 automatically so that you can hear any incoming voice conta...

Page 41: ...y The VHF7200 is capable of receiving enhanced LL position data if the vessel transmitting the Distress Call is sending this This provides the position of the distressed vessel to within 20m 60ft 6 3 Distress Acknowledgement DISTRESS ACK or Relay An alert sounds when a Distress Relay DISTRESS RELAY is received Press any key to cancel the alert Try to make voice contact with the calling vessel Main...

Page 42: ...ming control Yes Antenna connector SO 239 50 ohm Temperature Range 15ºC to 50ºC Waterproof JIS 7 Dimensions 161 W x 75 H x 147 D mm without bracket Weight 1 36 kg 3 0lbs without microphone Frequency stability 10 ppm Frequency control PLL GPS NMEA input Yes Comm port 4800 baud NMEA 38400 baud NAVBUS DSC Yes Rotary Channel Selector Yes FEATURES Flush Mount kit and dust cover Yes Local Distant contro...

Page 43: ...n 5 kHz Spurious harmonics better than 2 5 W Modulation distortion Less than 4 1 kHz for a 3 kHz deviation RECEIVER Frequency 156 025 163 275 MHz 12dB SINAD sensitivity 0 25 uV distant 2 5 uV local Adjacent CH selectivity more than 70 db Spurious response more than 70 db Intermodulation Rejection ratio more than 68 db Residual Noise level more than 40 db unsquelched Audio output power 2 W with 8 o...

Page 44: ...Re route the power cables away from the engine b Add a noise suppressor to the power cable c Use resistive spark plug wires and or use an alternator whine filter 4 No sound from the external speaker a Check that the external speaker cable is physically connected b Check the soldering of the external speaker cable 5 Transmissions are always on low power even when high HI power is selected The anten...

Page 45: ...x 62 m o 156 125 160 725 x x x 03 m o 156 150 160 750 x x x 63 m o 156 175 160 775 x x x 04 m o 156 200 160 800 x x x 64 m o 156 225 160 825 x x x 05 m o 156 250 160 850 x x x 65 m o 156 275 160 875 x x x 06 f 156 300 x 66 156 325 160 925 x x 07 156 350 160 950 x x 67 h 156 375 156 375 x x 08 156 400 x 68 156 425 156 425 x 09 i 156 450 156 450 x x 69 156 475 156 475 x x 10 h 156 500 156 500 x x 70...

Page 46: ...nels 06 13 15 16 17 70 75 and 76 may also be used for high speed data and facsimile transmissions subject to special Channel designator Notes Transmitting frequencies MHz Internship Port operations and ship movement Public correspondence Ship stations Coast stations Single frequency Two frequency 16 156 800 156 800 DISTRESS SAFETY AND CALLING 76 n 156 825 x 17 g 156 850 156 850 x x 77 156 875 x 18...

Page 47: ...nnels are used in its territorial waters h Within the European Maritime Area and in Canada these frequencies channels 10 67 73 may also be used if so required by the individual administrations concerned for communication between ship stations aircraft stations and participating land stations engaged in coordinated search and rescue and anti pollution operations in local areas under the conditions ...

Page 48: ... COM 14 156 700 156 700 Port Operations Selected VTS Areas Yes Yes PORT OPS VTS 15 2 RX Only 156 750 Environmental RX Only ENVIROMENTAL 16 156 800 156 800 International Distress Safety and Calling Yes Yes DISTRESS 17 1 156 850 156 850 State Controlled 1W Only Yes Yes SAR 18A 156 900 156 900 Commercial Yes Yes COMMERCIAL 19A 156 950 156 950 Commercial Yes Yes COMMERCIAL 20 157 000 161 600 Port Oper...

Page 49: ...ational Yes No SHIP SHIP 73 156 675 156 675 Port Operations Yes Yes PORT OPS 74 156 725 156 725 Port Operations Yes Yes PORT OPS 77 1 156 875 156 875 Port Operations 1W Only Yes Yes PORT OPS 78A 156 925 156 925 Boat Operations Recreational Yes No SHIP SHIP 79A 156 975 156 975 Commercial Yes Yes COMMERCIAL 80A 157 025 157 025 Commercial Yes Yes COMMERCIAL 81A 4 157 075 157 075 U S Government Enviro...

Page 50: ...NEL USAGE 1 LOW POWER 1 W only 2 Receive Only 3 LOW POWER 1 W initially Override to HIGH POWER by holding down H L key before transmitting Used normally in bridge to bridge communications 4 Lightly Shaded Simplex channels 03A 21A 23A 61A 64A 81A 82A and 83A cannot be lawfully used in U S waters unless special authorization is obtained from the U S Coast Guard Not for use by the general public 5 Th...

Page 51: ... up Yes No BRIDGE COM 14 156 700 156 700 Port Operations VTS in Selected Areas Yes Yes PORT OPS VTS 15 1 156 750 156 750 Commercial 1W Only Yes Yes COMMERCIAL 16 156 800 156 800 International Distress Safety and Calling Yes Yes DISTRESS 17 1 156 850 156 850 State Controlled 1W Only Yes Yes SAR 18A 156 900 156 900 Commercial Yes Yes COMMERCIAL 19A 156 950 156 950 Canadian Coast Guard Yes Yes CANADI...

Page 52: ...nal Yes Yes PLEASURE 72 156 625 156 625 Intership Yes No SHIP SHIP 73 156 675 156 675 Commercial Fishing Only Yes Yes COMMERCIAL 74 156 725 156 725 Commercial Fishing Only Yes Yes COMMERCIAL 77 1 156 875 156 875 Port Operations 1W Only Yes Yes PORT OPS 78A 156 925 156 925 Boat Operations Recreational Yes No SHIP SHIP 79A 156 975 156 975 Commercial Yes Yes COMMERCIAL 80A 157 025 157 025 Commercial ...

Page 53: ...ly 2 Receive Only 3 LOW POWER 1 W initially Override to HIGH POWER by holding down H L key before transmitting Used normally in bridge to bridge communications 4 Lightly Shaded Simplex channels 21A 23A 61A 64A 81A 82A and 83A cannot be lawfully used in Canada waters unless special authorization is obtained from the Canadian Coast Guard Not for use by the general public 5 The letter A illuminated b...

Page 54: ...156 125 160 725 x 03 a 156 150 160 750 x 63 a 156 175 160 775 x 04 a 156 200 160 800 x 64 a 156 225 160 825 x 05 a 156 250 160 850 x 65 a 156 275 160 875 x 06 a b 156 300 156 300 x 66 a 156 325 160 925 x 07 a 156 350 160 950 x 67 a c 156 375 156 375 x 08 a q 156 400 156 400 x 68 a 156 425 156 425 x 09 a b d 156 450 156 450 x 69 a 156 475 156 475 x 10 e 156 500 156 500 x 70 a 156 525 156 525 Digita...

Page 55: ...900 161 500 x 78 156 925 161 525 x 19 156 950 161 550 x 79 a 156 975 161 575 x 20 157 000 161 600 x 80 157 025 161 625 x 21 a 157 050 161 650 x 81 a 157 075 161 675 x 22 157 100 161 700 x 82 l m 157 125 161 725 x 23 m 157 150 161 750 x 83 a m 157 175 161 775 x 24 m 157 200 161 800 x 84 m 157 225 161 825 x 25 m 157 250 161 850 x 85 a m 157 275 161 875 x 26 m 157 300 161 900 x 86 a m 157 325 161 925...

Page 56: ...countries mentioned under 1 1 2 this channel is used for service category ship to port authorities g In the Netherlands this channel is used by its national coastguard for communications during oil pollution operations on the North Sea and for safety messages for the North Sea Waddenzee IJsselmeer Ooster and Westerschelde h This channel may be used only for service category on boardon board commun...

Page 57: ...HIP TO SHORE NAME TAG 00 1 156 000 156 000 UK Coast Guard Users Yes Yes UK COAST GRD M1 157 425 157 850 UK Marina Channel M1 Yes Yes UK MARINA M2 161 425 161 425 UK Marina Channel M2 Yes Yes UK MARINA 31 157 550 162 150 INT L Duplex Holland No Yes NL MARINA 96H 162 425 162 425 INT L Belgium No Yes BEL G MARINA L1 155 500 155 500 INT L Skandinavia Yes No LEISURE 1 L2 155 525 155 525 INT L Skandinav...

Page 58: ...408701 Ph 65 6741 3723 Fax 65 6741 3746 e mail riq postone com Taiwan Seafirst International Corporation No 281 Hou An Road Chien Chen Dist Kaohsiung Taiwan R O C Ph 886 7 831 2688 Fax 886 7 831 5001 e mail seafirst seed net tw web www seafirst com tw Thailand Thong Electronics Thailand Co Ltd 923 588 Ta Prong Road Mahachai Muang Samutsakhon 74000 Thailand Ph 66 34 411 919 Fax 66 34 422 919 e mail...

Page 59: ...59 VHF 7200 US and 7200 EU Operation Manual NAVMAN ...

Page 60: ...0560 Lon 174 44 535 E Lat 36 48 404 S NAVMAN Designed in New Zealand Made in China MN00249A VHF 7200 US and 7200 EU ...

Reviews: