15
NOTE:
PAUSE FOR A MOMENT - Using the PAUSE key on the cassette deck
instead of the
STOP/EJ.keytomomentarilyinterruptrecordinggivesyouamuchclearrecording.
Radio Recording Tips
To temporarily pause the recording, press PAUSE key on the cassette deck.
Press PAUSE key again to resume recording.
CD/MP3/USB Recording
A. Install a blank tape into cassette compartment.
B. Press the STANDBY/FUNCTION button on unit or the FUNCTION key on
remote to CD or USB mode. Load a disc into the disc compartment or
insert a USB bar into the USB slot, start playback by pressing the CD
PLAY/PAUSE/PAIR button.
C. Press the RECORD BUTTON and PLAY BUTTON simultaneously to start
recording. Press the STOP/EJ BUTTON lightly to end recording, or the
unit will stop recording automatically while the tape reaches its end.
D. To listen to the recording, press FUNCTION button to select “TAP” playing
mode, then start tape playback.
USING THE CD/MP3
Discs for Playback
This system can playback all digital audio CD, MP3 finalized digital audio CD-
Recordable (CD-R) discs, finalized digital audio CD-Rewritable (CD-RW) discs
and CD-DA format digital audio CD/CD-R/CD-RW discs.
Loading a Disc
1. Press the STANDBY/FUNCTION button on unit or the FUNCTION key
on remote to CD mode.
2. Open the CD door. “
OP
” will be shown on the display.
3. Place an audio CD/MP3 into the tray with the label side facing up.
4. Close the CD door. The total number of tracks and the disc type will
appear on the display after several seconds.
5. To remove the CD, press CD door PUSH OPEN/CLOSE to open CD
compartment lid, grasp the CD by its edges, and carefully take it out.
Note:
To ensure good system performance, wait until the disc tray completely reads
the disc before proceeding.
If no disc loaded into the compartment or the disc is place upside down or
unreadable, the display will show “
NO”
.
Playing a Disc
1. The playback starts from track 1 automatically when reading the disc.
2. To pause playback, press PLAY/PAUSE/PAIR button on unit or on
remote. The current playing track no. will flash on the display.
Summary of Contents for NPB-273
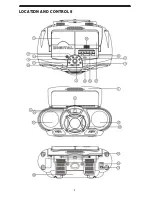
Page 9: ...9 LOCATION AND CONTROLS ...
Page 20: ......
Page 21: ......
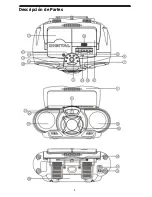
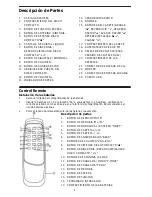
Page 29: ...8 Descripción de Partes ...


