background image

Any problems or questions call Regency Office Furniture at 1-866-816-9822

800-558-1010

www.NBF.com

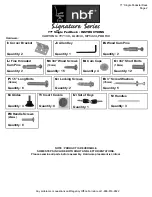
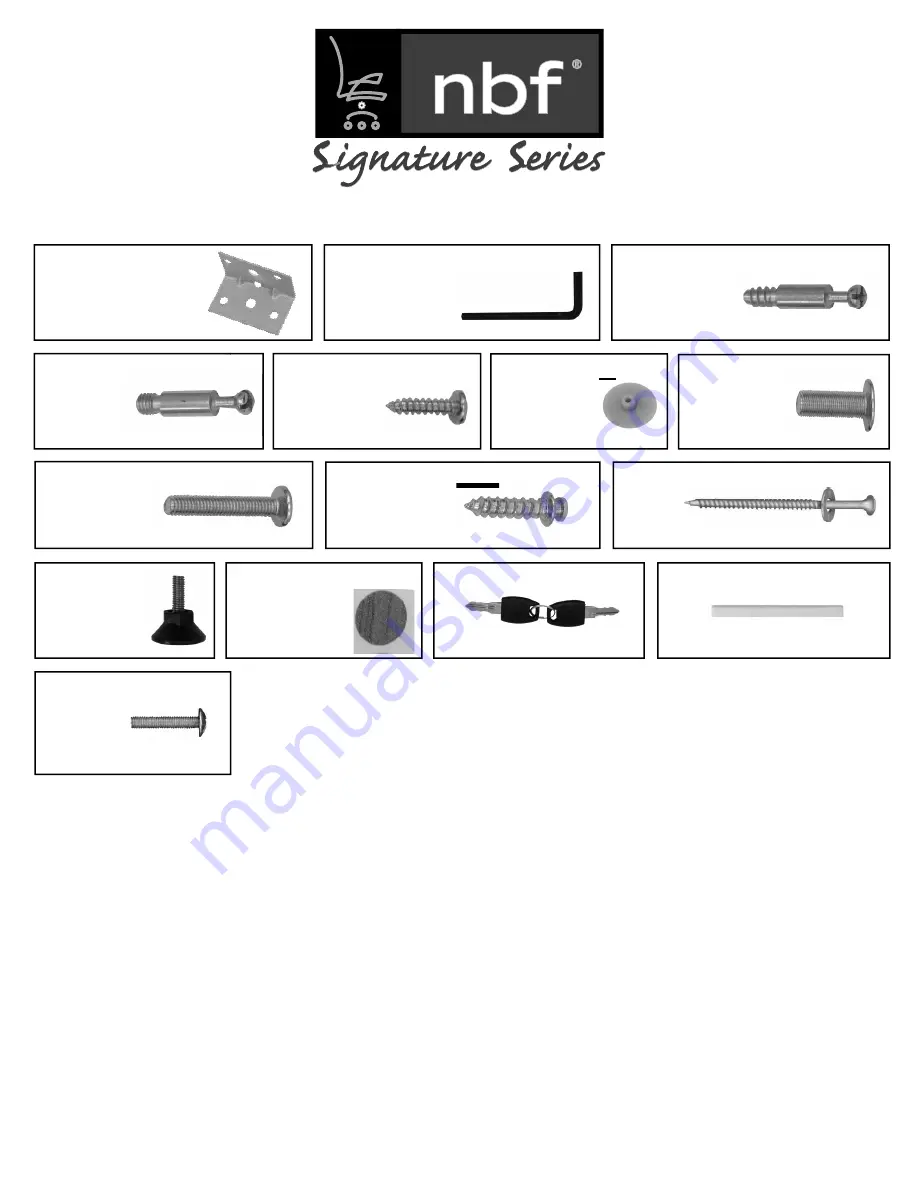
Hardware :

I: 

Corner Bracket

Quantity: 2

J: 

Allen Key

Quantity: 1

K: 

Wood Cam Pins

Quantity: 2

L: 

Fine threaded 

Cam Pins

Quantity: 2

M: 

3/4” Wood Screws

(19mm)

Quantity: 15

O: 

3/4” Short Bolts 

(19mm)

Quantity: 12

P: 

1.5” 

Long Bolts 

(38mm)

Quantity: 6

S: 

Glides

Quantity: 4

T: 

Insert Covers

Quantity: 8

Q: 

Locking Screws

Quantity: 2

N: 

Cam Caps

Quantity: 4

R: 

3” 

Screw/Washers

(76mm)

Quantity: 5

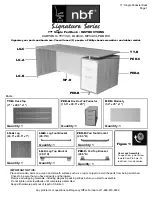
71” Single Ped Desk • INSTRUCTIONS

CARTONS: TT7130, LG2830, MP5424, PBBF30

U: 

Set of Keys

Quantity: 1

NOTE : PRODUCT IS REVERSIBLE.  

SOME STEPS INCLUDE BOTH RIGHT AND LEFT ORIENTATIONS.

Please examine all parts before assembly.  Hardware placement is critical. 

V: 

Handles

Quantity: 3

W: 

Handle Screws

(25mm)

Quantity: 6

71” Single Pedestal Desk

Page 2

Summary of Contents for TT7130

Page 1: ... a rug or carpet to avoid the parts from being scratched Check to be sure that you have all parts and hardware Remove all wrapping materials including staples packing straps before you start to assemble Do not tighten all screws bolts until completely assembled Keep all hardware parts out of reach of children Any problems or questions call Regency Office Furniture at 1 866 816 9822 15 5 x 29 5 x 2...

Page 2: ...Bolts 38mm Quantity 6 S Glides Quantity 4 T Insert Covers Quantity 8 Q Locking Screws Quantity 2 Locking Screws N Cam Caps Quantity 4 Cam Caps R 3 Screw Washers 76mm Quantity 5 71 Single Ped Desk INSTRUCTIONS CARTONS TT7130 LG2830 MP5424 PBBF30 U Set of Keys Quantity 1 NOTE PRODUCT IS REVERSIBLE SOME STEPS INCLUDE BOTH RIGHT AND LEFT ORIENTATIONS Please examine all parts before assembly Hardware p...

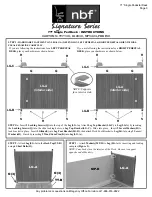
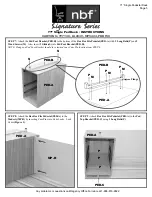
Page 3: ...ing holes on Leg Top Bracket LG C Slide into place Insert 2 Screw Washers R to lock bracket in place Insert 2 Glides S into Leg Foot Bracket LG B then attach Desk Foot Bracket to Leg LG A using 3 Screw Washers R Finish by inserting 2 Wood Cam Pins K into Leg LG A STEP 2 Attach Leg LG A to the Desk Top TT B using 6 Short Bolts O 6 Short Bolts O TT B LG A STEP 3 Attach Modesty MP D to Leg LG A by in...

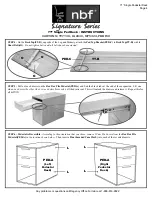
Page 4: ...tal PED A in the location shown below Then insert a Fine threaded Cam Pin L into each of the revealed inserts L L PED A PED A L L Left Pedestal Desk Right Pedestal Desk STEP 5 Pull out each drawer on the Box Box File Pedestal PED A and find the black tabs at the end of the suspension Lift one side up and press the other side down and simultaneously pull the drawer out This will unlock the drawer a...

Page 5: ...Cam Pins into Cam Locks Lock Cams Figure 1 STEP 7 Attach the Ped Foot Bracket PED B to the bottom of the Box Box File Pedestal PED A with 3 Long Bolts P and 3 Wood Screws M Also insert 2 Glides S into Ped Foot Bracket PED B NOTE Flange on Ped Foot Bracket should face toward your Cam Pin location from STEP 6 P P P M M M PED B Flange S S 71 Single Ped Desk INSTRUCTIONS CARTONS TT7130 LG2830 MP5424 P...

Page 6: ...Modesty MP D with Cam Caps N STEP 11B If the cam pin inserts are not being utilized for a return connection cover all cam pin inserts on the Leg LG A with Insert Covers T STEP 10 For additional stability attach Corner Brackets I to Box Box File Pedestal PED A and the Modesty MP D with 6 Wood Screws M per Corner Bracket Repeat this step for the Leg LG A and the Modesty MP D connection 71 Single Ped...

Reviews: