background image

Model 6712 Point-of-Sale Interface Scale User’s Manual

16


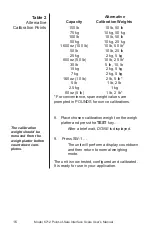
Alternative

Capacity

Calibration Weights

150 lb

10 lb, 50 lb

75 kg

10 kg, 50 kg

100 lb

10 lb, 50 lb

50 kg

10 kg, 25 kg

1600 oz (100 lb)

10 lb, 50 lb*

50 lb

10 lb, 25 lb

25 kg

2 kg, 5 kg

800 oz (50 lb)

10 lb, 25 lb*

30 lb

5 lb, 10, lb

15 kg

2 kg, 5 kg

7 kg

2 kg, 5 kg

160 oz (10 lb)

2 lb, 5 lb*

5 lb

1 lb, 2 lb

2.5 kg

1 kg

80 oz (5 lb)

1 lb, 2 lb*

* For convenience, span weight values are
prompted in POUNDS for ounce calibrations.

8. Place chosen calibration weight on the weigh

platter and press the 

TEST 

key…

After a brief wait, 

DONE 

is displayed.

9.  Press SW-1…

The unit will perform a display countdown
and then return to normal weighing
mode.

The unit is now tested, configured and calibrated.
It is ready for use in your application.

Table 2

Alternative

Calibration Points

The calibration
weight should be
removed from the
weigh platter before
countdown com-
pletes.

Summary of Contents for 6712

Page 1: ...User s Manual Model 6712 Point of Sale Interface Scale...

Page 2: ...Manual 2 CAUTION Risk of electrical shock Do not remove cover No user serviceable parts inside Refer servicing to qualified service personnel Weigh Tronix reserves the right to change specifications...

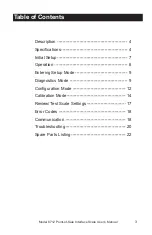
Page 3: ...le of Contents Description 4 Specifications 4 Initial Setup 7 Operation 8 Entering Setup Mode 9 Diagnostics Mode 9 Configuration Mode 12 Calibration Mode 14 Review Test Scale Settings 17 Error Codes 1...

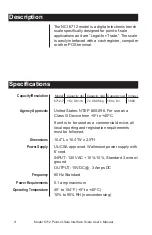
Page 4: ...5 H UL CSA approved Wallmount power supply with 6 cord INPUT 120 VAC 10 15 Standard 3 wire w ground OUTPUT 15VDC 3 Amps DC 60 Hz Standard 0 1 amp maximum 40 to 104 F 5 to 40 C 10 to 90 RH noncondensin...

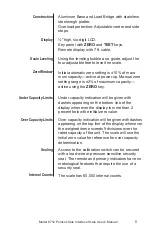
Page 5: ...apacity indication will be given with dashes appearing on the bottom line of the display whenever the display is more than 2 percent below the initial zero value Over capacity indication will be given...

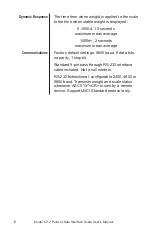
Page 6: ...1 5 seconds maximum mean average 1000d 2 seconds maximum mean average Factory default settings 9600 baud 8 data bits no parity 1 stop bit Standard 9 pin pass through RS 232 interface cable included N...

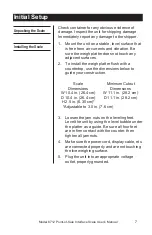
Page 7: ...o guide your construction Scale Minimum Cutout Dimensions Dimensions W 10 4 in 26 4 cm W 11 1 in 28 2 cm D 10 4 in 26 4 cm D 11 1 in 28 2 cm H 2 5 in 6 35 cm Adjustable to 3 0 in 7 6 cm 3 Loosen the j...

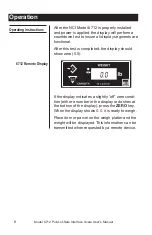
Page 8: ...ompleted the display should show zero 0 0 If the display indicates a slightly off zero condi tion either a number in the display or dashes at the bottom of the display press the ZERO key When the disp...

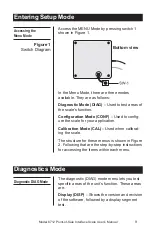
Page 9: ...e scale for your application Calibration Mode CAL Used when calibrat ing the scale The structure for these menus is shown in Figure 2 Following that are the step by step instructions for accessing the...

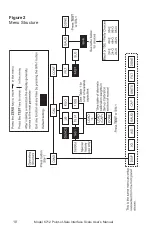
Page 10: ...Model 6712 Point of Sale Interface Scale User s Manual 10 Figure 2 Menu Structure...

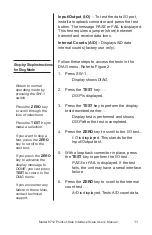
Page 11: ...4 Press the ZERO key to scroll to the I O test I O is displayed This stands for the Input Output test 5 With a loopback connector in place press the TEST key to perform the I O test PASS or FAIL is di...

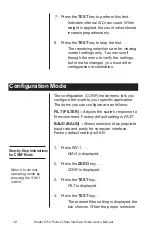
Page 12: ...rate and parity for computer interface Factory default setting is 96 N 1 Press SW 1 DIAG is displayed 2 Press the ZERO key CONF is displayed 3 Press the TEST key FILT is displayed 4 Press the TEST ke...

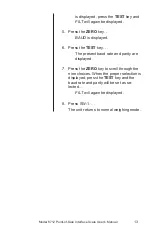
Page 13: ...key BAUD is displayed 6 Press the TEST key The present baud rate and parity are displayed 7 Press the ZERO key to scroll through the nine choices When the proper selection is displayed press the TEST...

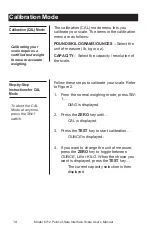
Page 14: ...enu are as follows POUNDS KILOGRAMS OUNCES Select the unit of measure lb kg or oz CAPACITY Select the capacity resolution of the scale Follow these steps to calibrate your scale Refer to Figure 2 1 Fr...

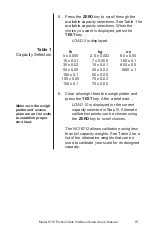
Page 15: ...0 1 50 x 0 05 150 x 0 05 75 x 0 02 150 x 0 1 75 x 0 05 6 Clear all weight from the weigh platter and press the TEST key After a brief wait LOAD 10 is displayed or the current capacity selected in Ste...

Page 16: ...2 5 kg 1 kg 80 oz 5 lb 1 lb 2 lb For convenience span weight values are prompted in POUNDS for ounce calibrations 8 Place chosen calibration weight on the weigh platter and press the TEST key After a...

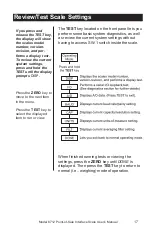
Page 17: ...o move to the next item in the menu Press the TEST key to select the displayed item to run or view When finished running tests or viewing the settings press the ZERO key until DONE is displayed Then p...

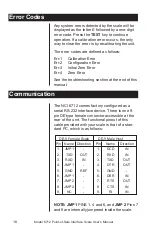
Page 18: ...e displayed as the letter E followed by a one digit error code Press the TEST key to continue operation If a calibration error occurs the only way to clear the error is by recalibrating the unit The e...

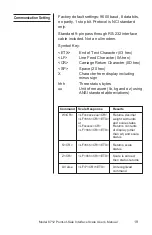
Page 19: ...aracter 0D hex SP Space 20 hex X Character from display including minus sign hhh Three status bytes uu Unit of measure lb kg and oz using ANSI standard abbreviations Communication Setting Command Scal...

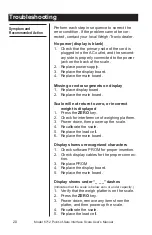
Page 20: ...ard Scale will not return to zero or incorrect weight is displayed 1 Press the ZERO key 2 Check for interference of weighing platform 3 Power down then power up the scale 4 Recalibrate the scale 5 Rep...

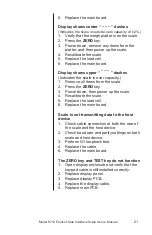
Page 21: ...1 Remove all items from the scale 2 Press the ZERO key 3 Power down then power up the scale 4 Recalibrate the scale 5 Replace the load cell 6 Replace the main board Scale is not transmitting data to...

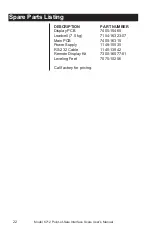
Page 22: ...l 22 Spare Parts Listing DESCRIPTION PART NUMBER Display PCB 7405 15465 Loadcell 7 5 kg 7154 16323 07 Main PCB 7405 16315 Power Supply 1148 15535 RS 232 Cable 1140 13842 Remote Display Kit 7300 16577...

Page 23: ...Model 6712 Point of Sale Interface Scale User s Manual 23...

Page 24: ...Avery Weigh Tronix 1000 Armstrong Dr Fairmont MN 56031 USA Telephone 507 238 4461 Facsimile 507 238 4195 e mail service wt nci com www wt nci com...

Reviews: