7197 Series II Service Manual
Chapter 3: Diagnostics
June
2011
33
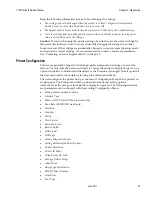
Keep the following information in mind when changing the settings:
The settings can only be changed when the printer is in level 1 diagnostics (setup mode):
Switch 1 must be set to On and Switch 2 must be set to Off.
The default options are set at the factory and are stored in the history non volatile memory.
Once the settings have been changed and stored in the non volatile memory, the diagnostic
setup is exited which saves the settings.
Caution:
If you are changing the printer settings, be sure they are the correct settings for
that particular function or test to avoid accidentally changing the settings for another
function or test. If the settings are accidentally changed you must reenter the setup mode
and reenter the correct settings. If you need assistance, contact a service representative.
See “Contacting a Service Representative” in chapter 3.
Printer Configuration
Printers are generally shipped with all appropriate configuration settings pre-set at the
factory. The only time the user should need to change the printer configuration is if a new
option is installed, communication baud rate or the firmware is changed. It is also possible
the user may need to run certain tests using the Configuration Menu.
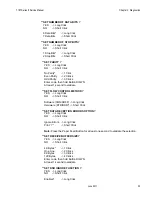
The user configures the printer using a convenient Configuration Menu that is printed on
receipt paper. The Configuration Menu prints instructions and setting options
interactively as the user goes through the configuration process. The following functions
and parameters can be changed with the scrolling Configuration Menu:
Setting Communication Interface
Interface Type
Ethernet RTC Protocol(Ethernet model only)
Baud Rate (RS232/USB model only)
Data Bits
Stop Bits
Parity
Flow Control
Reception Errors
Receive Buffer
DSR Signal
USB Type
Setting Diagnostic Modes
Setting Emulation/Software Options
Printer Emulation
Printer ID Mode
Default Lines Per Inch
Carriage Return Usage
Asian Mode
Receipt Synchronization
PDF417 Max Columns
Auto Reset
Font Type
Summary of Contents for 7197 II SERIES
Page 5: ...v EMC 100 240 1 5 0 8 50 60 24 2 3 3 125 NCR NCR EMC 360 NCR EMC A A...
Page 7: ...vii A NCR NCR NCR A...
Page 35: ...7197 Series II Owner s Manual Chapter 2 Setting Up and Using the Printer 21 September 2011...
Page 37: ...7197 Series II Owner s Manual Chapter 2 Setting Up and Using the Printer 23 September 2011...
Page 38: ...7197 Series II Owner s Manual Chapter 2 Setting Up and Using the Printer 24 September 2011...
Page 253: ...7197 Series II Owner s Guide Appendix B Print Characteristics 228 Februrary 2012 Code Page 932...
Page 272: ...7197 Series II Owner s Guide Appendix B Print Characteristics 247 Februrary 2012...


