Chapter 2: Hardware Installation
2-17
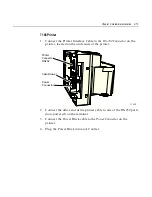
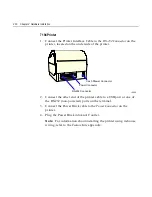
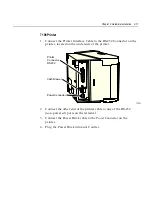
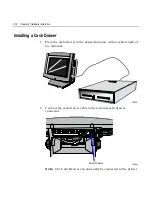
7196 Printer
1.
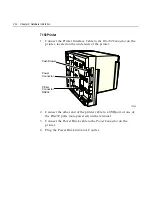
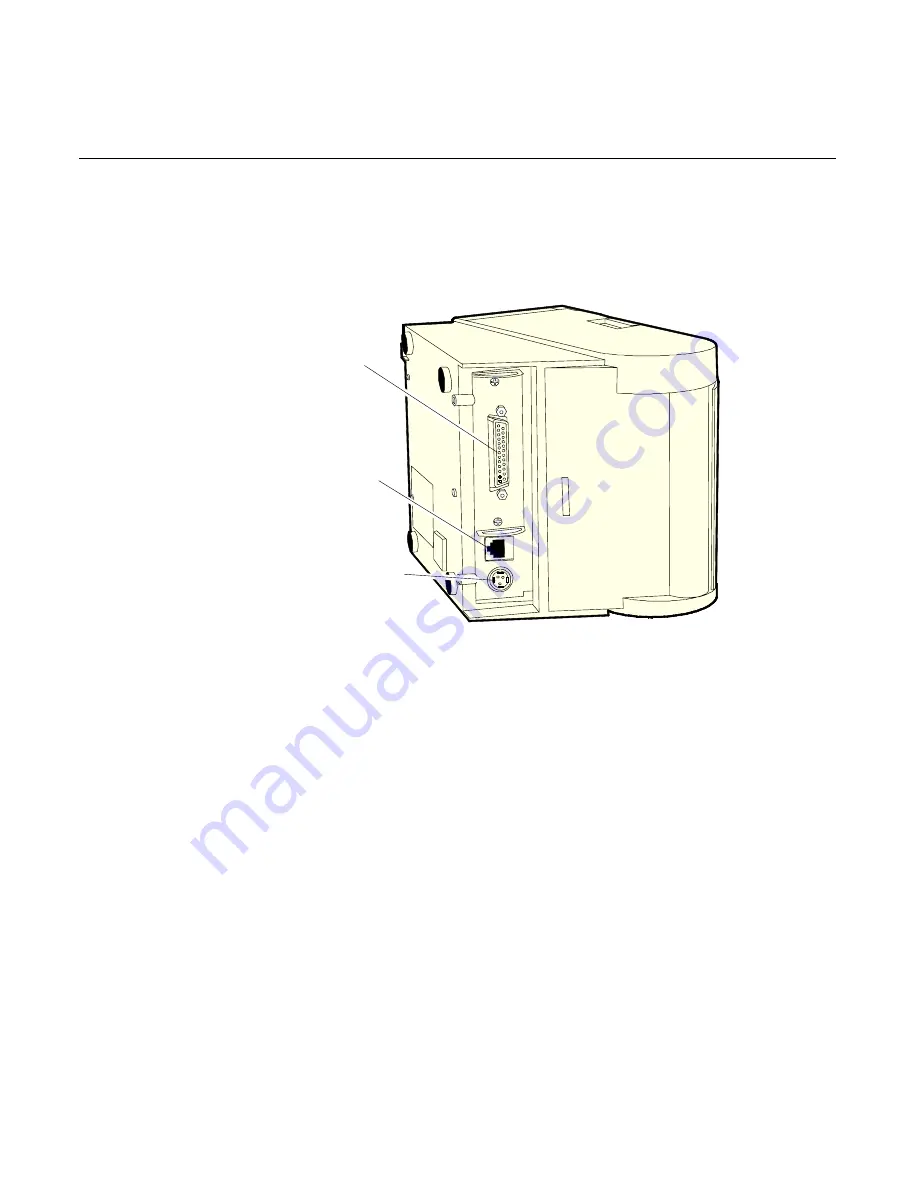
Connect the Printer Interface Cable to the RS-232 Connector on the
printer, located on the underside of the printer.
Printer
Connector
RS232
Cash Drawer
Power Connector
17331
2
Connect the other end of the printer cable to one of the RS-232
(non-powered) ports on the terminal.
3. Connect the Power Brick cable to the Power Connector on the
printer.
4. Plug the Power Brick into an AC outlet.
Summary of Contents for 7401 Web Kiosk
Page 1: ...NCR 7401 Web Kiosk Release 2 3 Hardware User s Guide 16436 NCR B005 0000 1254 Issue D...
Page 80: ...Chapter 2 Hardware Installation 2 21 2 Remove the Core Module from the Fixed Angle Mount 16397...
Page 183: ...3 74 Chapter 3 Setup...
Page 263: ...Appendix B Feature Kits B 55 11 Route the cables in the Wall Bracket as shown below 17359...
Page 302: ...B 94 Appendix B Feature Kits 17729 Pole Mount Wall Mount...
Page 326: ...B 118 Appendix B Feature Kits 2 Insert the end of the paper into the Paper Guide 16731...
Page 328: ...B 120 Appendix B Feature Kits 4 Remove the cut paper waste from the Presenter 16965...
Page 334: ...B 126 Appendix B Feature Kits 19050...
Page 367: ...Index 159...
Page 368: ...B005 0000 1254 September 2001 Printed on recycled paper...

