2-18 Chapter 2: Hardware Installation
1.
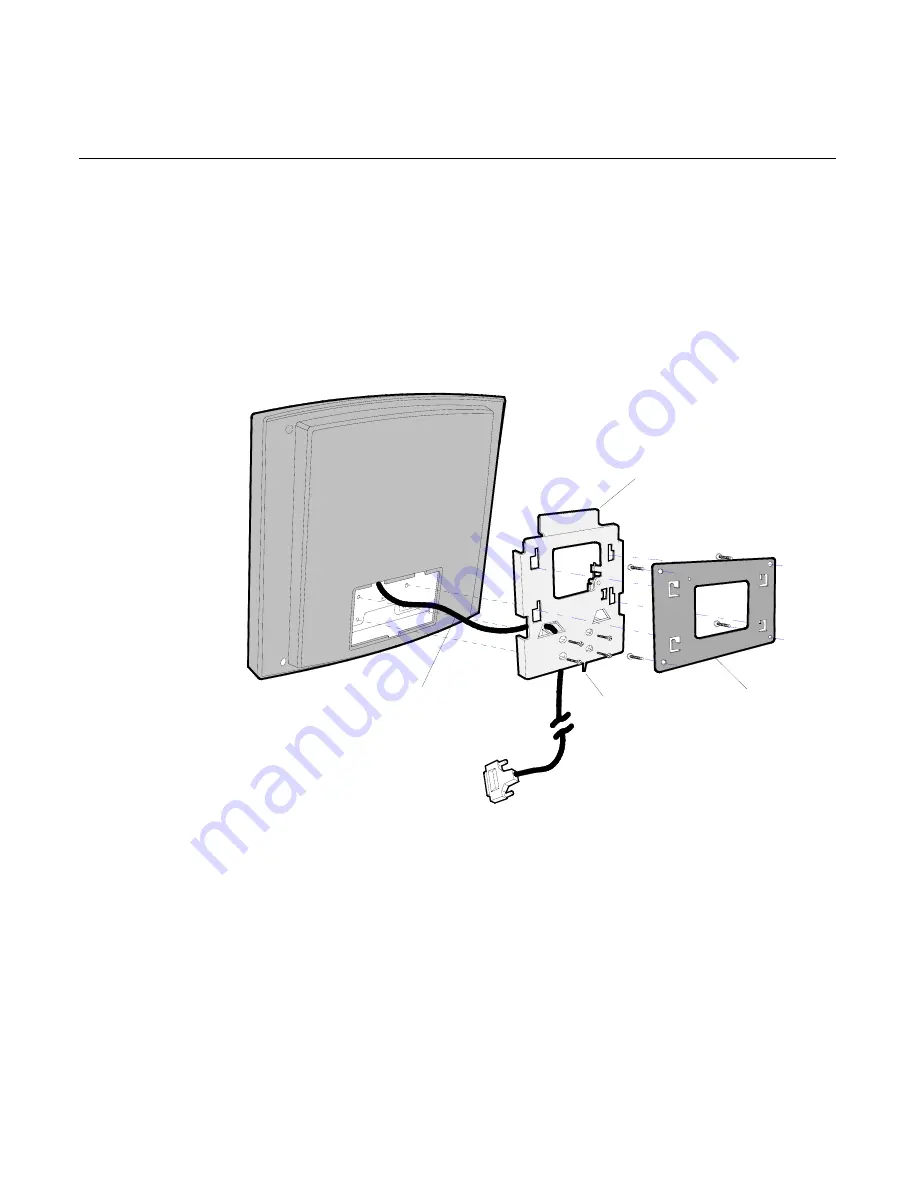
Secure the Wall Plate to the wall with lag screws (4) into the studs
or with hardware of similar strength. The recommended viewing
height for the terminal is 1.2 m (48") from the floor to the center of
the screen.
Note:
If routing cable through the wall drill a hole in the wall for the
cable.
18826
Wall Plate
Wall Mount Adapter Plate
Cable Routing
Release Lever
2.
Install the Wall Mounting Adapter Plate to the back of the Operator
Display with screws (4).
3.
Install the Operator Display to the Wall Plate. The bottom of the
Wall Mounting Adapter Plate has a Locking Tab that mates to
Locking Tab Insert on the Wall Plate. Push Wall Plate down until
Locking Tab locks into the insert on the Wall Plate.
4.
Latch the Release Lever.
Summary of Contents for 7460
Page 1: ...NCR 7460 Retail Terminal Release 1 2 Hardware User s Guide B005 0000 1280 Issue D...
Page 14: ...xii...
Page 40: ...1 26 Chapter 1 Product Overview...
Page 116: ...3 48 Chapter 3 BIOS Setup...
Page 138: ...5 8 Chapter 5 BIOS Updating Procedures...
Page 142: ...6 4 Chapter 6 NCR 7460 2x20 Customer Display Character Map...
Page 144: ......
Page 146: ...A 2 Appendix A Cables...
Page 150: ......
Page 153: ......


