background image

4

R6-Japan Camera

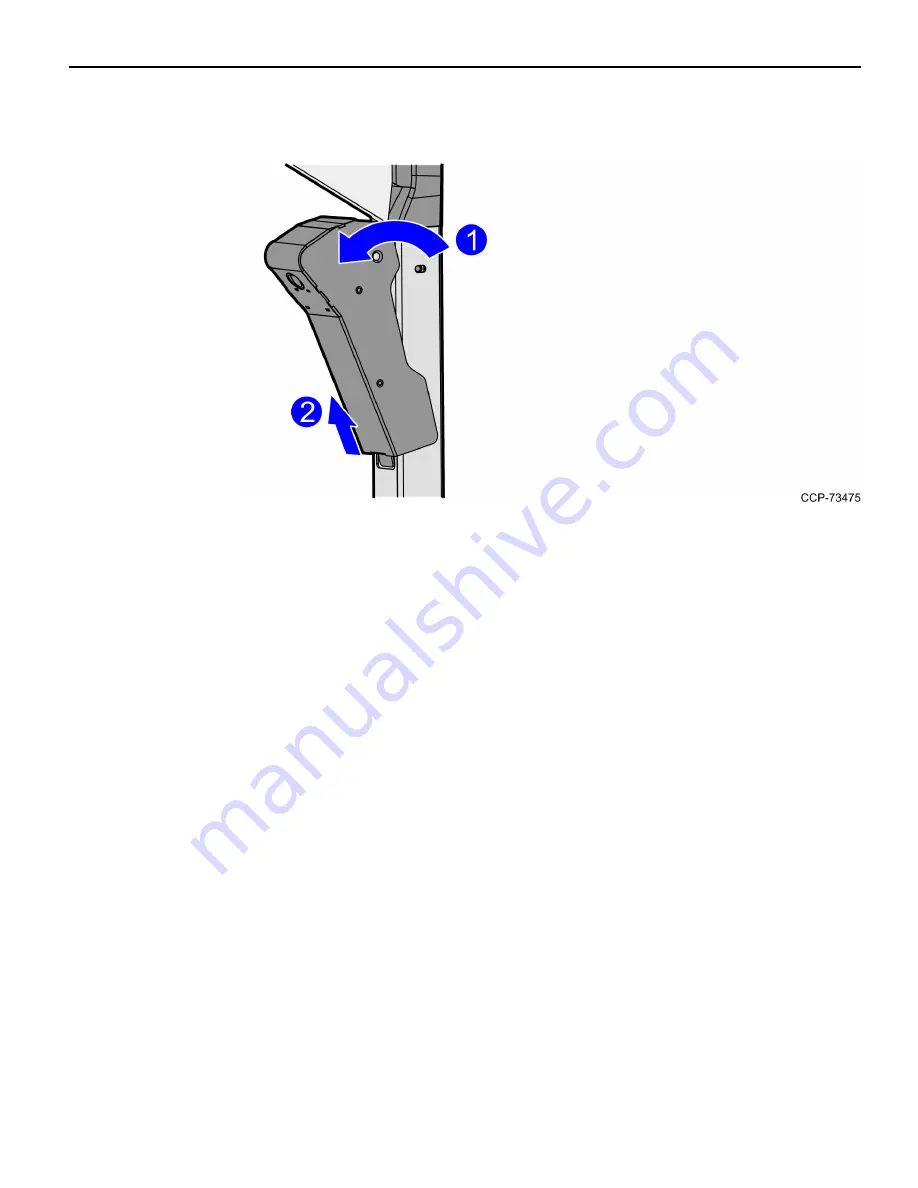
4. Disengage the front enclosure by sliding it up and out of the Tri-Light pole, as

shown in the image below.

5. Disconnect the cable attached to the camera.

Summary of Contents for 7707-K201

Page 1: ...Kit Instructions R6 Japan Camera 7707 K201 Issue A...

Page 2: ...the policy of NCR Corporation NCR to improve products as new technology components software and firmware become available NCR therefore reserves the right to change specifications without prior notice...

Page 3: ...i Revision Record Issue Date Remarks A Mar 2020 First Issue...

Page 4: ...umber Description 497 0527875 7707 K201 Camera Kit D Vitec 497 0521398 Bracket Camera Front 7707 795 0267702 Enclosure Camera Front 7707 Mid Silver 795 0261302 Enclosure Camera Rear 7707 Mid Silver 49...

Page 5: ...ormation refer to Routing Camera Cable on page 6 3 Install the R6 Japan Camera For more information refer to Installing Camera on page 10 4 Turn on the R6 Japan unit The ADD CADD window is displayed s...

Page 6: ...To remove the camera follow these steps 1 Turn off the SelfServ Checkout unit 2 Remove two 2 screws securing the camera enclosures to the Tri Light pole 3 Disengage the rear enclosure by sliding it u...

Page 7: ...4 R6 Japan Camera 4 Disengage the front enclosure by sliding it up and out of the Tri Light pole as shown in the image below 5 Disconnect the cable attached to the camera...

Page 8: ...lowly remove the Blanking Plate by starting from the sides until the plate is completely detached Caution Use the pry tool with caution to avoid scratches on the paint 2 Using a cloth or a cotton rag...

Page 9: ...use they go to the same destination 1 Remove the back panel from the Tower frame by removing two 2 screws 2 Connect the camera cable to the KIO Board USB Port H 3 Route the cable down the lower cabine...

Page 10: ...R6 Japan Camera 7...

Page 11: ...t the rear side of the Upper Enclosure as shown in the image below Ensure that there is at least 85 cm extra cable length from the P loop 5 Insert the cable through the opening on the side of the pole...

Page 12: ...R6 Japan Camera 9 6 Connect the camera cable to the camera unit and then secure cable using a cable tie as shown in the image below...

Page 13: ...front enclosure hook to the corresponding slot on the Tri Light pole b Lock the front enclosure by pushing it to the Tri Light pole 2 Slide the rear enclosure hooks between the front enclosure and Tr...

Page 14: ...R6 Japan Camera 11 3 Secure the enclosures to the Tri Light pole using two 2 screws...

Reviews: