


English
English-19
OSM LOCK OUT
This control completely locks out access to all OSM control functions. When attempting to
activate OSM controls while in the Lock Out mode, a screen will appear indicating the
OSM controls are locked out.
There are three types of OSM LOCK OUT:
OSM LOCK OUT with BRIGHTNESS and CONTRAST control: To activate the OSM Lock
Out function, press SELECT, then “+” key and hold down simultaneously. To deactivate
the OSM Lock Out, press SELECT, then “+” key and hold down simultaneously while in
the OSM menu. BRIGHTNESS and CONTRAST can be adjusted while in the lock out mode.
OSM LOCK OUT with no control: To activate the OSM Lock Out function, press SELECT,
then “>” key and hold down simultaneously. To deactivate the OSM Lock Out, press
SELECT, then “>” key and hold down simultaneously while in the OSM menu. No controls
can be adjusted while in the lock out mode.
OSM LOCK OUT with BRIGHTNESS (only) control: To activate the OSM LockOut function,
press SELECT, then “–” and “<” keys and hold down simultaneously. To deactivate the OSM
Lock Out, press SELECT, then “+” key and hold down simultaneously while in the OSM
menu. BRIGHTNESS can be adjusted while in the lock out mode.
OSM Rotation
To switch OSM between Landscape and Portrait modes. Press “+” or “-” to select.
Resolution Notifier
The optimal resolution is 1280 x 1024. If ON is selected, a message will appear on the
screen after 30 seconds, notifying you that the resolution is not set to 1280 x 1024.
Press “+” or “-” to select.
LED Brightness
Controls the brightness of the LED on the monitor, “OFF”, “MID” and “MAX”.
Factory Preset
Selecting Factory Preset allows you to reset all OSM control settings (BRIGHTNESS,
CONTRAST, BLACK LEVEL, AUTO BRIGHTNESS, AUTO ADJUST LEVEL, IMAGE
CONTROLS, GAMMA SELECTION, COLOUR CONTROL SYSTEM, SHARPNESS,
EXPANSION MODE, OFF TIMER, OSM POSITION, OSM TURN OFF, RAPIDMOTION,
TILE COMP, SYNC THRESHOLD, DISPLAY MODE, TILE-MATRIX) back to the factory
settings. Highlighting the control to be reset and pressing the RESET button can reset
individual settings. Press “SELECT” to reset.
Tag8
RapidMotion
This mode can be used when viewing moving video (such as DVD or MPEG) on the
monitor. For best results, RapidMotion should be used while in native resolution
(1280 x 1024).
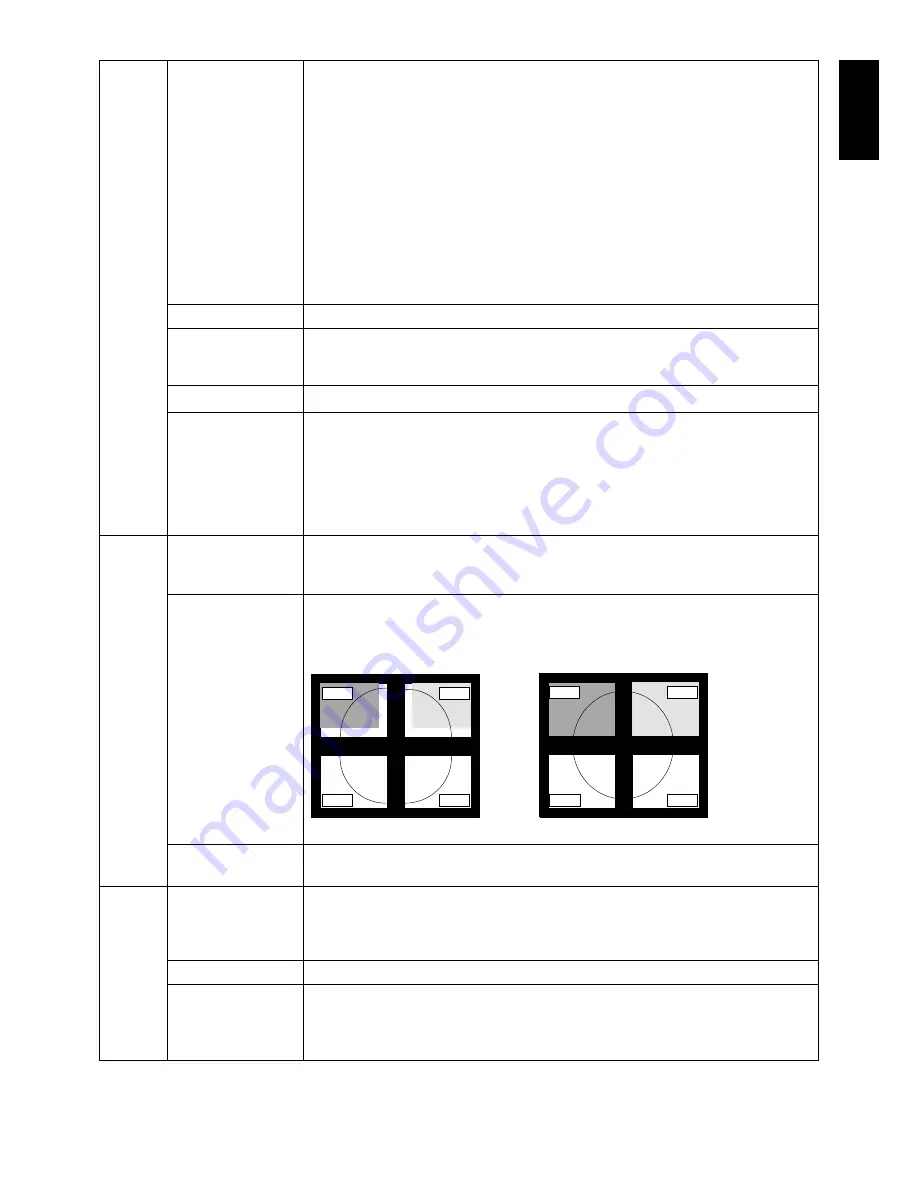
Tile Comp
If ON is selected, some picture contents are located within the monitor frame to maintain
picture linearity as much as possible. Works in tandem with Tile Matrix (Tag9) to
compensate for the width of the tile bezels in order to accurately display the image.
Tile Comp with 4 monitors (black area shows monitor frames):
Tile Comp OFF
Tile Comp ON
Sync Threshold
Adjusts the slice level of a synchronization signal manually.
(Analog input only)
Press “SELECT” to move the adjustment mode, and press “+” or “-” to adjust.
Tag9
Display Mode
Provides information about the current display resolution and technical data, including the
preset timing currently being used and the horizontal and vertical frequencies. Increases
or decreases the current resolution. Press “SELECT” to move the adjustment mode, and
press “+” or “-” to adjust.
Monitor Info.
Indicates the model and serial numbers of your monitor.
Tile Matrix
Tile Matrix demonstrates multiple screens. Press “SELECT” to move adjustment menu.
This feature provides a single large screen using 4, 9, 16 and 25 monitors. This requires
you to feed the PC output into each of the monitors through a splitter. Specify the number
of monitors and determine the monitor numbers by referring to the figures in menu.
monitor1
monitor2
monitor3
monitor4
monitor1
monitor2
monitor3
monitor4


