background image

English-5

English

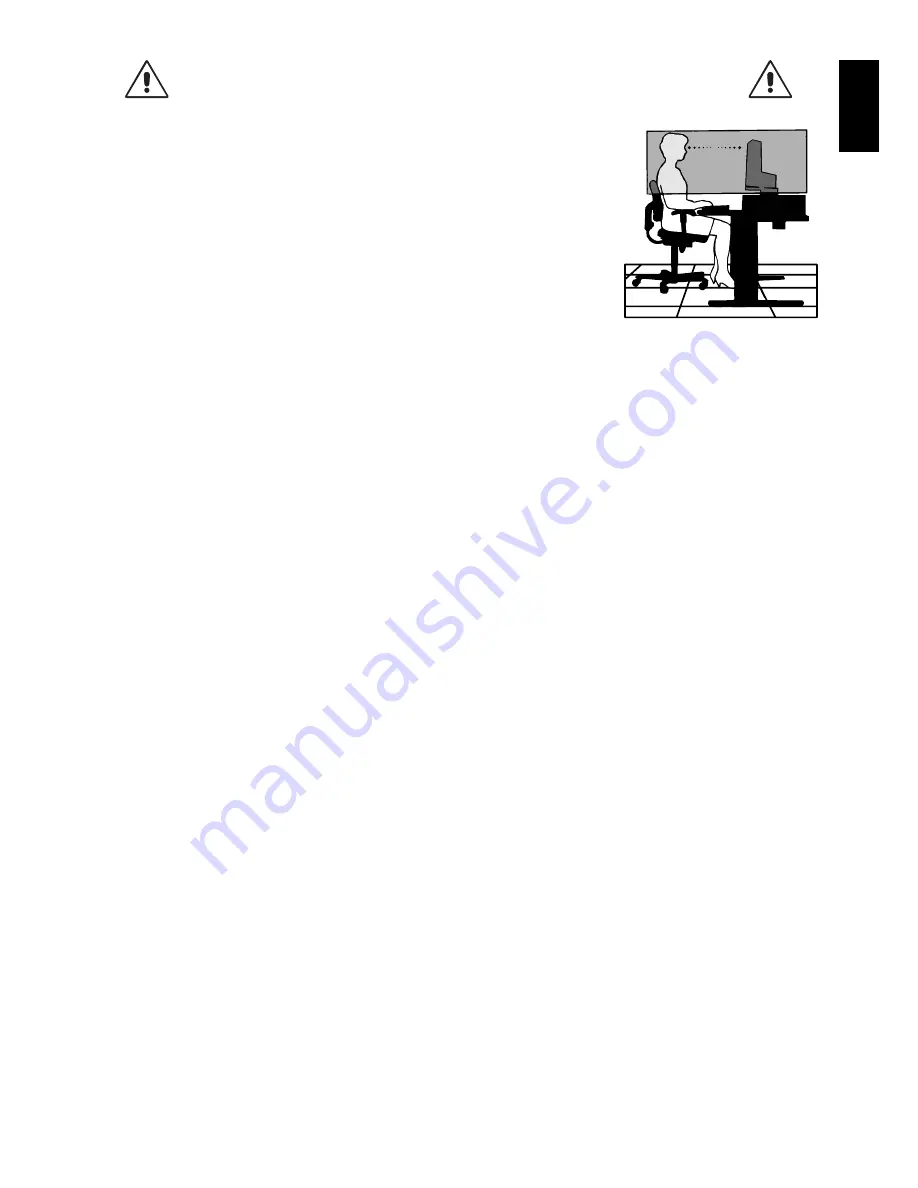
CORRECT PLACEMENT AND ADJUSTMENT OF THE MONITOR CAN

REDUCE EYE, SHOULDER AND NECK FATIGUE. CHECK THE

FOLLOWING WHEN YOU POSITION THE MONITOR:

• 

For optimum performance, allow 20 minutes for the display to warm up.

• 

Adjust the monitor height so that the top of the screen is at or slightly below eye level. 
Your eyes should look slightly downward when viewing the middle of the screen.

• 

Position your monitor no closer than 40 cm (15.75 inches) and no further away than 
70 cm (27.56 inches) from your eyes. The optimal distance is 50 cm (19.69 inches).

• 

Rest your eyes periodically by focusing on an object at least 20 feet away. Blink often.

• 

Position the monitor at a 90° angle to windows and other light sources to minimize glare 
and refl ections. Adjust the monitor tilt so that ceiling lights do not refl ect on your screen.

• 

If refl ected light makes it hard for you to see your screen, use an anti-glare fi lter.

• 

Clean the LCD monitor surface with a lint-free, non-abrasive cloth. Avoid using any 
cleaning solution or glass cleaner!

• 

Adjust the monitor’s brightness and contrast controls to enhance readability.

• 

Use a document holder placed close to the screen.

• 

Position whatever you are looking at most of the time (the screen or reference material) directly in front of you to minimize 
turning your head while you are typing.

• 

Avoid displaying fi xed patterns on the monitor for long periods of time to avoid image persistence (after-image effects).

• 

Get regular eye checkups.

Ergonomics

To realize the maximum ergonomics benefi ts, we recommend the following:

• 

To avoid eye fatigue, adjust the brightness to a moderate setting. Place a sheet of white paper next to the LCD screen for 
luminance reference.

• 

Do not position the Contrast control to its maximum setting.

• 

Use the preset Size and Position controls with standard signals.

• 

Use the preset Color Setting.

• 

Use non-interlaced signals with a vertical refresh rate of more than 60 Hz.

• 

Do not use primary color blue on a dark background, as it is diffi cult to see and may produce eye fatigue due to insuffi cient 
contrast.

Cleaning the LCD Panel

• 

When the LCD is dusty, please gently wipe with a soft cloth.

• 

Please do not rub the LCD panel with hard or coarse material.

• 

Please do not apply pressure to the LCD surface.

• 

Please do not use OA cleaner as it will cause deterioration or discoloration on the LCD surface.

Cleaning the Cabinet

• 

Unplug the power supply

• 

Gently wipe the cabinet with a soft cloth

• 

To clean the cabinet, dampen the cloth with a neutral detergent and water, wipe the cabinet and follow with a dry cloth.

NOTE: 

Many plastics are used on the surface of the cabinet. DO NOT clean with benzene, thinner, alkaline detergent, 
alcoholic system detergent, glass cleaner, wax, polish cleaner, soap powder, or insecticide. Do not touch rubber or 
vinyl to the cabinet for a long time. These types of fl uids and fabrics can cause the paint to deteriorate, crack or peel.

Summary of Contents for AS241W-BK

Page 1: ...AccuSync AS241W User s Manual...

Page 2: ...n English 2 Recommended use English 4 Contents English 6 Quick Start English 7 Controls English 9 Specifications English 12 Features English 13 Troubleshooting English 14 TCO Displays 5 English 15 Man...

Page 3: ...ALSO DO NOT USE THIS UNIT S POLARIZED PLUG WITH AN EXTENSION CORD RECEPTACLE OR OTHER OUTLETS UNLESS THE PRONGS CAN BE FULLY INSERTED REFRAIN FROM OPENING THE CABINET AS THERE ARE HIGH VOLTAGE COMPONE...

Page 4: ...nst harmful interference in a residential installation This equipment generates uses and can radiate radio frequency energy and if not installed and used in accordance with the instructions may cause...

Page 5: ...ified in the FCC Rules The intended primary use of this product is as an Information Technical Equipment in an office or domestic environment The product is intended to be connected to a computer and...

Page 6: ...nitor from the wall outlet and move to a safe location then refer servicing to qualified service personnel under the following conditions If the monitor is used in this condition the monitor may cause...

Page 7: ...tterns on the monitor for long periods of time to avoid image persistence after image effects Get regular eye checkups Ergonomics To realize the maximum ergonomics benefits we recommend the following...

Page 8: ...in Stand neck Stand Base Power Cord 1 Setup Manual Remember to save your original box and packing material to transport or ship the monitor 1 Type and number of power cords included will depend on the...

Page 9: ...system Figure A 4 Figure A 1 Figure A 3 Macintosh Cable Adapter not included Figure A 2 Figure A 4 DisplayPort cable 3 Connect all cables to the appropriate connectors Figure C 1 NOTE Incorrect cable...

Page 10: ...e display mount To meet the safety requirements the monitor must be mounted to an arm that supports the weight of the monitor and be UL certified See page 12 for details Remove the stand base before m...

Page 11: ...o to Adjustment stage Cursor goes to left Cursor goes to right At OSD showing Adjustment stage Go to Icon selection stage Adjust value decrease or Cursor for adjust goes to left Adjust value increase...

Page 12: ...rols Vertical Image Position within the display area of the LCD H SIZE Analog input only Adjusts the horizontal size by increasing or decreasing this setting FINE Analog input only Improves focus clar...

Page 13: ...g the aspect ratio DDC CI Turns ON or OFF the two way communication and control of the monitor CARBON SAVING Display the estimated carbon saving information in kg The carbon footprint factor in the ca...

Page 14: ...t 60 Hz to 75 Hz 1440 x 900 1 at 60 Hz 1680 x 1050 1 at 60 Hz 1920 x 1080 at 60 Hz NEC DISPLAY SOLUTIONS cites recommended resolution for optimal display performance Active Display Area Landscape Hori...

Page 15: ...power saving methods that allow the monitor to shift to a lower power consumption level when on but not in use saving two thirds of your monitor energy costs reducing emissions and lowering the air co...

Page 16: ...idle or turning off the monitor when not in use Message OUT OF RANGE is displayed screen is either blank or shows rough images only Image is displayed only roughly pixels are missing and OSD warning O...

Page 17: ...standards at an impartial laboratory Electric and magnetic elds emissions as low as normal household background levels Low acoustic noise emissions Some of the Environmental features of the TCO Certi...

Page 18: ...pan or http www necdisplay com in USA Energy Saving This monitor features an advanced energy saving capability When a VESA Display Power Management Signalling DPMS Standard signal is sent to the monit...

Reviews: