

7-2
Troubleshooting
This chapter provides information to help isolate and repair notebook malfunctions at the field
level. The notebook has a built-in program that automatically checks its components when the
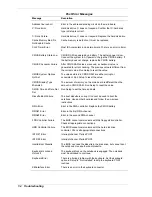
notebook is powered on. If there is a problem, the notebook displays an error message. If this
happens, follow any instructions on the screen.
If screen messages do not help or an error message does not appear, refer to the information in
this chapter to help determine and correct the problem. For the more common problems, refer to
“Problem Checklist” for assistance. If the information in the checklist does not help, refer to
“Startup Problems” for additional help. See “Diagnostics” for more detailed problem solving.
If disassembly is required, see Section 3, “Disassembly and Reassembly.” Jumper setting
information is given in Section 2, “System Configuration.”
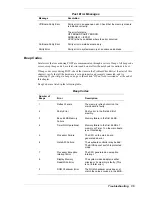
Problem Checklist
Check the items in the following list. If these items don't help, see the “Troubleshooting” table
that follows the list.
!
Check that power is on to the notebook.
!
Check that the AC adapter is plugged into a working electrical outlet. Test the outlet by
plugging in a lamp or other electrical device.
!
Check that all cables are securely plugged in.
!
Check that the display setting is configured correctly.
!
Check that the display’s brightness control is adjusted properly.
!
If using battery power, check that the secondary battery is properly inserted and fully
charged.
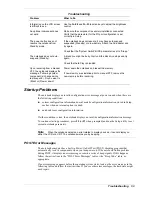
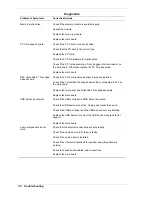
Troubleshooting
Problem
What to Do
The notebook does not power
on.
If you are operating the notebook with battery power, check that
the secondary battery is correctly inserted. Attach the AC adapter
to recharge the battery.
If you have the AC adapter attached, check that the electrical
outlet you are using works.
LCD screen is dark and blank.
Power-saving mode has shut off the backlight. Recover by
pressing any keyboard key.
The built-in LCD may not be selected. Press
Fn-F3
once or twice.
Screen brightness needs adjustment. Use the
Fn-F8
and
Fn-F9
keys.
The notebook entered Standby mode due to low battery power.
Use the power meter to check battery status. Plug in the AC
adapter or replace the battery, and then press the power button
to resume operation.
Battery power does not last
long.
Use power-saving modes.
Fully charge and fully discharge the battery several times to
recondition it.
Replace the battery.
Summary of Contents for DayLite Series
Page 42: ...3 Disassembly and Reassembly Required Tools and Equipment Disassembly Reassembly ...
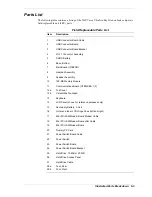
Page 58: ...5 Illustrated Parts Breakdown Illustrated Parts Breakdown Parts List ...
Page 65: ...7 Troubleshooting Problem Checklist Startup Problems Diagnostics ...
Page 73: ...8 NEC Computers Information Services Service and Support Functions Technical Support ...
Page 76: ...9 Specifications System Components Memory Map Interrupt Controllers ...


