1. Installing Internal Optional Devices
Express5800/R120h-2M (2nd-Gen) User’s Guide
106
Chapter 2 Preparations
Note
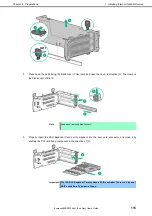
Make sure that the edge of a PCI card bracket is seated into the fixed slot of
the riser card unit.
Depending on type of PCI cards, the terminal part of the PCI card may be too
large to fit in the connector.
If you have trouble installing the card, remove the card once and try again. If
you apply excessive pressure on the card, a PCI card or riser card might break.
6.
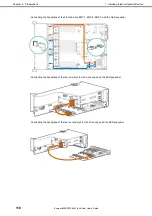
Connect the required internal and external cables to the PCI board. Refer to the documentation that came
with the PCI board.
Tips
To connect a PCI card to the connector on motherboard with cable, connect a cable
to PCI card before installing riser card unit.
7.
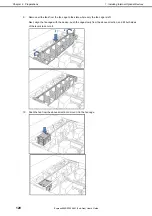
Fit the terminal of riser card to the slot on the mother board and insert the terminal firmly into the slot. Then
fix the riser card. Next, raise the screw handle at the top of cage and turn the handle to the right 180 degrees
to fix the cage.Then put down the screw handle as before.
8. See
Chapter 2 (1.34 Installing Top Cover)
to attach the top cover of the server.
Note
In order to prevent damage of the system due to improper cooling or elevated
temperature, please do not activate the server or enclosure without implementing
any of component or blank on all of drive bays and device bays.
9. Please
see
Chapter 2 (2 Installation and Connection)
in this manual to conduct installation and connection,
and turn the power supply ON.
Removal
The procedure for removal is the reverse of installation.
Re-attach the blank cover if you operate without it attached.
Important Re-attach the blank cover removed to maintain the internal cooling.


